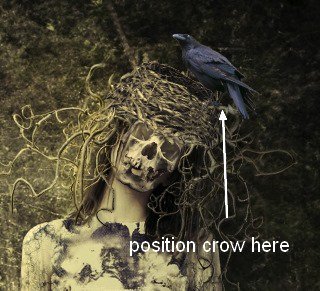
Select the crow and drop it into the nest:
Step 31
Apply several adjustment layers to the crow:

Step 32
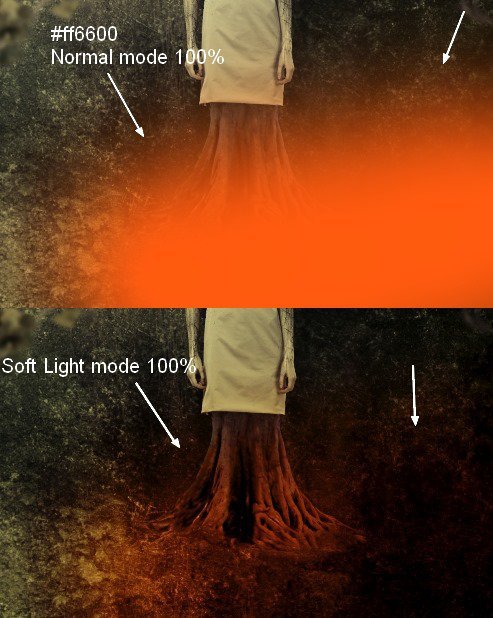
Now we need to create a lighting effect for the scene. Create a new layer at the top. Use a soft brush with the color #ff6600 to paint the bottom right part and change the mode to Soft Light at 100%:
On the next layer, we changed the brush color to #ef4c54. Brush both sides and set the blending mode to Soft Light at 100%:

Step 33
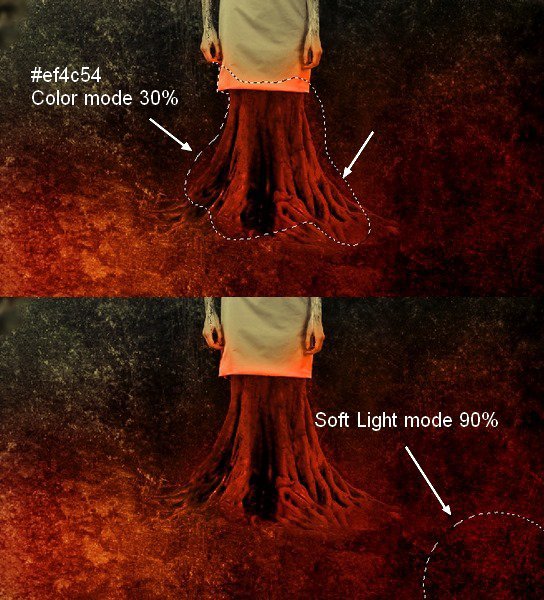
Now create 3 layers at the top. On the first one, use the color #ff6600 to paint above the tree and the lower part of the model’s dress and her hands. Change the mode to Color at 100%:
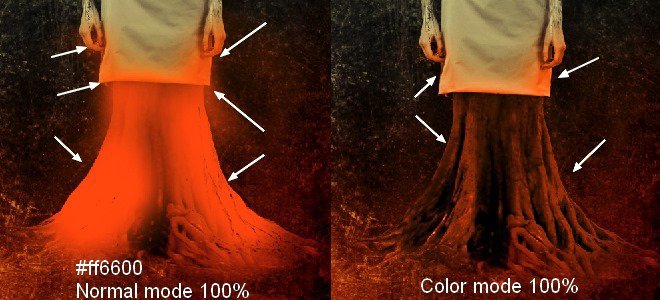
On the second and third layers, use the color #ef4c54 to paint the tree, the model’s dress, hands, and the bottom right part of the image. We changed the second layer’s mode to Color at 30%, and the third to Soft Light at 90%:
Step 34
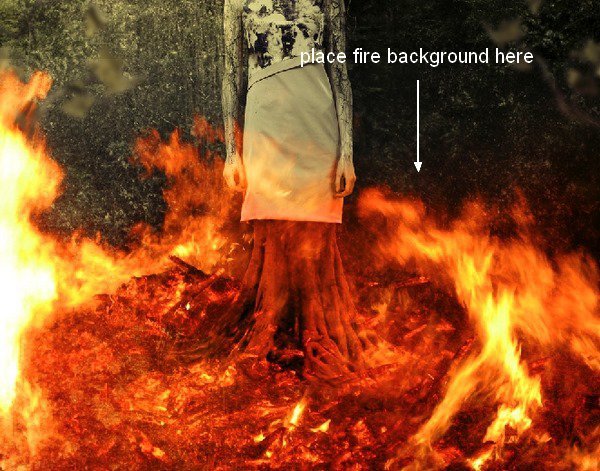
Place the fire background at the bottom of the scene:
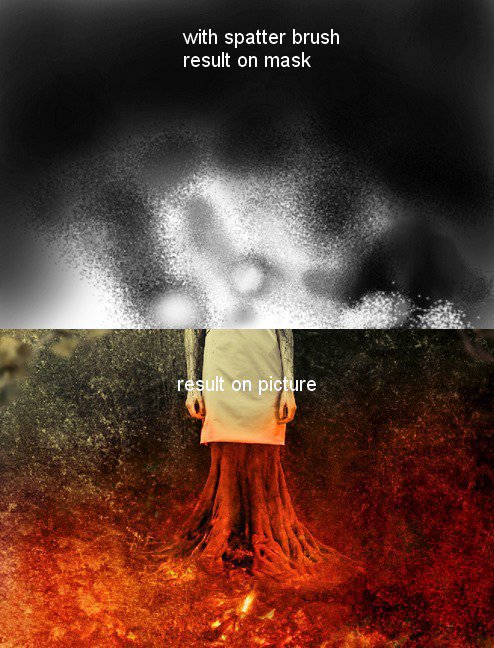
Use the Spatter brush (24 pixels) with the same settings we used in step 14 to remove the edges. The goal is to achieve a rich, blazing look, but not too obvious. You can see the result on the mask and the image itself:
Step 35
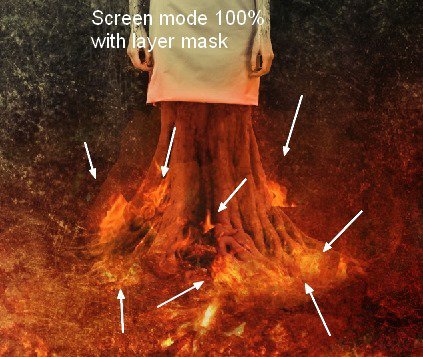
Open the fire photo. Take different parts of the fire and place them near the base of the tree. Duplicate them and edit the fire to the desired size:

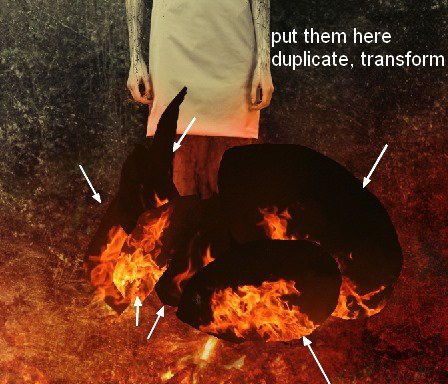
Change the blending mode of these fire layers to Screen at 100% and use a layer mask to remove and blur details in the fire:
Step 36
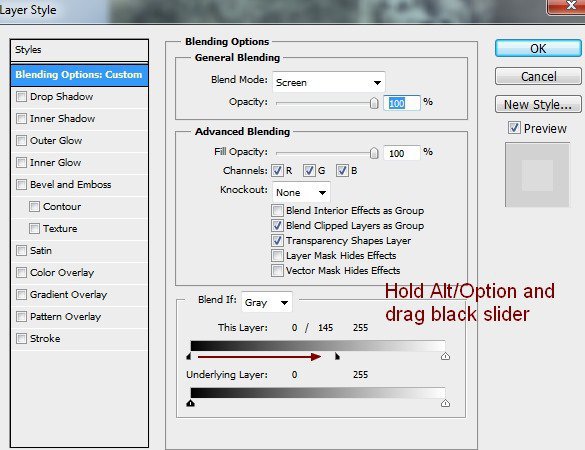
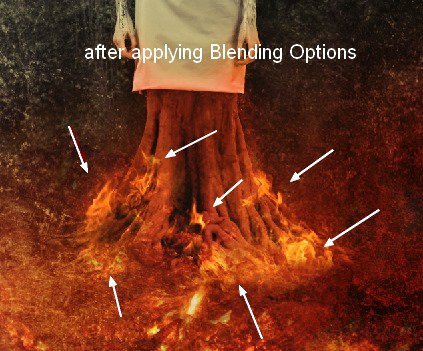
To remove harsh edges in the fire, double-click on the fire layer, choose Blending Options. Hold Alt/Option and drag the black slider to the right until the black edge disappears. Then select all other fire layers, right-click and choose Copy Layer Styles. Here’s the result of these actions:
Step 37
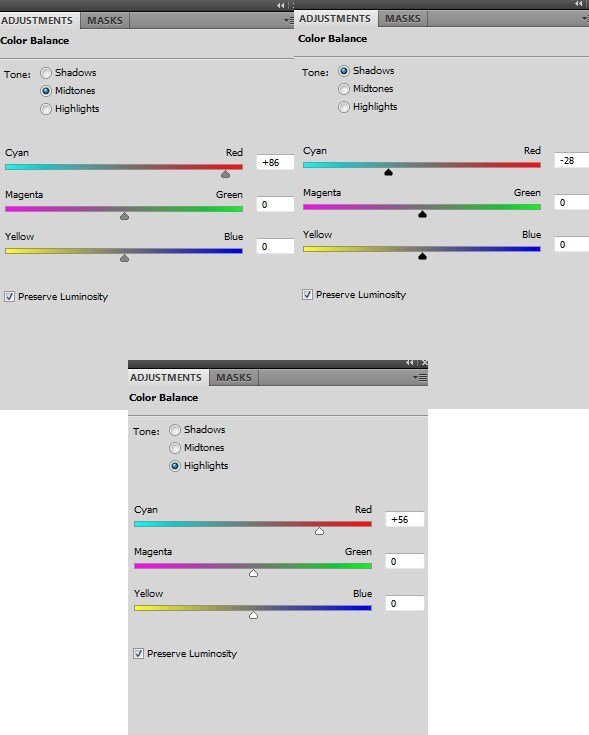
Group all the fire layers and change the blending mode to Screen at 100%. Use Color Balance and Curves to achieve a brighter fire effect and make it less obvious:
On the Curves layer mask, remove the right part with the fire:
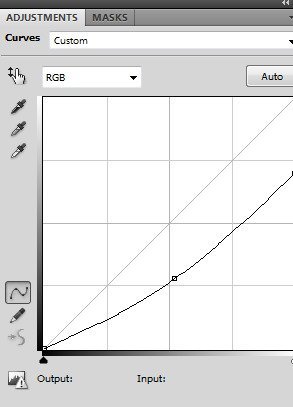
Step 38
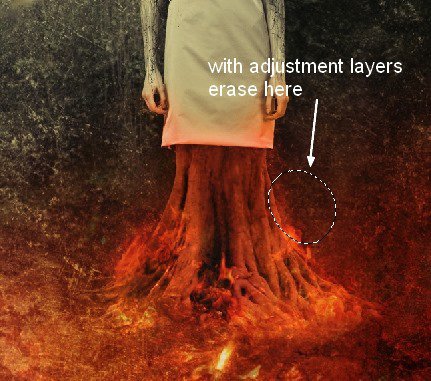
Final step: use 2 adjustment layers at the top to add contrast and color to the image:
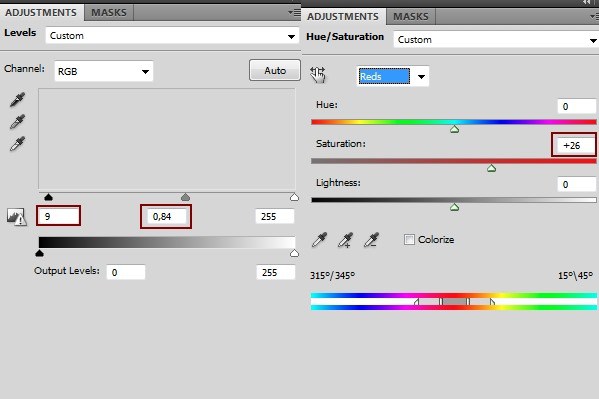
On the Levels layer with a mask, use a soft black brush with low opacity (20-25%) to blur the black effect on the right side:

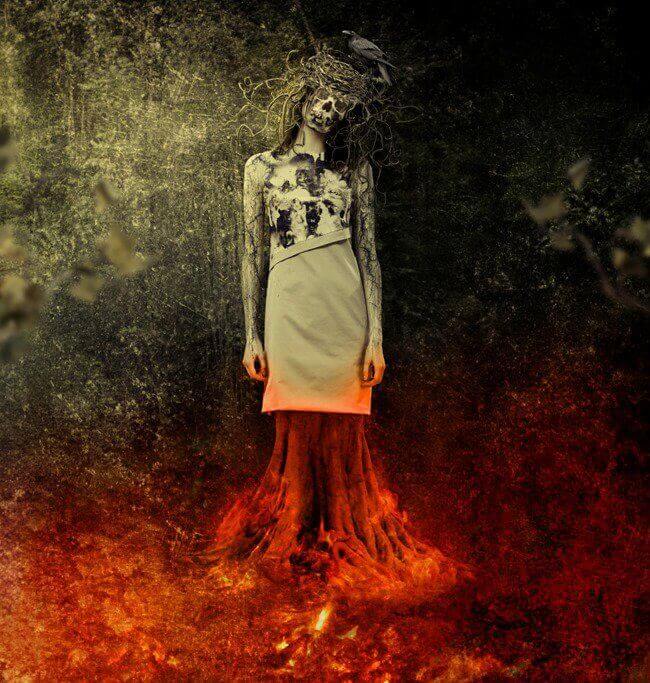
Final Result

Tap to react


