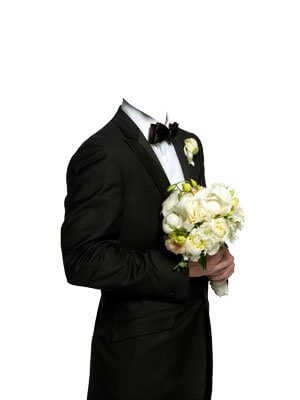
Photoshop PSD Source for Editing — Groom with Bouquet
Wedding photo editing is a craft that demands both technical precision and artistic vision. This free PSD source featuring a groom holding a bouquet gives you a ready-made framework for professional-grade photo montage. The template comes in a compact 300 by 400 pixel format — ideal for social media posts, wedding invitations, or digital album pages.
The PSD file includes fully editable layers separated into logical groups: the groom figure, the bouquet, background elements, and adjustment layers for lighting and color balance. JPEG preview is also included so you can quickly assess the template without launching Photoshop.

What Is a PSD Montage Template and Why You Need One
A PSD montage template is a layered Photoshop document where key visual elements are pre-arranged. The most common use case for wedding templates is face replacement: you take a client's portrait, extract the face, and blend it onto the template's figure. The result looks like the client posed in that exact composition — same lighting, same outfit, same atmosphere.
Without templates, every wedding photo composition would require separate photoshoots, rented outfits, studio time, and a photographer on location. Templates shortcut this process dramatically. You get a professional result in minutes instead of hours.
The groom with bouquet template is particularly useful for wedding photographers who need quick mockups, for invitation designers who want personalized visuals, and for digital artists building composite wedding scenes. It's a small file — but the techniques you practice on it transfer to any template of any complexity.
Step-by-Step Face Replacement Workflow
Face replacement in a PSD template follows a standard pipeline. Master this and you can work with any wedding template regardless of size or style:
Step 1 — Open the Template and Prepare Your Source Photo
Open the PSD in Photoshop. Examine the layer structure. You should see clearly labeled groups — typically one for the figure, one for background, and adjustment layers on top. Now open the client's photo. The source photo needs to match the template lighting direction. If the template shows frontal lighting, your source photo should have frontal lighting too. Mismatched light directions are the number one giveaway of a poor montage.
Step 2 — Extract the Face
Use the Lasso Tool or Pen Tool to roughly select the face area. Copy it with Ctrl+C and paste into the template with Ctrl+V. Position the face layer above the groom figure layer. Use Ctrl+T for Free Transform to scale and rotate until the face proportions align with the template's head shape. Hold Shift while dragging corner handles to maintain aspect ratio.
Step 3 — Blend with Layer Masks
Add a layer mask to the face layer. Use a soft black brush at 30-40% opacity to gradually erase hard edges where the face meets the template. Work slowly — zoom in to 200-300% and feather the transition. The goal is to make the seam invisible. Pay special attention to the hairline, jawline, and ears.
Step 4 — Match Skin Tone
This is where most beginners fail. The client's skin tone rarely matches the template. Use a Curves Adjustment Layer clipped to the face layer (hold Alt and click between layers). Adjust the red, green, and blue channels independently until the skin tone blends. Then add a Hue/Saturation adjustment layer and tweak saturation. Wedding photos typically benefit from slightly warm skin tones.
Step 5 — Global Color Correction
Once the face is blended, apply color correction to the entire composition. This unifies the look. Add a Color Lookup adjustment layer at the top of the layer stack and experiment with LUT presets. Wedding edits often work well with warm, slightly desaturated cinematic LUTs.
Good photo montage is invisible. If the viewer's first thought is "this looks photoshopped," you've failed. The mark of professional work is when nobody notices the edit.
Table: Common PSD Montage Problems and Solutions
| Problem | Cause | Solution |
|---|---|---|
| Face looks "pasted on" | Hard edges, missing blend | Soften mask edges; reduce opacity on transition zones |
| Skin tone mismatch | Different lighting conditions | Use Curves per channel; add Hue/Saturation clipped to face |
| Lighting direction clash | Source photo has different key light | Flip source photo horizontally; use Dodge/Burn to reshape shadows |
| Grain/noise mismatch | Source and template have different ISO levels | Add noise to the cleaner layer via Filter - Noise - Add Noise |
| Blurry face vs sharp template | Source photo resolution too low | Apply Smart Sharpen to face layer; upscale with Preserve Details 2.0 |
| Color cast inconsistency | Different white balance settings | Use Photo Filter adjustment layer clipped to face; warm or cool as needed |
| Edge glow at seam | Mask edge too sharp | Apply Gaussian Blur to mask; use Refine Edge for hair details |
Table: Comparison of Wedding PSD Template Types
| Template Type | Typical Size | Layers | Difficulty | Best For |
|---|---|---|---|---|
| Solo portrait (like groom with bouquet) | 300-800 px | 3-8 layers | Easy | Social media posts, small invitations |
| Couple portrait | 1000-3000 px | 10-20 layers | Medium | Wedding invitations, framed prints |
| Multi-person composition | 3000-6000 px | 20-50+ layers | Hard | Large format prints, album covers |
| Frame/album mockup | 2000-4000 px | 5-15 layers | Medium | Portfolio presentation, client previews |
| Themed scene composite | 4000-8000 px | 30-100+ layers | Expert | Art prints, competition entries |
Color Correction for Wedding Photos — A Practical Approach
Wedding photography has its own color language. Whites must stay white — brides notice yellow gowns immediately. Skin tones should be warm but natural. Backgrounds should complement but not compete with the couple. Here's a reliable workflow:
Start with a Levels adjustment to set black and white points. Hold Alt while dragging the black slider to see clipping — stop when the first black pixels appear. Repeat with the white slider. Next, add a Curves layer and create a gentle S-curve: lift highlights slightly, drop shadows. This adds depth without crushing detail.
For wedding-specific color grading, add a Selective Color layer. In the red channel, reduce cyan and increase yellow slightly for warmer skin. In the white channel, add a touch of cyan and reduce yellow to keep the dress crisp. This two-channel adjustment alone transforms flat wedding photos.
The bride's dress is your white balance reference. If the dress looks white on your calibrated monitor, skin tones will usually fall into place naturally.
Working with Adjustment Layers — The Non-Destructive Workflow
Never apply adjustments directly to pixel layers. Use adjustment layers instead. They're non-destructive, editable at any time, and can be masked to affect only specific areas. Here are the essential adjustment layers for wedding editing:
- Curves — overall contrast and per-channel color balance
- Hue/Saturation — global or targeted saturation control
- Selective Color — fine-tune specific color ranges
- Color Balance — quick shadows/midtones/highlights shifts
- Photo Filter — warming or cooling the entire image
- Gradient Map — creative color grading with blend modes
For the groom with bouquet template specifically, try this combo: a warm Photo Filter at 15% opacity, a gentle S-curve, and Selective Color on reds to bring out skin warmth. It takes 90 seconds and dramatically improves the result.
Advanced Technique — Frequency Separation for Skin Blending
When you need to blend a face into a template with different skin texture, frequency separation is your best tool. This technique splits the image into two layers: one for color and tone (low frequency), one for texture and detail (high frequency).
Duplicate the face layer twice. Apply Gaussian Blur to the bottom copy — radius around 8-10 pixels. This is your low frequency layer. On the top copy, go to Image - Apply Image, select the blurred layer as source, set blending to Subtract, Scale 2, Offset 128. Set this top layer's blending mode to Linear Light. Now you can retouch color on the low layer and texture on the high layer independently.
Frequency separation is not a beginner technique. Practice on non-critical projects first. When done right, it produces seamless skin blending that's physically impossible with simple masks.
Dodge and Burn for Realistic Lighting
After face replacement, the lighting often feels flat. Dodge and burn — the old darkroom technique — brings back three-dimensionality. Create a new layer, fill with 50% gray (Shift+F5, choose 50% Gray), set blending mode to Soft Light. Use a soft white brush at 5-10% opacity to paint highlights (dodge) and a soft black brush for shadows (burn). Paint along the natural contours of the face — cheekbones, nose bridge, jaw shadows.
This technique ties the composited face to the template lighting because you paint light and shadow that matches the existing illumination direction.
Table: Photoshop Tools Quick Reference for Wedding Montage
| Tool / Command | Shortcut | Use Case |
|---|---|---|
| Move Tool | V | Position face and elements |
| Free Transform | Ctrl+T | Scale, rotate, skew face |
| Brush Tool | B | Paint on layer masks |
| Clone Stamp | S | Remove imperfections, extend backgrounds |
| Healing Brush | J | Blend skin texture seamlessly |
| Pen Tool | P | Precise path-based selections |
| Quick Selection | W | Rough subject isolation |
| Merge Visible | Ctrl+Shift+E | Flatten for export |
| Create Clipping Mask | Ctrl+Alt+G | Limit adjustment to one layer |
| Invert Mask | Ctrl+I | Flip selection on mask |
Export Settings for Wedding Edits
After completing the montage, export settings matter as much as the edit itself. For social media, export at 2048 pixels on the long edge, JPEG quality 80%, sRGB color space. For print, keep the full resolution, export as TIFF or PSD, Adobe RGB color space, 300 DPI. For client delivery, provide both: a high-res TIFF for printing and a web-optimized JPEG for sharing.
Always save your working PSD with adjustment layers intact. Clients will request changes — different crop, warmer tones, remove that one strand of hair. A flattened JPEG locks you out of revisions.
A quick sanity check: before delivering, view the image at 100% zoom. Scan the face-template seam, check for color fringing, verify skin tone consistency, and ensure the wedding dress or suit doesn't have unintended color casts from the compositing process.
Table: Recommended Photoshop Settings for Wedding Editing
| Setting | Recommended Value | Why |
|---|---|---|
| Color Space | sRGB for web, Adobe RGB for print | sRGB is universal online; Adobe RGB captures wider gamut for printing |
| Bit Depth | 16-bit | More tonal range for smooth gradients, less banding in skies and skin |
| DPI for new documents | 300 | Print standard; scale down for web export |
| History States | 50-100 | More undo steps for complex compositing work |
| Scratch Disk | Fast SSD with 50+ GB free | Large PSDs with many layers consume significant scratch space |
| Cache Levels | 6-8 | Higher cache accelerates zoom and pan on large documents |
FAQ — Frequently Asked Questions About Wedding PSD Templates
What is a PSD montage template?
A PSD montage template is a layered Photoshop document that contains pre-arranged visual elements — figure, background, lighting adjustments — designed for face replacement or photo compositing. You insert your subject's face into the composition, blend it with masks and color correction, and produce a photo that looks like an original shoot. Wedding templates typically feature brides, grooms, or couple poses in romantic settings.
How do I replace a face in a PSD template?
The standard workflow: open the template and source photo, select the face with Lasso or Pen Tool, copy and paste into the template as a new layer, use Free Transform to match proportions, add a layer mask and paint with a soft brush to blend edges, then apply Curves and Hue/Saturation clipped to the face to match the skin tone. Finally, global color correction unifies the entire composition.
Why does the face look "fake" after replacement?
Three common culprits: hard mask edges that create visible seams, mismatched skin tones between source and template, and conflicting lighting directions. Fix seams with a soft brush on the mask at 20-30% opacity. Fix skin tone with per-channel Curves adjustments clipped to the face. Fix lighting by analyzing the template's shadow direction and choosing a source photo taken under similar conditions.
Can I use this template for commercial work?
Yes. This groom with bouquet template is provided for both personal and commercial use. You can incorporate it into client wedding edits, invitation designs, and portfolio pieces. Check the license file included with the download for specific attribution requirements. Most PSD templates on photolessons.org are free for commercial use with no attribution required.
What file format does the template come in?
The archive contains a PSD file (native Photoshop format with layers) and a JPEG preview image. The PSD preserves all layer information so you can edit every element independently. The JPEG lets you preview the template without opening Photoshop. Both files are included at 300 by 400 pixels.
What version of Photoshop do I need?
The template works with Adobe Photoshop CS6 and later, including all Creative Cloud versions. It also opens in Affinity Photo with minor layer adjustments. The PSD uses standard layer blending modes and adjustment layers — no third-party plugins required. For older versions, some adjustment layer presets may need manual recreation.
How do I match skin tones between different people?
Sample the template skin with the Eyedropper tool (I), note the RGB values. On the face layer, add a Curves adjustment, go to each channel individually, and adjust until the sampled skin areas produce similar RGB values. A more advanced method: use a Solid Color fill layer set to Hue blending mode at low opacity to shift the overall skin hue toward the template.
Why do I need adjustment layers instead of editing pixels directly?
Adjustment layers are non-destructive. You can double-click them at any time to revise settings, mask them to affect specific areas, and delete them without losing pixel data. When you edit pixels directly with Image - Adjustments commands, each change is permanent. For wedding editing where clients request revisions, non-destructive workflows are non-negotiable. It takes discipline but prevents rework.
What is the best resolution for wedding photo editing?
For most wedding templates, work at 300 DPI at the intended print size. If the template is 300x400 pixels at 72 DPI — like this groom with bouquet template — it's optimized for screen display, not large prints. For printable results, seek templates in the 2000-4000 pixel range at 300 DPI. This particular template is ideal for social media, digital invitations, and web galleries.
How do I add a background to a transparent PSD template?
If the template has a transparent background, place a new layer at the bottom of the layer stack and fill it with a solid color, gradient, or imported background image. Use a soft shadow under the figure for grounding — create a new layer, paint a soft black ellipse under the feet, set blending mode to Multiply at 40-60% opacity, and blur it with Gaussian Blur.
Tap to react