Wedding Photo Book PSD Template for Photoshop — "Bride and Groom"
A wedding is an event you want to preserve not just as a folder of files on a hard drive, but as a tangible, beautiful album. A photo book solves this: pages turn, emotions come alive again. And if the book is professionally designed — it's no longer just an album, but a family heirloom.
The "Bride and Groom" template is a ready-made Adobe Photoshop project containing 6 PSD files at 7819 by 4209 pixels resolution. Archive weight — 539 MB. That's enough to print an A3 spread with enormous quality headroom. Text labels are placed on separate layers, so editing them takes no time at all.
What's Inside the Archive: Complete Contents
The archive contains 6 ready-made spreads. Each spread is a separate PSD document where the background, decorative elements, text, and photos are on different layers. Here's what you get after extraction:
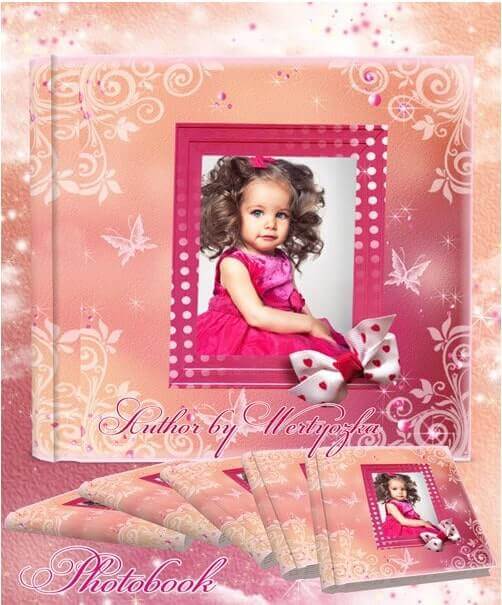
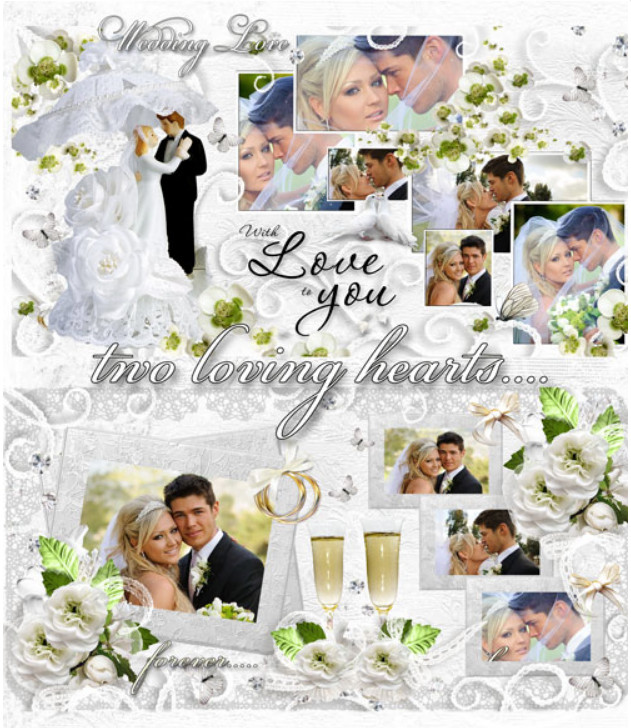
- Cover — large portrait of the bride and groom against a floral ornament background
- Spread 1 — central composition with a large photo of the couple and a headline
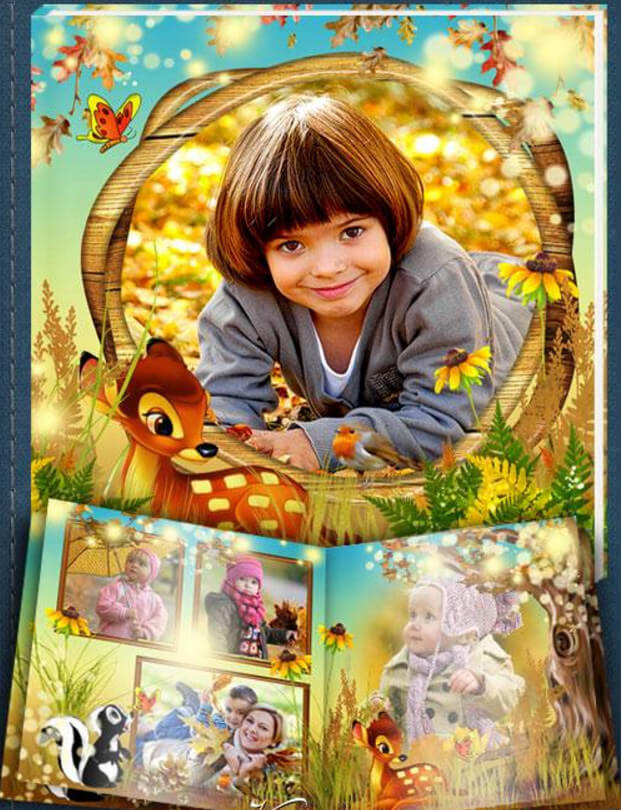
- Spread 2 — multi-frame layout: 3-4 photos per page, neat typesetting
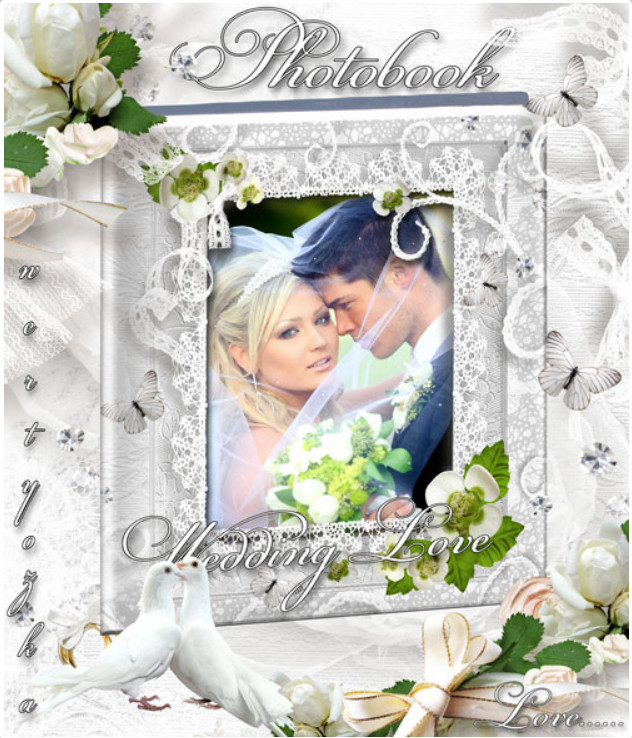
- Spread 3 — romantic frame with vignettes and space for a caption
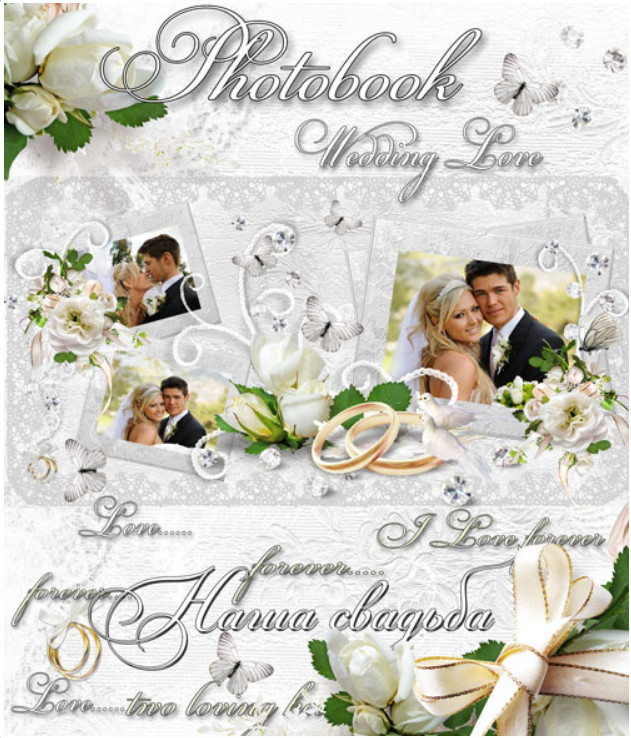
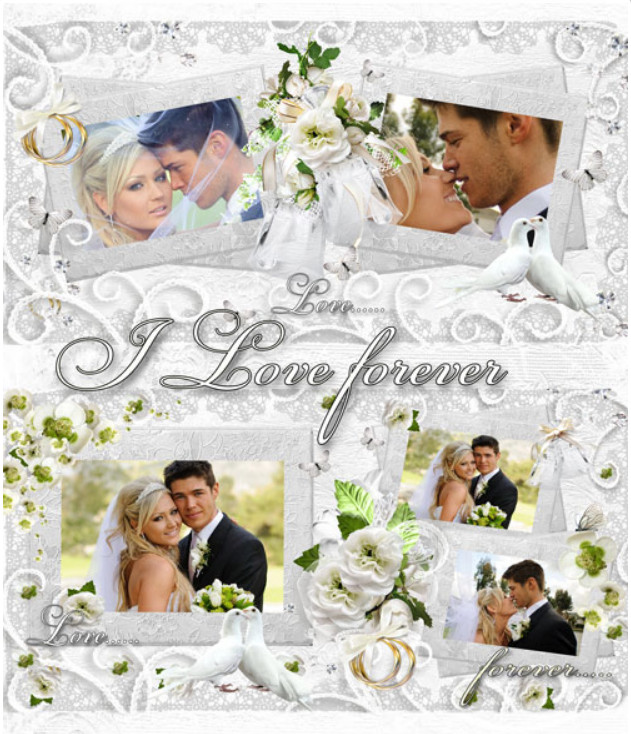
- Spread 4 — photo collage focusing on wedding details
- Final spread — panoramic shot and space for a thank-you message
All files are saved in the RGB color mode at 300 dpi. That's more than enough for high-quality offset printing. If needed, you can convert to CMYK right inside Photoshop — more on that below.
How to Edit the Template: Step-by-Step Guide
The template is designed so that anyone with minimal Photoshop knowledge can handle it. But let's go through each step in detail, because the devil is in the details.
Step 1: Extraction and Opening
Download the archive and extract it to a separate folder. Don't try to open PSD files directly from the archive — Photoshop doesn't like that, and layer-to-smart-object connections can break. Open the first file via Ctrl+O or drag it into the Photoshop window.
Step 2: Text Replacement
All text layers are named clearly in the Layers panel: "Headline," "Names," "Date," "Thank You," and so on. Find the right layer, select the Type tool T, and type your own information. By the way, text can not only be changed but also removed — if a certain headline isn't needed, just hide the layer via the eye icon in the Layers panel.
Step 3: Inserting Photos
The most crucial moment. Each photo in the template has a designated place. Here's how to proceed:
- Open your photo in Photoshop
- Select all: Ctrl+A
- Copy: Ctrl+C
- Return to the template document
- In the Layers panel, find the layer marked "Place photo here" or similar
- Paste the photo: Ctrl+V
- Adjust size via Ctrl + TFree Transform mode and crop excess via Clipping MaskCreates a clipping mask on the layer below
Done — the photo is in place, exactly in the frame the designer intended. No magic, just clean layer order.
Color Correction: Matching Colors to Your Photos
The template is designed in warm, pastel tones with floral elements. But your photos may have been shot in a different color palette — say, a cold winter palette or, conversely, too vibrant. What to do? Let's break down three working methods.
Method 1: Template Adjustment Layers
The author has provided adjustment layers — Hue/Saturation, Color Balance, Curves. They sit at the very top of the Layers panel and affect the entire spread. Double-click the adjustment layer icon and change tone, saturation, brightness. Adjust so that the background and photos harmonize.
Method 2: Manual Background Tinting
If adjustment layers aren't enough, you can recolor background elements. Find the background layer, create a Hue/Saturation adjustment layer above it, link it as a Clipping Mask Ctrl+Alt+G. Now the correction only affects the background, and photos stay untouched.
Method 3: Desaturation with Toning
A radical method, but justified in some cases. Convert all photos to black and white via a Black & White adjustment layer, then apply a slight sepia or blue tint through Photo Filter. You get a cohesive, stylish series. The template with floral elements in monochrome looks especially striking — tested many times.
\u{201c}Better to spend an hour on color correction before printing than to get a print run with acidic hues. Monitor screens lie almost always — do a test print of one spread on regular paper.
| Wedding Style | Primary Color | Accent | Template Recommendation |
|---|---|---|---|
| Classic | White, cream | Gold, peach | Leave as is — pastel palette fits perfectly |
| Rustic / Country | Beige, green | Brown, terracotta | Lower background saturation, add warmth via Photo Filter |
| Winter | White, light blue | Silver, blue | Shift Hue to cooler side, remove yellow |
| Vintage | Sepia, cream | Copper, burgundy | Add slight sepia through adjustment layer |
| Modern Minimalist | White, gray | Black, green | Hide some decorative layers, keep clean background |
Working with Fonts
The template uses decorative fonts — likely something like Cormorant Garamond, Playfair Display, or their equivalents. It's beautiful, but before sending to print, check two things:
- Font presence in your system. If a required font is missing, Photoshop will warn you when opening. Download and install it or replace it with something similar.
- Converting to outlines. Not all print shops accept PSD files with live fonts — display issues may arise. Solution: before saving the final file, select all text layers, right-click, and choose "Rasterize Type." Or save a copy where text is already rasterized.
Which fonts work as replacements? Here's a verified selection:
| Purpose | Recommended Font | Alternative | Where to Download |
|---|---|---|---|
| Headlines (decorative) | Playfair Display | Cormorant Garamond | Google Fonts (free) |
| Couple Names | Great Vibes | Alex Brush | Google Fonts / DaFont |
| Date and body text | Montserrat Light | Raleway | Google Fonts (free) |
| Thank-you notes | Open Sans Light | Lato Light | Google Fonts (free) |
| Initials / monogram | Bodoni MT | Didot | Standard Windows / Mac |
Preparing for Print
So, the layout is ready. What's next? Sending to a print shop is its own quest with its own pitfalls. Let's walk through them in advance.
Resolution and Size
The template's native resolution is 7819 by 4209 pixels. At 300 dpi, this yields a print of approximately 66 by 35.5 centimeters. For an A3 photo book spread (297 x 420 mm per spread — i.e., 420 x 594 mm) — plenty of reserve. When scaled to a standard 30 x 60 cm spread, quality remains perfect.
Color Mode: RGB or CMYK?
The template is saved in RGB — Photoshop's native mode, and working in it is more convenient: all filters, adjustment layers, and blending modes work without restrictions. But print shops print in CMYK. Before saving the final file, do the following:
- Save a working copy in RGB (in case you need changes)
- Create a duplicate via Image → Duplicate
- Convert to CMYK: Image → Mode → CMYK Color
- Check how colors changed — some bright shades (ultramarine, neon green) dull out in CMYK
- If colors "died," return to the RGB version and boost saturation of problem areas before conversion
- Save the CMYK version as TIFF with LZW compression
Bleeds
Photo books are printed with edge trimming. If an important element is within 3-5 mm of the edge — it may be cut off. Solution: add 5 mm bleeds on each side, or if the template doesn't account for this, simply keep significant content no closer than 10 mm to the spread edge.
Comparison with Other Wedding Templates
The market offers dozens of options, but "Bride and Groom" stands out in several aspects. Here's an honest comparison table:
| Parameter | "Bride and Groom" | Typical Envato Template | Free PSD | Canva Template |
|---|---|---|---|---|
| Number of files | 6 PSD (full spreads) | 2-4 spreads | 1-2 spreads | Unlimited (within the service) |
| Resolution | 7819 x 4209 px | 3000-5000 px on the long side | 2000-3500 px | Depends on plan |
| Archive size | 539 MB | 50-200 MB | 10-50 MB | No offline file |
| Text layers | Separate, labeled | Usually present | Often rasterized | Editable in online editor |
| Color correction | Flexible (layers, masks) | Medium | Minimal | Limited |
| Print readiness | 300 dpi, RGB → CMYK | Usually 300 dpi | Not always 300 dpi | Automatic |
| Design uniqueness | High (handcrafted) | Mass-market (sold to hundreds) | Mass-market | Mass-market (thousands of users) |
| Offline access | Full (PSD on disk) | Full | Full | No (cloud only) |
The main advantage of this template is detail density. 7819 pixels on the long side give a dot density where even tiny elements like flower petals and lace ornaments look sharp, without "staircasing." Second advantage — the archive weight. 539 MB for 6 files means there are no compression artifacts inside, and all elements are truly high-resolution, not upscaled.
And about free PSDs from stock sites — they're almost always rasterized into a single layer. That means text can't be separated from the background, photos can't be neatly replaced, colors can't be tweaked. With such a "template," you simply paste your photos on top and pray they fit the frame. The savings are questionable at best.
Practical Layout Tips
The template provides structure, but the content is up to you. Here are a few principles that turn a "just an album" into a story:
- First spread — your strongest shot. A close-up portrait of the couple where emotions are visible. Not a group photo, not a staged registry office shot — a living moment.
- Alternate close-ups and wide shots. If all photos are the same scale — the eye glides over without latching on. A close portrait on the left page, a wide shot or detail on the right — rhythm naturally emerges.
- Don't overcrowd the spread. Better 2-3 photos per spread with breathing room than 8 tiny ones where nothing can be seen.
- Details matter. Rings, bouquet, shoes, invitations, table setting — a couple of such shots across the whole book gives it depth.
- Final spread — the farewell. Don't put a random photo there. A sunset panorama with silhouettes, a shot of you walking away, or a thank-you to guests — something that provides closure.
\u{201c}A photo book isn't a dump for all decent shots. It's a selection. Ruthless. Keep 20-30 best frames, not 200. The book only benefits from this.
Frequently Asked Questions
What version of Photoshop is needed to work with this template?
The template opens in Photoshop CS6 and above, including all Creative Cloud versions. PSD format is universal — no compatibility issues have been observed. If you have an older version, just update to the current one or use the free CC trial period.
Can I open PSD files in free alternatives like GIMP or Photopea?
GIMP opens PSD files, but adjustment layers and smart objects may not read correctly. Photopea — the web editor — works reasonably well, but at 80-100 MB per spread, it lags even on a powerful computer. We recommend native Photoshop — no surprises.
Why is the archive 539 MB? Isn't that too big?
On the contrary, it's a sign of quality. The large size means images are saved losslessly at high resolution. For comparison: the same set in JPEG compression would weigh 20-30 MB, but with artifacts and "staircasing" on gradients. 539 MB for 6 professional spreads is normal.
How do I fix things if I accidentally mess up the photo replacement?
Work with a copy. Before starting editing, save a copy of each PSD with the "_original" suffix. Then any mistake is no problem — open the original and start over. Better yet — use the History Panel Window → History and save intermediate versions via Ctrl+Alt+S (Save As).
What format should I save the finished spread in for the print shop?
The universal option: TIFF without compression or with LZW compression, CMYK color mode, 300 dpi, layers merged (flatten). Some print shops accept PDF/X-1a — then export via File → Save As → Photoshop PDF with the "High Quality Print" preset. Confirm requirements with the specific print shop.
Can the template be resized for a different book format?
Yes, via Image → Image Size. But remember: enlarging will lose quality. Shrinking is fine. If you need A4 format (210x297 mm per page), the current resolution is more than sufficient. When changing aspect ratios (say, square format), part of the background will need cropping or manually adding — that's custom work.
What if the background color doesn't match my photos?
Adjust through adjustment layers as described in the color correction section. If that doesn't help — fully recolor the background: select the background layer, create a new layer above with the desired color, link it as a Clipping Mask Ctrl+Alt+G. The ornament stays, the color changes.
How long does it take to create a book from this template?
With photos ready: 2-3 hours to replace images, text, and correct one spread. For all 6 spreads — 4-6 hours of relaxed work. The biggest time-eater is photo selection, not insertion. So first select all photos, sort them into folders by spread number, and only then open Photoshop.
Tap to react