Let's explore one of the key features of Photoshop — its workspace. It allows you to customize the tool panels you have constant access to according to your needs.
What is the workspace in Photoshop and why should you customize it
The workspace in Adobe Photoshop is the set of panels, tools, and windows you see on screen while working. In essence, it is your interface, the one you interact with. By default, Photoshop offers several preset workspaces, but the true power of the program lies in its ability to fully adapt the interface to your tasks.
Imagine you are a professional retoucher. You need the Layers, Adjustments, Histogram, and Navigator panels daily. Why would you want to see the 3D or Animation panels if you never use them? Proper workspace customization helps you remove the clutter, reduce the time spent searching for tools, and focus on your creative work.
In this article, we will thoroughly examine how workspaces work in Photoshop, what types exist, how to customize and save them, and we'll also provide practical tips for interface optimization. At the end, a useful bonus and a call to action await you.
Standard Photoshop workspaces
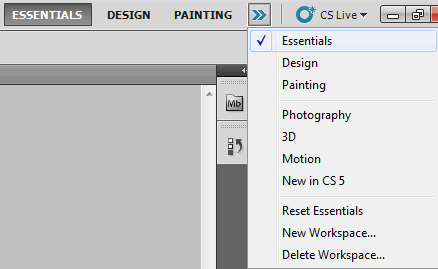
Photoshop comes with several preset workspaces, each optimized for specific tasks. To switch between them, click the Workspace icon in the upper‑right corner of the main program window or go to the Window > Workspace menu.
Here is the list of standard workspaces:
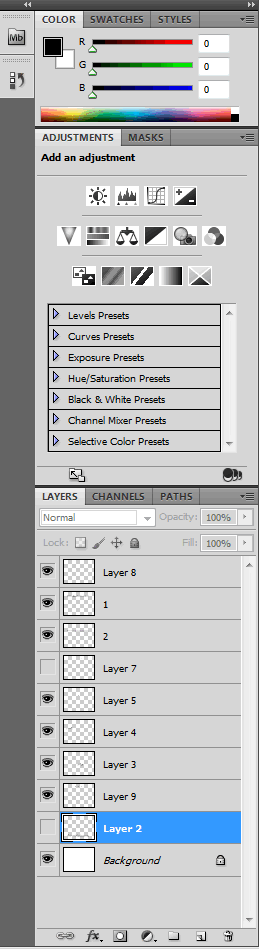
- Essentials — the default universal workspace. Contains the most popular panels: Layers, Adjustments, Properties, Color, and Swatches. Suitable for most tasks.
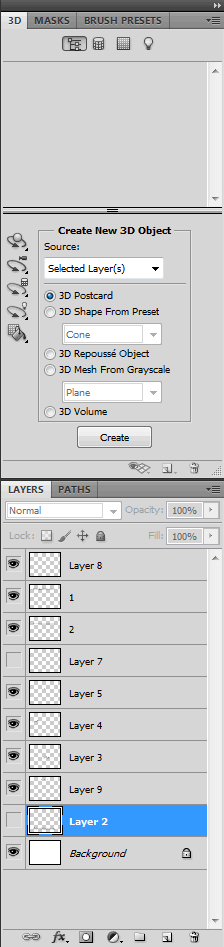
- 3D — includes panels for working with three‑dimensional models: 3D, Properties, and Layers. Ideal for designers working with 3D graphics.
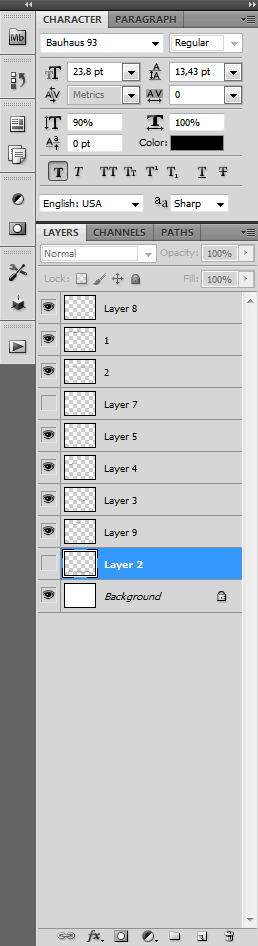
- Graphic and Web — optimized for web design and graphics. Contains Layers, Paths, Glyphs, and Styles panels.
- Motion — includes the Timeline panel and other tools for video and animation work.
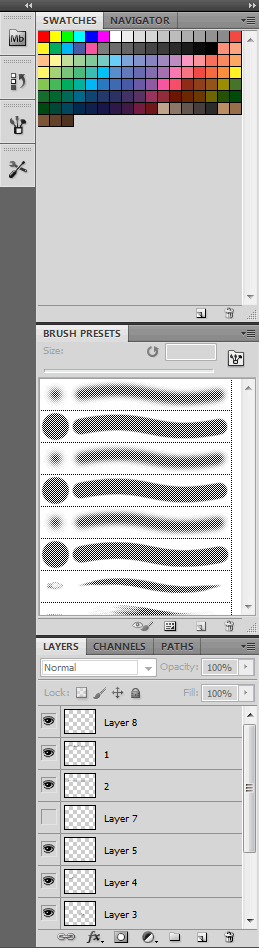
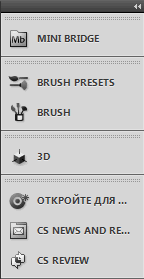
- Painting — geared toward artists. Instead of the histogram, it features Swatches and Brush Presets panels.
- Photography — designed for photographers. The Histogram and Navigator panels replace Color and Swatches from Essentials.
If you accidentally changed the panel arrangement and want to revert everything, simply select Window > Workspace > Reset [Workspace Name].
Below are all the standard panels that are present in the program by default:

Some panels have multiple display options: they can be placed at the top of the window or at the bottom, for example, the animation workspace.


Panels — the building blocks of the workspace
Panels are the "bricks" from which any workspace is built. They contain the tools and settings you need for your work. Photoshop has dozens of panels, and you can turn them on, turn them off, move, and group them as you like.
The main panels you will use most often:
- Layers — manage layers, their order, blending modes, and opacity.
- Adjustments — create adjustment layers (brightness, contrast, levels, curves, etc.).
- Properties — settings for the selected layer or adjustment.
- Color — choose the foreground and background colors.
- Swatches — quick access to saved colors.
- History — list of performed actions for undoing.
- Channels — manage color channels.
- Paths — work with vector paths.
- Libraries — access to saved elements (colors, brushes, styles).
- Navigator — quickly navigate around the image.
- Histogram — analyze the tonal distribution in the image.
How to add and remove panels
To add a panel, go to the Window menu and choose the panel you want from the list — a checkmark will appear next to it, and the panel will appear on screen. To remove a panel, uncheck it in the same menu or close it by clicking the cross in its title bar.
How to move, group, and dock panels
You can drag panels by their title bars to change their position on the screen. If you drag one panel's tab onto another's, they will be grouped into a single window. To "dock" a panel to the edge of the screen, drag it toward the right or left border — a blue highlight will appear indicating the docking location.
Panel sizes can be changed by dragging the borders between them. To collapse a group of panels, simply click on the title bar or press the double‑arrow icon at the top of the group.
Customizing the toolbar
In addition to the panels, you can also customize the toolbar itself. This is the vertical bar on the left where all of Photoshop's tools are located. To open the customization window, choose Edit > Toolbar.
In the window that opens, you can:
- Add and remove tools.
- Change their order.
- Group tools by category for easier access.
For example, if you rarely use the 3D tools, you can hide them to make the toolbar more compact and less distracting.
Saving your own workspace
The most exciting part is creating your unique workspace. After you have arranged the panels, customized the toolbar, and organised everything as you like, save this "snapshot" of your interface.
Step‑by‑step instructions:
- Arrange the panels and tools the way you like them.
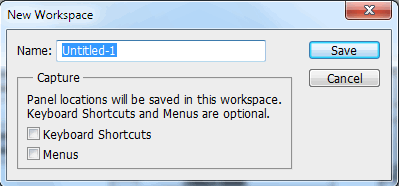
- Go to Window > Workspace > New Workspace.
- Enter a name for your workspace (e.g., "My Retouch" or "Web Design").
- In the Capture section, check what you want to save: panel layout, keyboard shortcuts, and/or menus.
- Click Save.
Now your workspace will appear in the workspace dropdown list in the upper‑right corner, and you can switch to it at any time.

To reset your custom workspace to the saved state, choose Window > Workspace > Reset [Name]. If you want to protect the workspace from accidental changes, you can lock it: Window > Workspace > Lock Workspace.
Comparing workspaces
To make it easier for you to choose the right workspace, we have prepared a comparison table.
| Workspace | Main panels | Target audience |
|---|---|---|
| Essentials | Layers, Adjustments, Properties, Color, Swatches | Universal, for most tasks |
| Photography | Layers, Adjustments, Histogram, Navigator | Photographers, retouchers |
| Painting | Layers, Swatches, Brush Presets, History | Artists, illustrators |
| Graphic and Web | Layers, Paths, Glyphs, Styles | Web designers, graphic designers |
| Motion | Timeline, Layers, Properties | Video editors, animators |
| 3D | 3D, Properties, Layers | 3D designers |
Keyboard shortcuts for managing the workspace
Knowing keyboard shortcuts significantly speeds up your work. Here are some useful combinations for managing the interface:
- F — cycle through display modes: standard, with panels, full screen.
- Spacebar — temporarily activate the Hand tool to move the image.
- Z — Zoom tool; Alt + click — zoom out.
- R — Rotate View tool to rotate the canvas.
- Alt + W — quickly open the Workspace menu.
Tips for optimizing your workspace
Here are a few extra tips to make your work in Photoshop even more comfortable:
- Change the background colour of the work area. Right‑click on the grey area outside the image and choose a grey shade or another colour you like.
- Use full‑screen mode. Press F twice to hide all panels and menus and focus solely on the image.
- Quick zoom. Double‑click the Hand tool to fit the image to the window size.
- Rotate the canvas. The Rotate View tool (R) lets you rotate the view without altering the image itself — this is handy for drawing or retouching in hard‑to‑reach areas.
- Organise panels by frequency of use. Place the most essential panels in prominent locations, and hide or group the ones you rarely use.
Frequently Asked Questions
Question: How do I switch between workspaces in Photoshop?
Answer: To switch between workspaces, click the Workspace icon in the upper‑right corner of the main window or choose Window > Workspace and select the desired workspace from the list.
Question: How do I add a panel to the workspace?
Answer: Go to the Window menu and select the panel you want from the list. A checkmark will appear next to its name, and the panel will be displayed on screen.
Question: How do I remove a panel from the workspace?
Answer: Uncheck the panel name in the Window menu, or close the panel by clicking the cross in its title bar.
Question: How do I save my own workspace in Photoshop?
Answer: Arrange panels and tools as you prefer, then choose Window > Workspace > New Workspace, enter a name, and click Save.
Question: How do I reset a workspace to its default state?
Answer: Select Window > Workspace > Reset [Workspace Name] to restore it to its original layout.
Question: Can I lock the workspace to avoid accidental changes?
Answer: Yes, choose Window > Workspace > Lock Workspace. To unlock, select Unlock Workspace.
Question: Which workspace is best for photographers?
Answer: For photographers and retouchers, the Photography workspace is the best choice, as it includes the Histogram and Navigator panels for more precise image work.
Conclusion
Customizing the workspace in Photoshop is not just a matter of convenience — it is a key factor in productivity. When all the tools you need are at your fingertips and unnecessary panels don't distract you, you work faster, more efficiently, and enjoy the process more.
We have covered all the standard workspaces, learned how to add and remove panels, group them, save your own settings, and even lock the interface against accidental changes. Now you can create the ideal environment for any task — be it retouching, web design, 3D modelling, or digital painting.
Do you want to get even more useful Photoshop materials, ready‑made workspace templates, and exclusive video tutorials?
Tap to react


