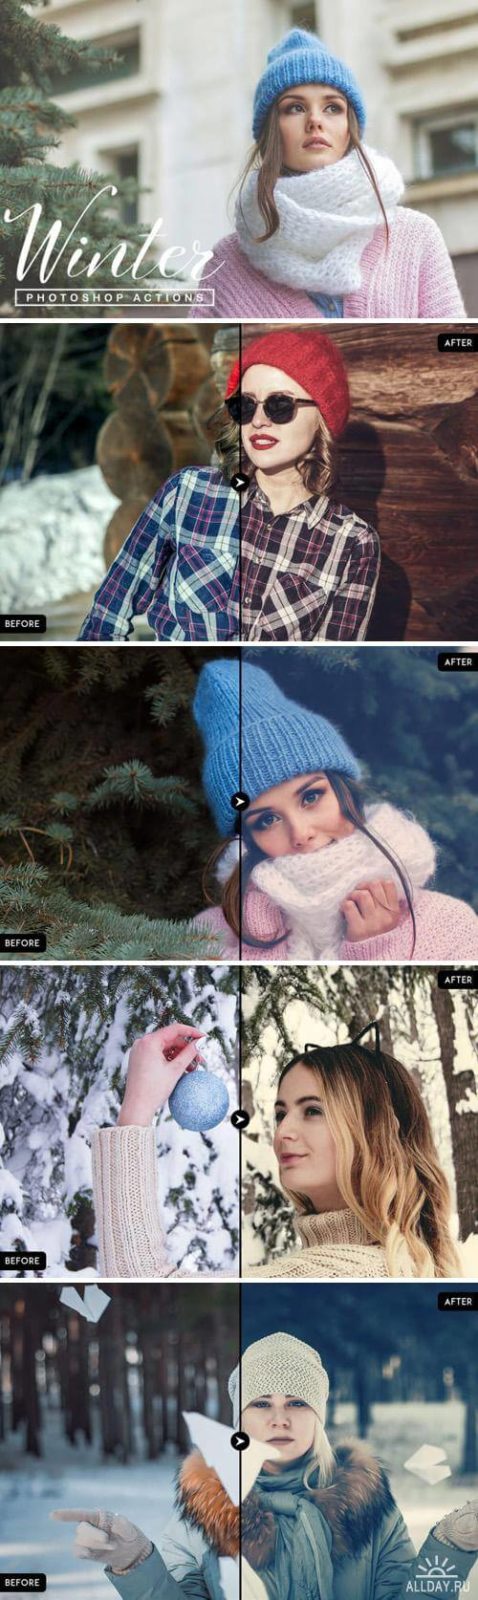
Have you ever shot a winter landscape only to end up with grey skies and flat snow that looks like dirty cotton wool? Cameras are merciless with winter scenes: they flatten contrast, turn sparkling snow into a white blob, and completely kill the feeling of frosty air. That is exactly the problem this pack solves — the 70 Winter Photoshop Actions Bundle. Seventy ready-to-use operations that bring winter atmosphere back to your photographs without hours of manual editing.

70 Winter Photoshop Actions Bundle — snow, frost, ice effects
70 winter Photoshop actions covering snow, frost, ice, winter glow and color toning

Inside the archive are two ATN files and 70 actions totaling 13.1 MB. No third-party plugins, no additional installations. Everything runs on vanilla Photoshop, starting from CS6 version and above. The creators have packed virtually every type of winter processing you could need: from subtle toning to full seasonal transformations.

What Is Inside the Bundle: Categories of Winter Effects

Seventy actions is not just a marketing number. Each one does something specific, and they are all organized into logical categories. Let us break down exactly what you get.

Category Action Count What It Does Best Photo Types
Snow Effects 14 Adds falling snow, snow haze, snow swirls Portraits, landscapes, urban scenes
Frost / Ice 12 Creates frosted glass effect, ice crust, crystals Macro, product shots, portraits
Winter Glow 10 Soft winter radiance, blue haze, diffused light Portraits, wedding photos, holiday shots
Color Toning 12 Cool blue and icy tones, winter color presets Any photo needing winter color grading
Atmosphere 10 Fog, frosty haze, visible breath vapor Landscapes, street scenes, forest
Special FX 12 Snowstorms, northern lights, time-freeze effects Creative projects, art photography

The category numbers are approximate — the exact distribution inside the ATN files may differ slightly. But the overall picture is clear: you get a full toolkit for turning any image into a winter scene.

How to Install and Use ATN Files

Installing actions in Photoshop takes less than a minute. But there are a couple of details that beginners often miss, then wonder why nothing seems to work.

Installation steps:

  1. Download the archive and extract it to any folder. Inside you will find two .ATN files and possibly a preview image.
  2. Launch Photoshop. Open the Actions panel: Alt+F9 or via Window > Actions.
  3. In the top-right corner of the Actions panel, click the menu icon (four horizontal lines) and select Load Actions.
  4. Locate the extracted .ATN file, select it, and click Load.
  5. A new folder with the action set appears in the panel. Expand it to see all 70 actions.
If the Actions panel does not open, check that you are not in Essentials workspace mode. Switch to Photography or another workspace via Window > Workspace.

To apply an action to your photo:

  1. Open the image in Photoshop.
  2. In the Actions panel, select the desired action from the list.
  3. Click the Play button (triangle icon) at the bottom of the panel.
  4. Wait for completion — some actions finish in seconds, others may take up to a minute on slower machines.
Always duplicate the background layer (Ctrl+J) before running an action. Actions perform many operations, and undoing them via History is not always possible. Having a backup layer is much safer.

Comparison with Other Winter Action Packs

Several popular winter action sets are available on the market. Let us look at how this one stands out.

Feature 70 Winter Actions Bundle Sleeklens Winter Pack Free Single Actions
Total actions 70 30–40 1–5
Archive size 13.1 MB 5–15 MB 0.1–2 MB
Effect categories 6 (snow, frost, glow, toning, atmosphere, SFX) 2–3 1
Non-destructive editing Yes, layer-based Yes Not always
Batch processing Supported Supported Manual only
Compatibility CS6 and up (including CC) CC 2017+ Varies by author

The main advantage of this bundle is variety. Instead of buying three or four separate packs for snow, frost, and toning, you get everything in one archive. For a photographer processing winter weddings or holiday photo sessions, this covers the entire season in one download.

Best Photo Types for Winter Actions

An action is not a magic wand. Apply Snow Effect to a beach photo with palm trees and the result will look absurd. Let us examine which source images yield the best results.

Ideal Candidates

  • Outdoor portraits — warm clothing, hats, scarves. The actions add snow and atmosphere that logically belong in the scene.
  • Urban winter landscapes — streets, parks, architecture. Snow effects make a grey city look festive.
  • Forest and nature — bare trees, frozen branches. Adding frost and fog turns an ordinary forest into something magical.
  • Holiday scenes — Christmas trees, fairy lights, festive tables. Glow and snow effects amplify the holiday atmosphere.

Challenging Cases

  • Studio portraits — snow on a studio backdrop looks unnatural. Stick to color toning in cool tones instead.
  • Summer photos — green foliage and snow create cognitive dissonance. If you absolutely must, shift the color palette to autumn/winter first, then apply the action.
  • Night shots — actions that add snow can conflict with light sources. Check the result at 100% zoom before committing.
Pro tip: before applying any winter action, reduce the overall saturation of your photo by 10–15%. Winter scenes in nature are less saturated, and the action will blend more naturally with a muted starting point.

Before and After: What to Check

When you apply an action, Photoshop executes a command sequence: it creates adjustment layers, applies filters, adds new layers with textures. The result is rarely perfect on the first try — and that is normal. Here is what to check after each application:

  • Layer opacity — many actions create effects with excessive intensity. Lower the Opacity of top layers to 50–70% for a more natural look.
  • Layer masks — snow should not be falling on a portrait subject's face. Use a black brush on the layer mask to remove snowflakes from skin areas.
  • Color balance — after applying an action, the photo may shift into excessive blue. Add a Color Balance adjustment layer and bring some warmth back into the shadows.
  • Noise and artifacts — actions with snow effects generate new pixels. At high source ISO, this can produce digital noise. Inspect at 100% zoom.

Batch Processing: How to Apply an Action to Hundreds of Photos

Imagine you shot a winter wedding — 800 frames. Processing each one manually is three days of work. Photoshop can automate this through batch processing.

Step by step:

  1. Make sure your desired action is loaded in the Actions panel and you know its exact name.
  2. Create two folders: Source (for originals) and Output (where Photoshop will save processed files).
  3. Go to File > Automate > Batch and select the appropriate Set and Action.
  4. In the Source field, select Folder and point to your Source folder.
  5. In the Destination field, select Folder and point to your Output folder.
  6. Check Override Action Save As Commands so Photoshop does not prompt for confirmation on every file.
  7. Click OK and wait. On modern computers, a batch of 100 photos processes in 5–10 minutes.
During batch processing, Photoshop shows no preview. Run your first Batch on 3–5 test photos, verify the results, and only then process the full set. An error repeated across 800 frames takes a very long time to fix.

Customization: How to Tweak Actions for Your Style

The default action settings rarely produce perfect results for a specific image. But actions are not a black box. After execution, you see all created layers and can edit each one.

A standard action after running typically creates this layer structure:

  • Background (your original photo, locked)
  • Color Adjustments group — Hue/Saturation, Color Balance, Curves adjustment layers
  • Effects group — snow/frost texture layers in Screen or Overlay blend mode
  • Atmosphere group — fog/haze layers
  • Vignette group — edge darkening

Your control levers:

  • Effects group Opacity — the main intensity control. Drop to 60% and the snow becomes softer.
  • Effects group Blend Mode — Screen makes snow transparent-white, Overlay gives a contrasty effect. Experiment with both.
  • Hue/Saturation inside Color Adjustments — move the Hue slider to shift snow tint from blue to purple or teal.
  • Gaussian Blur on snow layers — add a touch of blur and sharp snowflakes turn into soft snowfall.

System Requirements and Compatibility

The actions have been tested on Adobe Photoshop CS6 and all Creative Cloud versions (CC 2017–2024). On older versions (CS5 and below), some filters may not be supported — the action will either stop with an error or produce incorrect results.

Minimum system requirements for comfortable work:

  • Processor: Intel Core i3 or AMD Ryzen 3 (i5 / Ryzen 5 recommended for batch processing)
  • RAM: 8 GB (16 GB for batch processing large files)
  • Disk space: 100 MB free (actions themselves plus Photoshop temporary files)
  • GPU: any with OpenGL 2.0 support (for blur filters and rendering)

On underpowered laptops, some actions (especially those adding many snow layers) may run slowly. Solution: before running the action, downsize the photo to 3000px on the long edge — the speed difference will be 2–3 times faster.

\u{201c}

Wedding photographer, 8 years in the industry, Photographer
Winter actions are not a substitute for good light and composition. They are a tool that rescues frames shot in overcast weather, where snow looks grey and the sky is a white sheet. Ten minutes of batch processing and the entire session looks like it was shot in perfect snowfall.

Working with Winter Actions on RAW Files

Many photographers ask: should I apply actions directly to RAW or convert to JPEG first? The answer is definitive: basic RAW conversion first, then the action. Photoshop actions work with raster layers, while a RAW file is a digital negative that needs to be developed first.

The correct workflow:

  1. Open the RAW file in Camera Raw or Lightroom and apply basic corrections: exposure, white balance, shadows, highlights. Shift white balance slightly cooler (4500–5000K) — winter actions blend better on a slightly cooled image.
  2. Convert to 16-bit TIFF or PSD — not 8-bit JPEG. Actions create gradients (snow, glow, fog), and 8-bit depth causes banding and posterization on smooth transitions.
  3. Open the resulting file in Photoshop and only then apply the action.
  4. Finalize with cropping, resizing to your target format, and export to JPEG sRGB for web or print use.

A common misconception: applying an action directly in Camera Raw as a preset. That does not work — actions (.ATN) and presets (.XMP) are fundamentally different things. A preset adjusts Raw converter parameters, an action manipulates layers in Photoshop.

Frequently Asked Questions

What is an ATN file and how does it differ from a preset?

An ATN (Action) file is a recorded sequence of Photoshop commands. Unlike a preset, which simply stores slider positions, an action automatically performs dozens of operations: creating layers, applying filters, setting blend modes — all with one click of the Play button.

How large is the archive and what is inside?

The archive is 13.1 MB and contains two ATN files with a combined total of 70 actions. No additional files, fonts, or presets are required — everything runs on vanilla Photoshop.

Can I use these actions in Photoshop Elements?

Photoshop Elements supports loading ATN files but not all functionality. Actions that use adjustment layers or complex filters may work incorrectly. Full Photoshop CC is recommended for reliable results.

The action applied but looks unnatural. What should I do?

Lower the opacity of top layers to 40–60%. Check layer masks and remove snow from faces and skin. Add some warmth back via Color Balance in the shadows. These three adjustments turn a plastic-looking effect into an organic winter scene.

Do these actions work on both macOS and Windows?

Yes, ATN files are cross-platform. The installation process is identical on both operating systems. The only difference is keyboard shortcuts: Mac uses Cmd instead of Ctrl.

Can I undo an action after it runs?

Partially — via the History panel (Window > History). However, an action may perform 50+ steps, and History only stores the last 20–50 steps depending on your settings. Always duplicate the layer before running an action (Ctrl + J) — it is far more reliable.

Are these actions suitable for commercial use?

Yes, you can use the processed results in commercial projects: wedding albums, stock photography, advertising. The ATN files themselves cannot be resold as a standalone product.

Which action should I choose for an outdoor portrait?

Start with Winter Glow for soft radiance and add Snow Effect at 40% Opacity. For portraits, avoid actions from the Special FX category — they are too aggressive on skin tones and textures.

Why does batch processing freeze on some photos?

Most likely, your Source folder contains files in non-standard formats (GIF, PNG with transparency) or with different color profiles. Convert all source files to JPEG sRGB before running Batch for consistent results.

Can I combine multiple actions on a single photo?

Yes, but apply them sequentially, not simultaneously. Start with Color Toning, then Atmosphere, and finally Effects (Snow/Ice). This order produces the most natural-looking outcome.

Tap to react