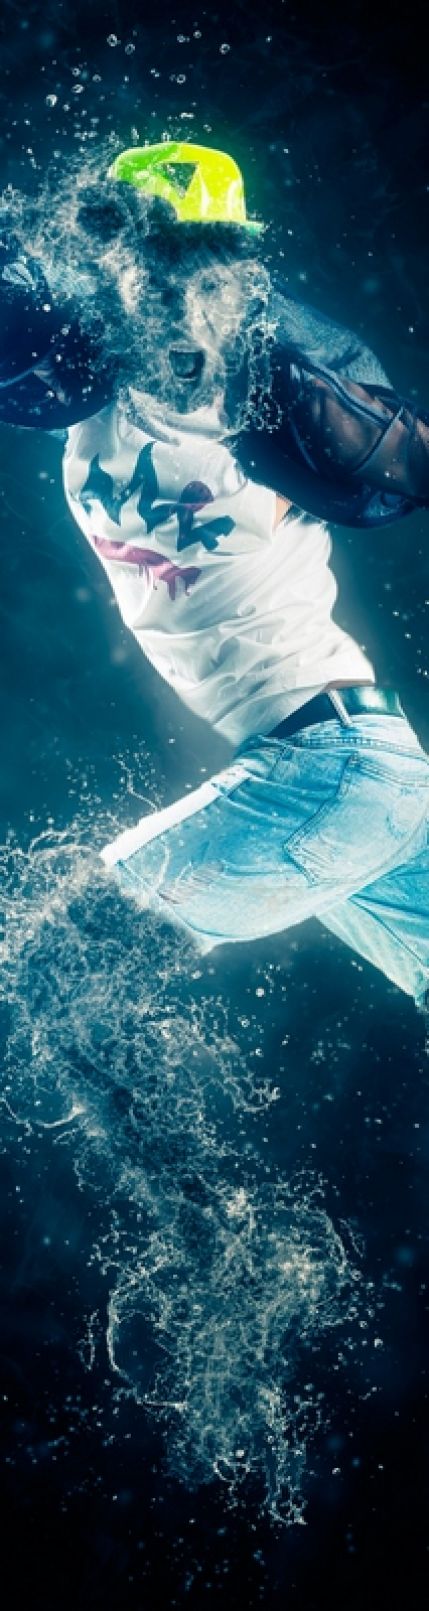
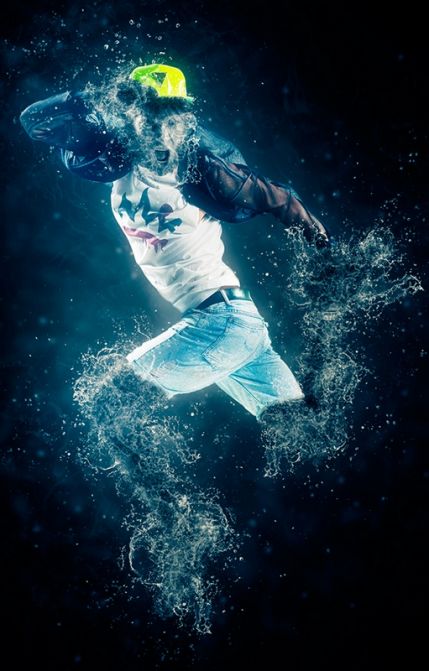
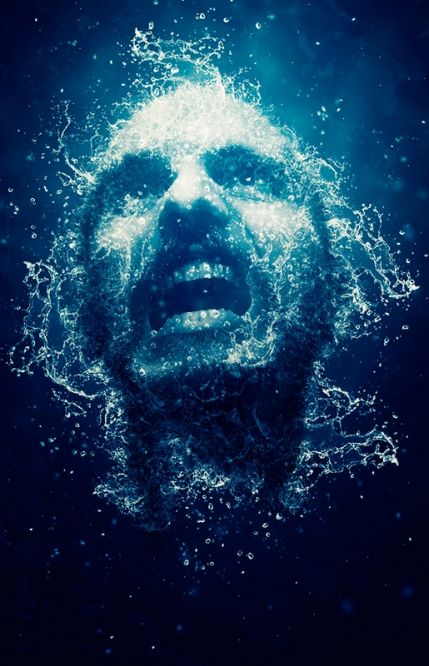
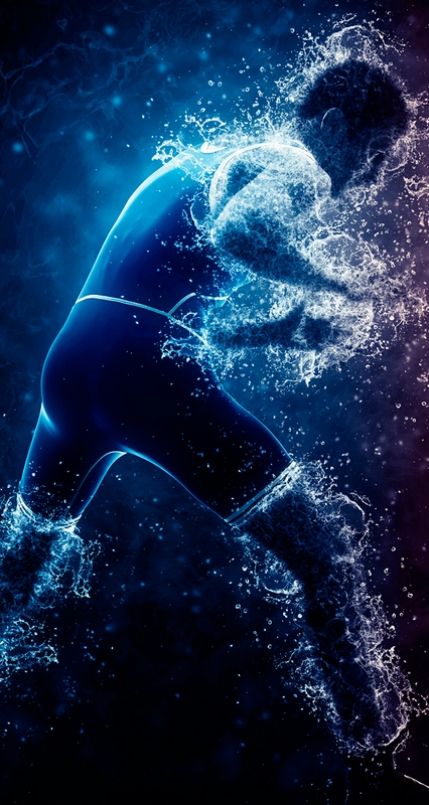
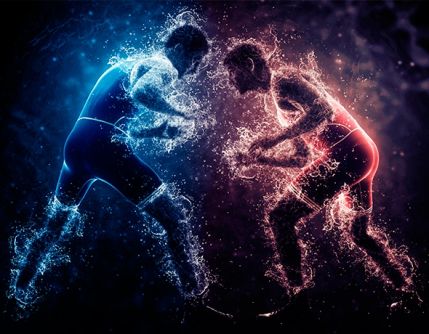
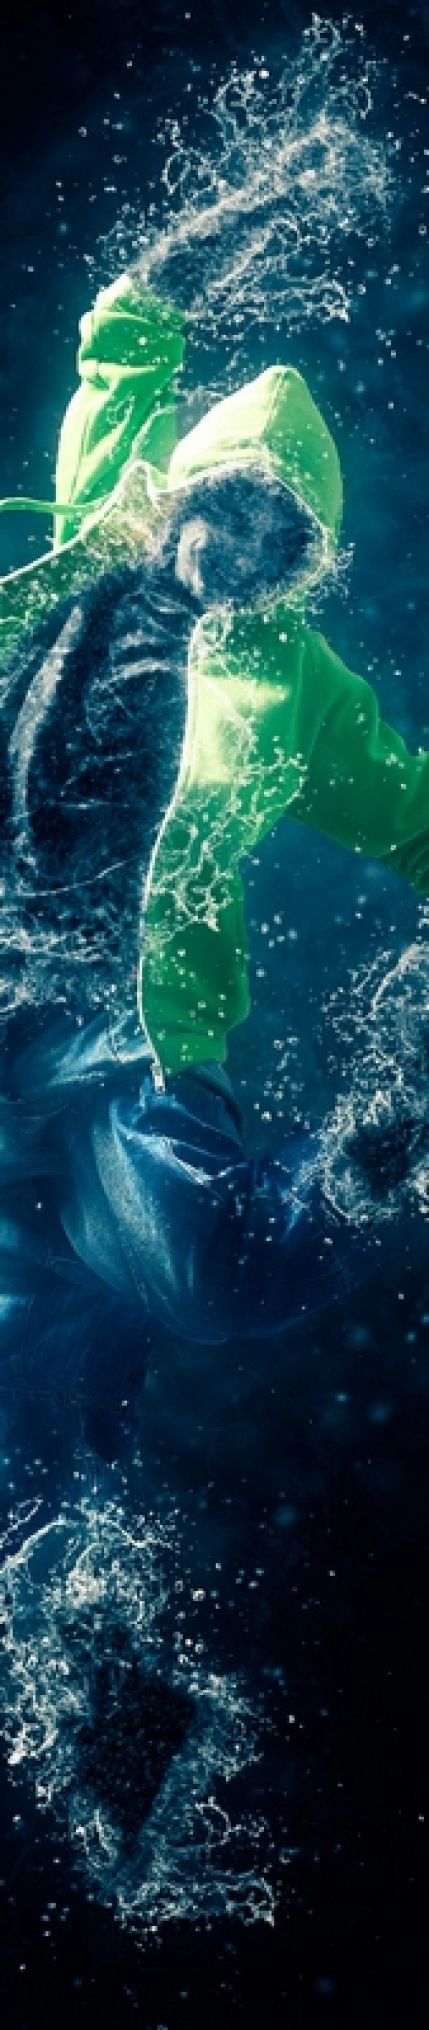
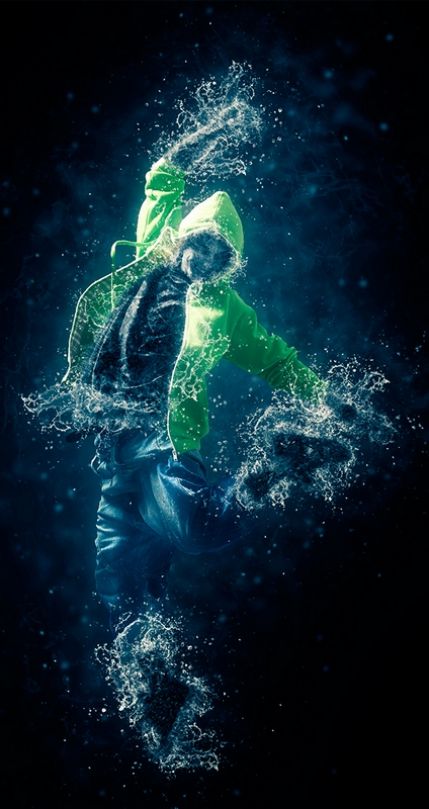
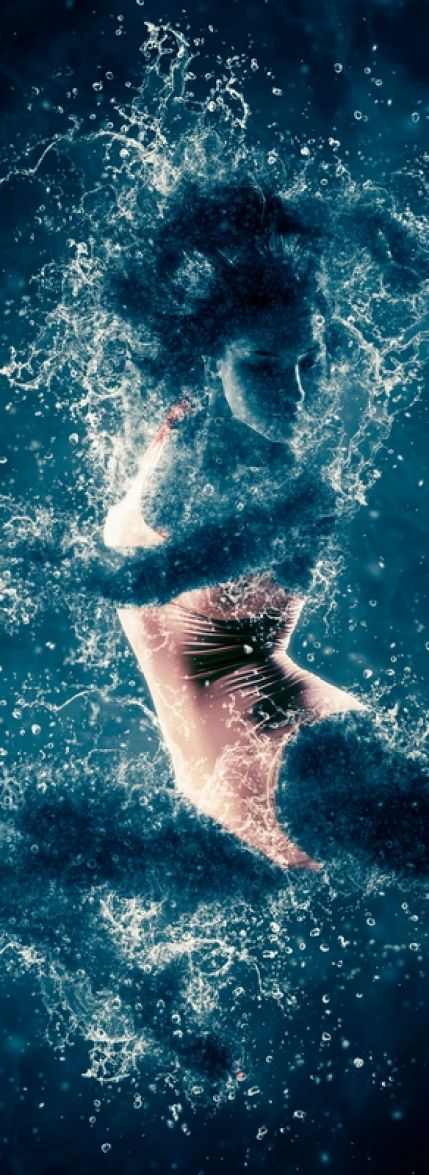
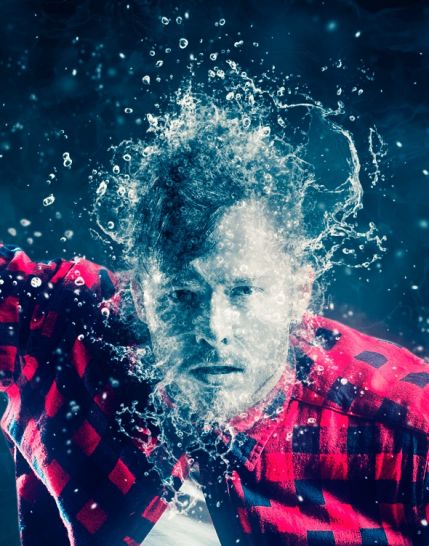
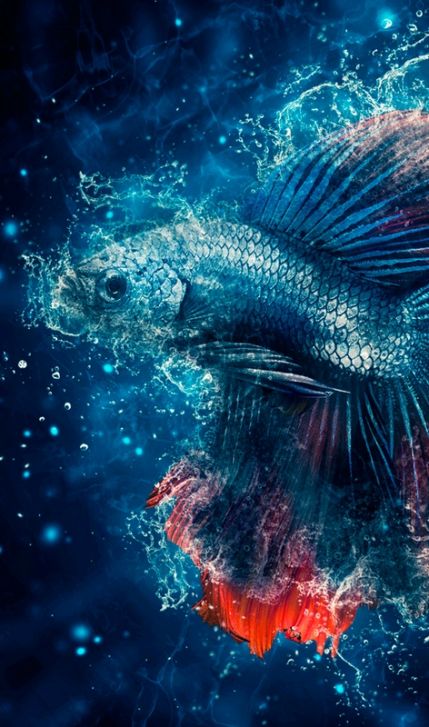
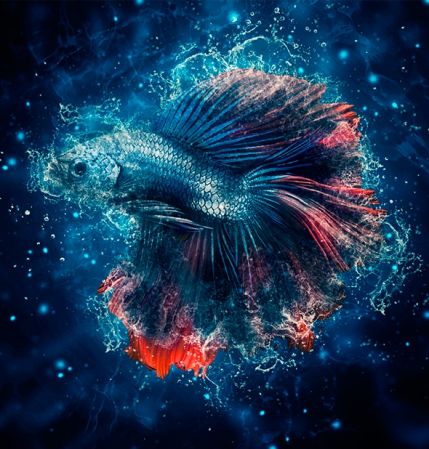
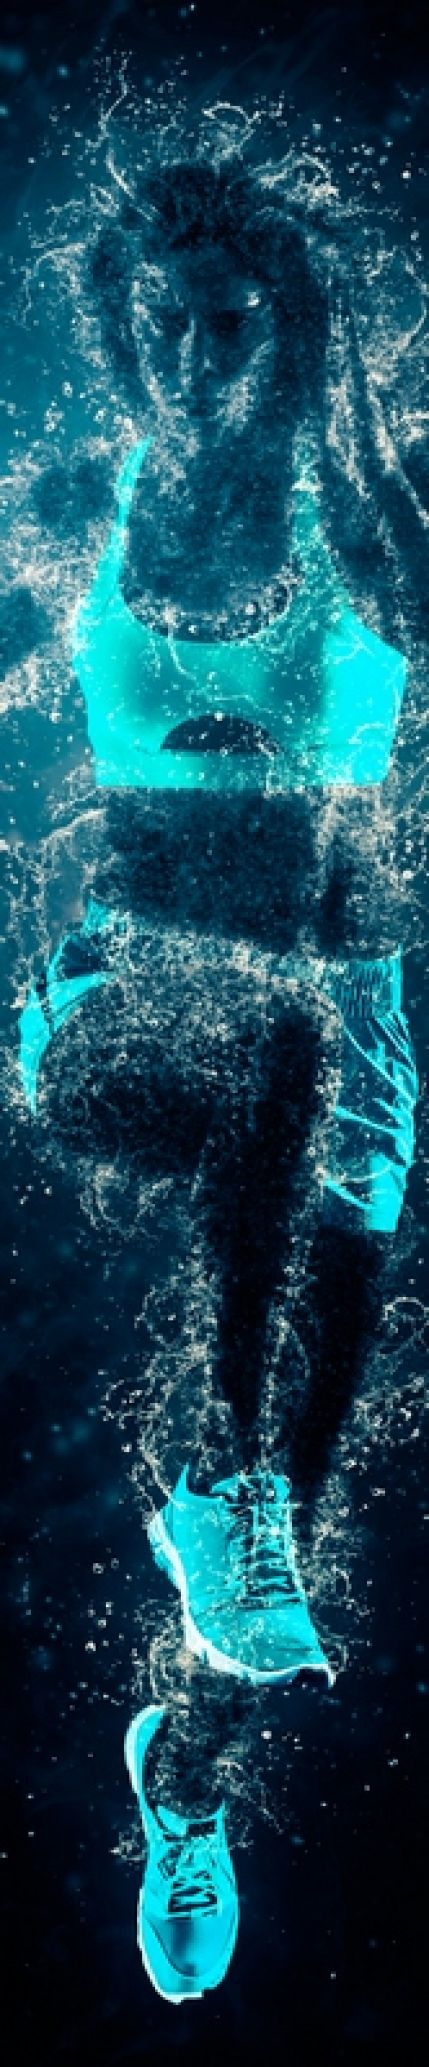
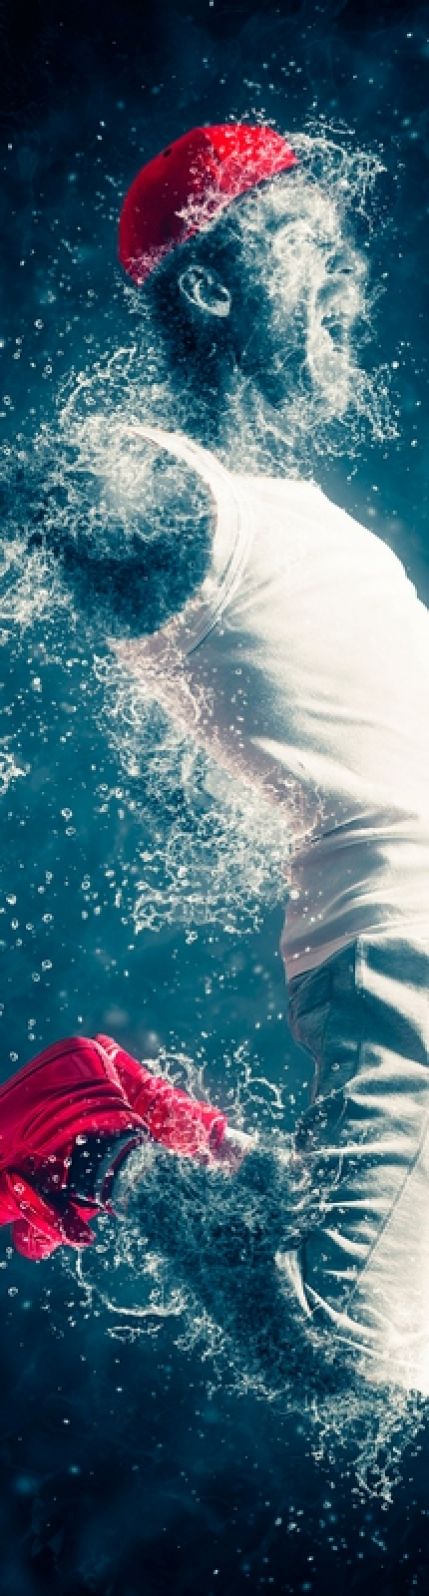
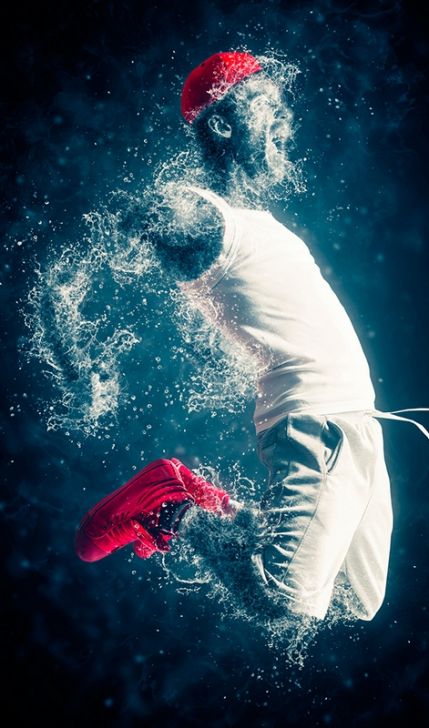
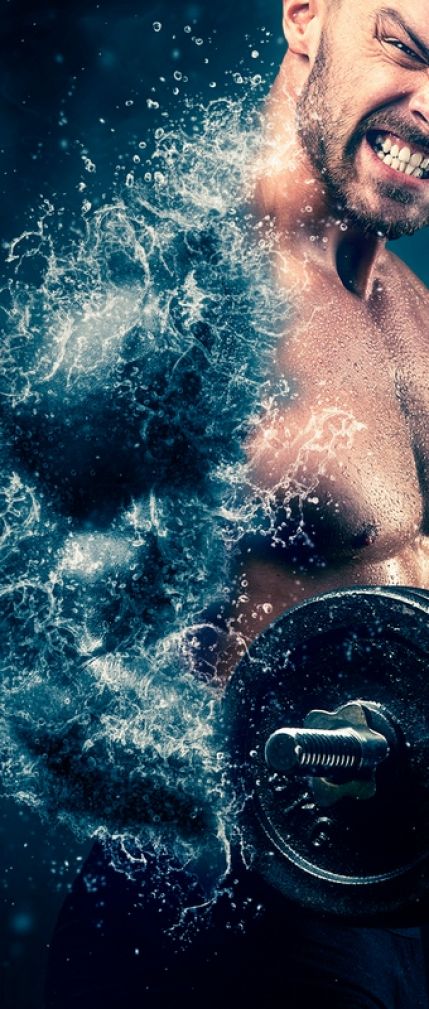
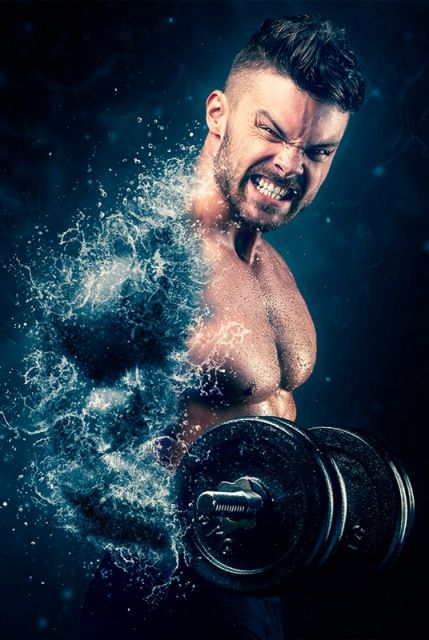
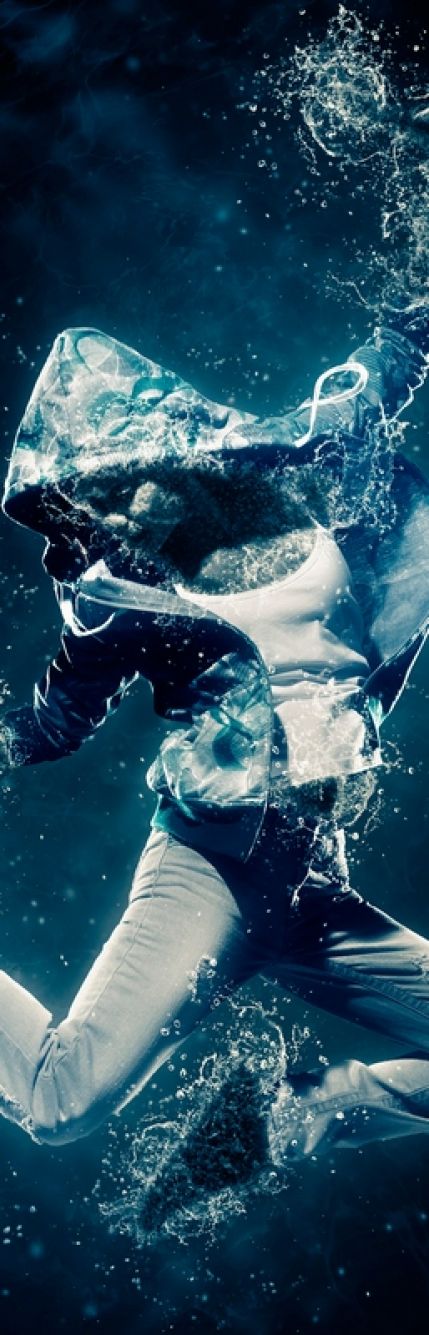
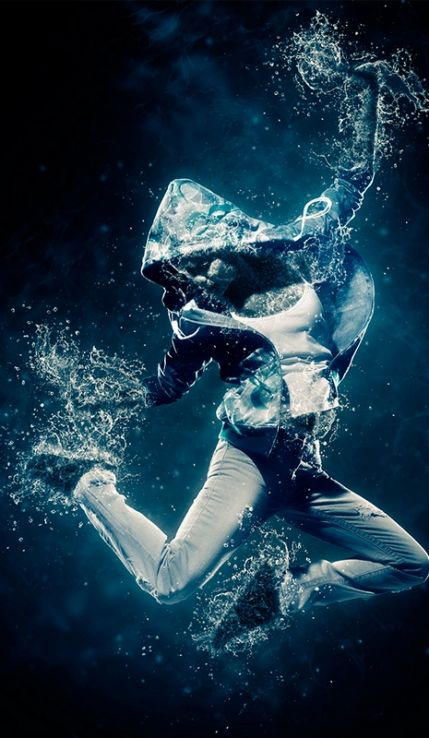
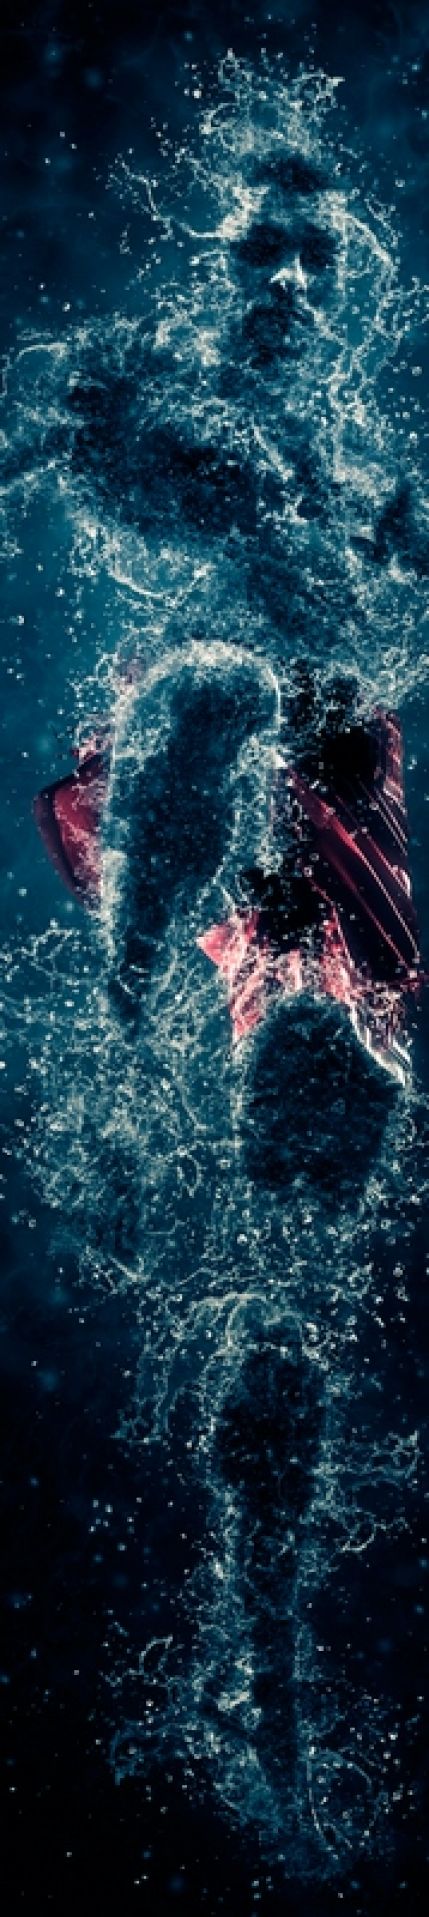
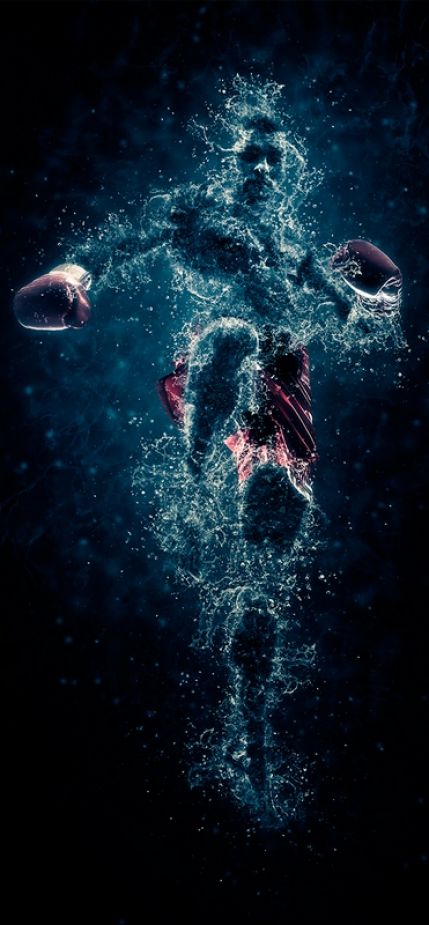
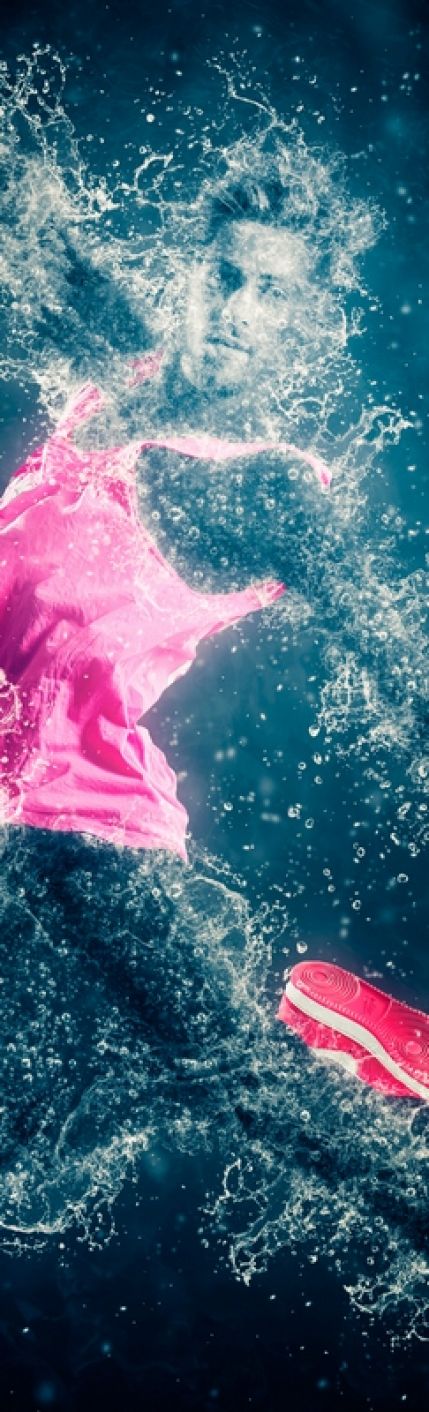
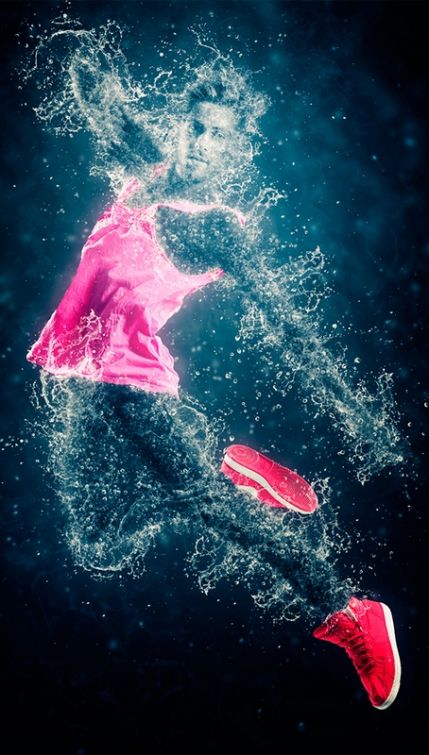
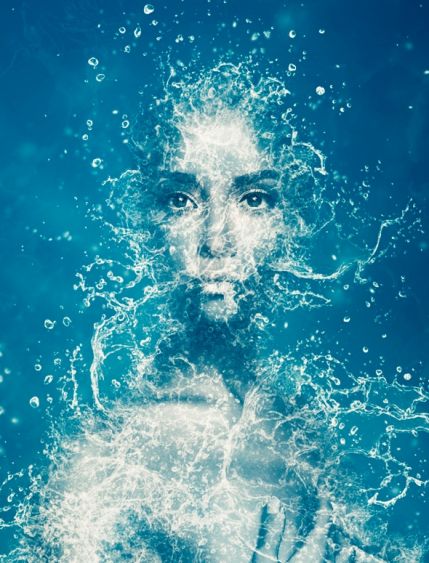
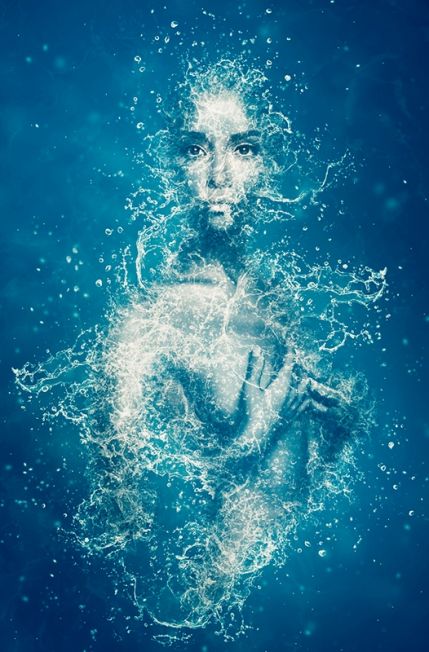
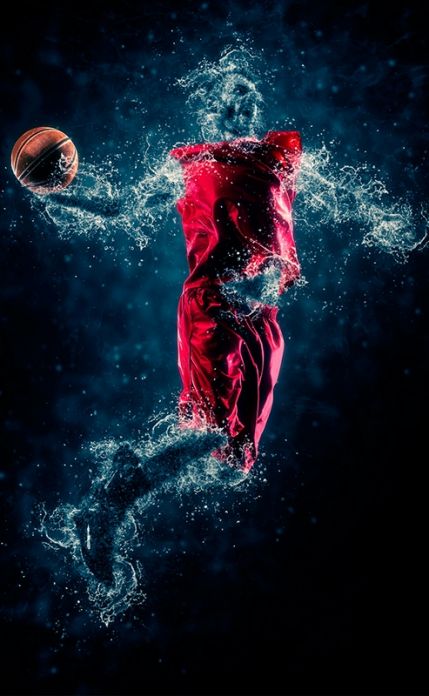
I remember the first time I saw a water splash Photoshop action in use. Someone took a portrait, ran an action, and within minutes the subject appeared to be made of water — dissolving into splash droplets, freezing mid-air as if photographed by a high-speed camera. I assumed it took hours of manual work. It did not. It took an action, a well-prepared image, and about three minutes.
The Water Photoshop Action is one of the most visually striking effects in the Photoshop action ecosystem. It analyzes the silhouette of your subject, generates splash and droplet elements around the edges, and composites them into a cohesive water-transformation scene. The effect makes it look as though your subject is literally turning into water — part solid, part liquid, with cascading droplets and splashing waves.
It sounds like magic because, functionally, it is. The action automates dozens of steps that would take a skilled retoucher hours to replicate manually. Brush strokes, layer masks, blend modes, color adjustments, splash element placement — all scripted and executed in sequence. Your job is to prepare the image correctly and let the action do the heavy lifting.
What the Water Photoshop Action Actually Does
In practice, here is what happens: you open a portrait, run the action, and a few minutes later you have a PSD with dozens of layers. At first glance the result looks finished — and it is close. But the real power of the action reveals itself during follow-up manual tweaking. Every splash layer can be moved, recolored, duplicated, or deleted. The action does not give you a final image — it gives you a construction kit of ready-made parts.
Under the hood, the action performs approximately thirty to fifty individual operations depending on the version. It starts by duplicating your base layer and creating a selection from the subject. From that selection, it generates edge detection masks that determine where water should appear. Then it systematically places pre-designed splash and droplet elements around the silhouette, matching the subject's contours. Layers are adjusted with blend modes like Screen and Overlay to integrate the water elements naturally. Color correction is applied to unify the palette. The final result is a multi-layered PSD with full control over every element.
Types of Images That Work Best
| Image Type | Effect Quality | Why | Tips |
|---|---|---|---|
| Portraits on white background | Excellent | Clean silhouette, high contrast | Remove the background before running the action |
| Objects on solid color | Excellent | Sharp edges, easy detection | Neutral gray or white backgrounds work best |
| Full-body shots on white | Very good | More edges for splash placement | Ensure limbs are separated for better effect |
| Products on light background | Good | Defined shape, clean lines | Products with curves produce better splashes |
| Busy or dark backgrounds | Poor | Action cannot separate subject | Remove background manually first |
| Low-resolution images | Poor | Splash elements look pixelated | Minimum 2000px on the long edge |
The action is not magic, though it certainly looks that way. You feed it a silhouette and it builds water drama around it. The cleaner the silhouette, the more convincing the final scene. The rule is simple: garbage in, garbage out. Good source, good result. — it needs something to work with. Feed it a clean silhouette and it delivers spectacular results. Feed it a messy JPEG with a cluttered background and you will wonder why you spent money on the action. Image preparation is half the battle.
Step-by-Step Installation Guide
- Download the Water Photoshop Action file — it will have a .ATN extension
- Open Adobe Photoshop (CS6 or newer recommended; CC 2015+ ideal)
- Open the Actions panel: Window > Actions or press Alt + F9
- Click the panel menu icon (four horizontal lines) in the top-right corner of the Actions panel
- Select Load Actions from the dropdown menu
- Navigate to your downloaded .ATN file and click Open
- The action set will appear in your Actions panel — expand it to see the component actions
How to Use the Action: The Right Way
Running the action is the easy part. Preparing your image is where most people stumble. Here is the workflow that produces professional results.
Step 1: Prepare Your Image
Open your photo in Photoshop. The subject must be on a separate, transparent layer. If your subject is on a background, use the Object Selection tool or Quick Selection tool to isolate it, then mask out the background. Name this layer exactly as specified in the action instructions — most actions require a specific layer name like "Subject" or "Your Image." Check the action documentation for the required layer name. Ignore this step and the action will either fail or produce garbage.
Step 2: Set Image Resolution
For best results, your image should be at least 2000 pixels on the long edge. The splash elements are rendered at a fixed resolution. If your image is too small, the water droplets will look disproportionately large. If it is too large, the action may take significantly longer to complete. Around 2500-4000 pixels wide is the sweet spot for most actions.
Step 3: Run the Action
Select the appropriate action within the set — most Water Action packs include multiple variations like "Main Effect," "Light Splash," and "Heavy Splash." Click the Play button at the bottom of the Actions panel. Photoshop will execute the sequence. Do not touch anything. Do not click. Do not switch windows. Let it run. The process can take anywhere from one to five minutes depending on your image size and computer speed.
Step 4: Customize the Result
When the action finishes, you will have a PSD with numerous layers organized into folders. The beauty of actions is that they leave everything editable. Want more splashes? Duplicate a splash layer. Want fewer droplets? Toggle the visibility of droplet layers. Want different colors? Add a Hue/Saturation adjustment layer above the splash group. The action gives you a starting point — you make it your own.
Customization Options After Running the Action
| What to Customize | How | Effect |
|---|---|---|
| Splash intensity | Adjust opacity of splash layer groups | From subtle mist to aggressive splashing |
| Water color | Hue/Saturation adjustment layer | Blue water, neon liquid, any color |
| Droplet size | Scale individual droplet layers | Fine mist vs large flying drops |
| Splash direction | Flip splash layers horizontally or vertically | Change the flow direction of water |
| Subject visibility | Adjust opacity of subject layer | Full visibility to ghost-like presence |
| Background | Place a new layer below everything | Dark background for dramatic contrast |
| Blend intensity | Change blend modes on splash layers | Screen for bright, Multiply for dark integration |
Comparison with Similar Actions
Water actions are part of a larger family of transformation effects. Here is how they stack up.
- Dispersion Action: Breaks the subject into particles that scatter outward like dust or ash. More aggressive and chaotic than water. Water action preserves the subject's form better, while dispersion completely fragments it.
- Smoke Action: Converts edges into wispy smoke trails rising upward. Softer and more ethereal. Water action is more dramatic and dynamic.
- Fire Action: Adds flame effects around the silhouette. Warmer palette, more destructive feel. Water action is cooler-toned and refreshing by comparison.
- Sand/Dust Action: Similar to dispersion but with finer particles and more lateral movement. Water action has a vertical emphasis with droplets falling downward.
- Neon/Light Action: Adds glowing edge effects rather than physical elements. Purely aesthetic; water action has a tactile, physical quality.
The water action stands out because it combines fluidity with structure. Dispersion destroys form. Smoke obscures it. Water transforms it while keeping it recognizable. That is why water effects are so popular for album covers, movie posters, and editorial photography.
Common Issues and Troubleshooting
- Action stops after a few steps. Check that your subject layer is named correctly per the action instructions. Check that you have enough RAM — close other applications if Photoshop is sluggish.
- Splashes look pixelated. Your image resolution is too low. Start with an image at least 2000 pixels wide. The action's splash elements are high-resolution but cannot compensate for a tiny source image.
- Water effect appears in wrong places. The action placed splashes based on the detected silhouette. If your subject has hair or complex edges, manually clean up the initial selection before running the action.
- Colors look off. The action applies color adjustments tuned for neutral lighting. If your original has a strong color cast, add a Color Balance adjustment layer after the action completes.
- Photoshop runs out of memory. Merging unnecessary layers before running the action helps. Also, run the action on a cropped version of your image and composite it back into the full composition afterward.
- Action requires a newer Photoshop version. Some actions use features introduced in CC 2015 or later. Check the action requirements before purchasing. CS6 users may need to find older action versions.
Tips for Maximum Quality Results
- Use well-lit images. Hard shadows on the subject complicate the action's edge detection. Soft, even lighting without harsh shadows gives a clean selection and better output.
- Do not sharpen before the action. Sharpening creates halos on object edges that the action interprets as background. Apply sharpening only after the action finishes, at the final stage.
- Check your color profile. Actions are typically optimized for sRGB. If your image is in Adobe RGB or ProPhoto RGB, convert to sRGB before running. Colors will be more accurate.
- Keep the original handy. Always work on a copy of your file. Some actions clear the history state to save memory, so you cannot undo the result with standard tools.
- Test on a small crop. If your image is very large, crop a 1000x1000 pixel section and run the action on that. You will quickly assess the result without waiting for the full render.
- Experiment with opacity. The best result often comes at less than 100% intensity. Try reducing overall splash group opacity to 70-80% — the effect becomes softer and more natural.
System Requirements for Photoshop Actions
- Photoshop Version: CS6 minimum; CC 2015 or newer recommended
- RAM: 8 GB minimum; 16 GB recommended for images above 3000px
- Operating System: Windows 10/11 or macOS 10.15+
- Language: Actions typically work in all language versions; some may require English-language Photoshop
- Image Format: RGB color mode, 8-bit; 16-bit may cause compatibility issues with some actions
If your system meets these specs but the action still fails, the most common culprit is a missing resource file. Many Water Action packs ship with companion brushes, gradients, and patterns that must be loaded separately. Check the ZIP file you downloaded for any .ABR, .GRD, or .PAT files and load them all before running the action.
Before and After: What to Expect
A well-executed Water Photoshop Action result is dramatic. The lower half of your subject dissolves into a cascade of water droplets. Splashes arc outward from the silhouette edges. The upper half retains clarity — the face, the product, the focal point remains recognizable. This graduated effect — solid on top, dissolving toward the bottom — is the signature aesthetic of water actions.
With customization, you can push the effect further. Reduce the subject opacity to create a ghostly water figure. Colorize the splashes for a surreal neon liquid effect. Add multiple splash layers at different opacities for depth. The action gives you ninety percent of the effect; your creativity supplies the remaining ten percent that makes it unique.
\u{201c}The best way to think about Photoshop actions is as a starting point, not a finish line. The action handles the technical heavy lifting. Your job is to take the result and make it yours — tweak, adjust, composite. That is where the art happens.
When Not to Use Water Action
As striking as the water effect is, there are situations where it does not belong. Do not use it on group photos — the action is designed for a single subject. Do not apply it to images with text — the letters will distort beyond recognition. Do not try processing photos of pets with fluffy fur — the edges will be jagged and the effect will look messy. And most importantly: do not put a water effect on images where documentary accuracy matters. This is an artistic tool, not a journalistic processing tool. Everything has its place.
FAQ: Water Photoshop Action
What is a Photoshop action and how does it work?
A Photoshop action is a recorded sequence of commands that automates repetitive tasks. The Water Photoshop Action is a pre-built sequence that creates water splash effects around a subject by generating droplet layers, applying masks, and adjusting blend modes — all automatically. You open your image, press Play, and the action does the rest.
Do I need advanced Photoshop skills to use this action?
No. The action is designed for users of all skill levels. You need to know how to isolate a subject from its background and how to load an action file — both are basic skills. The action handles all the complex compositing automatically. Customizing the result afterward benefits from intermediate Photoshop knowledge but is optional.
Why does my action stop with an error message?
The most common cause is incorrect layer naming. Most Water Actions require your subject layer to have a specific name — check the documentation. Other causes: the image is not in RGB mode, the background is not transparent, or companion resource files (brushes, patterns) were not loaded.
Can I use this action on any type of image?
Technically yes, but results vary dramatically. Images with a clearly defined subject on a transparent background produce the best results. Portraits, product shots, and isolated objects work well. Complex scenes with busy backgrounds, low contrast, or soft edges produce weaker effects unless you manually isolate the subject first.
How long does the action take to run?
Typically one to five minutes, depending on your image resolution and computer specifications. Images at 4000+ pixels on a machine with 16 GB RAM complete in about two to three minutes. Smaller images on slower machines take proportionally longer. During execution, do not interact with Photoshop — let the action run uninterrupted.
Can I edit the result after the action finishes?
Yes — that is the whole point. The action produces a layered PSD file. Every splash, droplet, and adjustment layer remains independently editable. You can change colors, adjust opacity, reposition elements, add or remove effects, and modify the background. The action output is a starting point, not a final product.
Is the Water Photoshop Action compatible with Photoshop CS6?
Many modern Water Actions require CC 2015 or later because they use features not available in CS6. Check the action's system requirements before purchasing. Some creators offer CS6-compatible versions. If you are on CS6, look specifically for actions that state CS6 compatibility.
What image resolution gives the best results?
At least 2000 pixels on the longest edge. The sweet spot is 2500-4000 pixels. Below 2000 pixels, the splash elements look disproportionately large and pixelated. Above 5000 pixels, the action runs noticeably slower without a proportional quality improvement. RGB color mode and 8-bit depth are recommended for compatibility.
Can I use the action for commercial projects?
Yes, in most cases. Check the license that came with your action purchase. The vast majority of Photoshop actions are licensed for both personal and commercial use. Some creators ask for attribution. The action output is your original work — you are not distributing the action itself, just the images it helped create.
How do I change the water color after running the action?
Add a Hue/Saturation adjustment layer above the splash layer groups, then clip it to the group (Alt+click between layers). Drag the Hue slider to shift the water color. Blue water becomes green, purple, red — whatever you need. For precise control, use a Selective Color adjustment layer targeting whites and neutrals, which are the dominant tones in splash elements.
Tap to react


