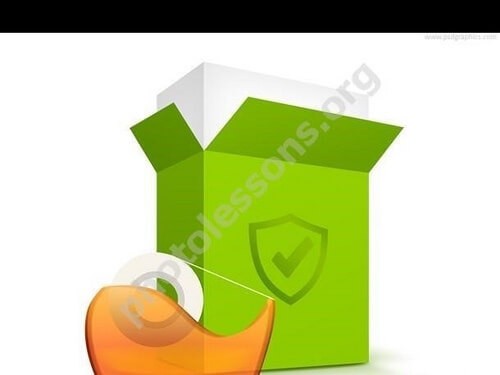
Packaging PSD Template for Photoshop
Quality packaging is the first thing a customer sees. Whether it's a physical product on a store shelf, an e-commerce product card, or a brand presentation, a realistic packaging mockup creates the right impression and builds trust. In this article, we offer a free PSD source file of a packaging box with tape texture — a fully editable template for Adobe Photoshop suitable for both professionals and beginners.

The packaging template is rendered at 1280x960 pixels resolution. This is sufficient for creating quality previews, catalog mockups, e-commerce product cards, and presentation materials. The file is fully layered with all elements on separate layers labeled in both Russian and English. You won't have to guess which layer is which — everything is named and organized into groups.
What's Inside the PSD File
The template contains all elements for a realistic packaging mockup. Let's examine each element in detail. The box base is a 3D projection with correct perspective. The designer built the geometry so it looks natural at an angle. This saves you from constructing perspective yourself, which is valuable if you don't work with 3D graphics.
The tape texture gives the mockup a natural look, simulating real adhesive tape with characteristic folds and semi-transparency. Shadows from the tape create volume and depth — an important element often missing in cheap templates. Without shadows, packaging looks flat and artificial. The soft gradient background provides a neutral environment for product presentation.
Separate layers for inserting your design let you quickly replace demo content with your own. The template includes a placeholder layer showing how your logo, text, and images should be arranged. Each face of the box has its own layer: one for the front, separate ones for sides and top. If your product has a complex shape, you can adapt each layer individually.
Layers are grouped into logical folders: Box, Tape, Shadows, Background, Text. This is the organization standard used by professional designers in studios and ad agencies. Grouping simplifies navigation: collapse groups you don't need and focus only on elements requiring changes.
Technical Specifications
| Parameter | Value |
|---|---|
| Resolution | 1280x960 pixels |
| File format | PSD (multi-layer) |
| Packaging type | Cardboard box with tape, 3/4 angle |
| Compatibility | Adobe Photoshop CS6 and newer |
| Layer count | Over 15 structured layers |
| Elements | Box, tape, shadows, gradient background, text |
| Color mode | RGB (8 bits per channel) |
| File size | Optimized for quick download (under 5 MB) |
Comparison with Alternatives
There are several ways to get a packaging mockup: download a ready PSD template, use a photo render, or order a 3D model. Let's compare them.
| Feature | Our PSD Template | Stock Photo Render | 3D Model |
|---|---|---|---|
| Cost | Free | $5-20 per image | $30-150 per model |
| Editability | Full, any element changeable | Almost none | Requires 3D software knowledge |
| Preparation time | 10-30 minutes | Instant (but fixed) | Hours or days for rendering |
| System requirements | Minimal, any PC | Minimal | Powerful PC needed |
| Realism | High for 2D | Maximum (photograph) | Maximum with good render |
| Modification flexibility | Maximum | None | Requires re-rendering |
How to Use the Packaging Template
Working with the template is simple. Open the PSD file in Adobe Photoshop. You'll see the layer structure in the Layers panel. If the panel isn't visible, press F7. Locate the group responsible for box design, usually named Design or Place Your Design Here.
To replace the demo design, follow these steps. Open your design file in a separate Photoshop tab. Select all content (Ctrl + A), copy (Ctrl + C), switch to the template tab, and paste (Ctrl + V). A new layer appears in the Layers panel. Drag it above the placeholder layer.
Use Ctrl + T for free transform: adjust size and angle to match the box perspective. For precision, enable the grid with Ctrl + ' and rulers with Ctrl + R. To rotate or skew, hold Ctrl and drag a corner transform handle — you can distort individual points to match the exact angle.
To create a clipping mask, hold Alt and click between your design layer and the box layer in the Layers panel. An arrow appears, indicating the top layer clips to the bottom one. Your design now only shows inside the box contour — the fastest way to achieve clean results without manual trimming.
Customizing the Packaging Appearance
You can change not only the design but also the packaging appearance. Change the box color with a Hue/Saturation adjustment layer above the box layer — create a clipping mask by Alt-clicking between layers. Drag the Hue slider for smooth color changes across the spectrum, Saturation for intensity, Lightness for brightness.
The tape texture can be controlled separately. For neater or more ragged tape edges, use the layer mask: click the white mask next to the tape layer and paint with a soft black brush (Opacity 50%). Black conceals, white reveals. Masks are non-destructive — switch to a white brush anytime to restore hidden areas.
Use Cases for the Template
This PSD template works for many projects. Packaging designers can quickly show clients how the product will look on a shelf. Instead of describing in words or showing flat layouts, insert the design into this template and get a realistic image in 15 minutes. Clients see exactly what they'll get, reducing revisions and speeding approval.
Marketers and e-commerce store owners use such mockups for product cards. Research shows products with quality packaging photos sell 30% better than the same products without packaging. The template lets you quickly create a consistent style for your entire catalog, boosting brand recognition. Add a logo in the corner — and all cards look like part of a unified line.
Small business owners can independently prepare gift packaging mockups for their products: add a logo, contacts, ingredient lists, and usage instructions. This is especially useful for handmade cosmetics producers, confectioners, and craft makers. No need to hire a designer for a single product card — the template lets you do it yourself.
Freelancers use the template for portfolios to showcase packaging skills. Even without real projects, create a concept design for a fictional brand and render it in a realistic mockup. Such portfolios look professional and attract clients. Bloggers and reviewers use the template for YouTube video thumbnails and article covers where packaged products need visual presentation.
The template is also great for education. Use it to study perspective, layer masks, blending modes, adjustment layers, and clipping masks in Photoshop. Design students use such templates for coursework and graduation projects. Teachers can give the template as a base for practical packaging design assignments.
Choosing the Right Angle for Packaging
The camera angle directly affects product perception. Our template uses a 3/4 angle, universally suitable for most products. It shows the front and side of the box, giving a complete impression of shape and design. If your product has important details on the back, consider a different angle or add an additional product card showing the rear view.
For premium products (perfume, luxury alcohol, jewelry), a top-down 45-degree angle creates lightness and airiness. For shelf products (cereal, tea, household chemicals), a frontal or eye-level angle works better — it mimics a shopper's view on a store shelf. Consider these nuances when choosing or creating a packaging mockup.
Common Mistakes When Using the Packaging Template
Even experienced designers sometimes make mistakes with PSD packaging mockups. Here are the most common issues and how to avoid them. First mistake — wrong perspective. Beginners often just place their design over the box without considering face angles. The result looks flat and doesn't fit the packaging volume. Always use free transform with Ctrl held for individual corner adjustment.
Second mistake — ignoring blending modes. If your design looks too bright or unnatural, try changing the layer blending mode to Multiply, Overlay, or Soft Light. For shadows on packaging, always use Multiply; for bright areas, use Screen or Overlay. Normal mode only works for flat elements without lighting considerations.
Third mistake — missing shadows. Without shadows, the packaging looks like a cut-and-pasted applique. Even a light drop shadow adds depth and realism. Don't skip this step even if you think the shadow isn't needed — the viewer's eye subconsciously looks for shadows to understand spatial positioning.
Fourth mistake — overly bright or busy backgrounds. A bright background distracts from the packaging and makes the mockup look unprofessional. Stick to neutral tones: gray, white, light beige. If a background is mandatory per brief, blur it with Filter — Blur — Lens Blur to simulate shallow depth of field from a professional camera.
Fifth mistake — working in the wrong color space. If you plan to use the mockup for print but keep the file in RGB, printed colors will look completely different. Always convert to CMYK before sending to a print shop. For digital use, keep RGB — it provides wider color gamut on screens.
Sixth mistake — compressing the PSD file. When saving, don't enable layer compression (File — Save As — uncheck Minimize PSD File Size). This can cause data loss, especially with masks and adjustment layers. Save a full-quality copy and export to PNG for client delivery.
Advanced Techniques
If basic settings aren't enough, try advanced techniques for maximum realism. Start with shadows. The template includes tape shadows, but add a drop shadow from the box onto the surface. Create a new empty layer below all box layers, fill with black, apply Filter — Blur — Gaussian Blur (15-20 px radius), reduce opacity to 30-40%.
For natural shadow direction, use Ctrl + T with Ctrl held to skew the rectangular shadow into a trapezoid extending away from the light source. The shadow should be darker and denser near the box base and blur as it moves away. This creates the illusion the box is actually standing on a surface.
For tape highlights, use the Dodge tool with Highlights range and 10-15% exposure. Carefully paint along tape edges where light hits. Alternative method: create a new layer in Overlay mode, fill with 50% gray (Edit — Fill — 50% Gray), paint highlights with a white brush at 20% opacity and shadows with a black brush.
Final step — overall color correction. Add a Curves adjustment layer above all layers. Give the image a slight tint depending on product type. For food and cosmetics, warm tones: raise the red channel by 3-5%, lower blue by 2-3%. For electronics, cool tones: raise blue, lower red. Color correction makes the image cohesive and professional.
Frequently Asked Questions
Can I use the template for commercial projects?
Yes, for client mockups and commercial projects. Distributing the raw PSD file as your own product is not permitted.
How do I change the box color?
Add a Hue/Saturation adjustment layer with a clipping mask above the box layer. Drag the Hue slider to change color, Saturation for intensity.
Is the template suitable for printing?
No, it's for digital use. For printing, increase resolution to 300 dpi and convert to CMYK color mode.
How do I add my own logo?
Paste the logo on a new layer, transform with Ctrl + T, and create a clipping mask (Alt + click between layers).
Why doesn't my design match the perspective?
Use Ctrl + T with Ctrl held to move corner points independently. Enable View — Snap for precise alignment.
Can I remove the tape from the mockup?
Yes, disable or delete the Tape layer/group on the Layers panel.
What background works best for presentation?
Neutral gray or white with a soft gradient. Avoid busy backgrounds that distract from the product.
Does it open in Photoshop Elements?
Yes, but adjustment layers and smart objects may work incorrectly.
Can I animate the packaging?
Yes, through frame animation in Photoshop Timeline, export as GIF.
Why is my design layer invisible after pasting?
Check layer visibility, Normal blending mode, and layer order.
Tap to react


