How to create a calendar in Photoshop with your own hands will be discussed in this article.

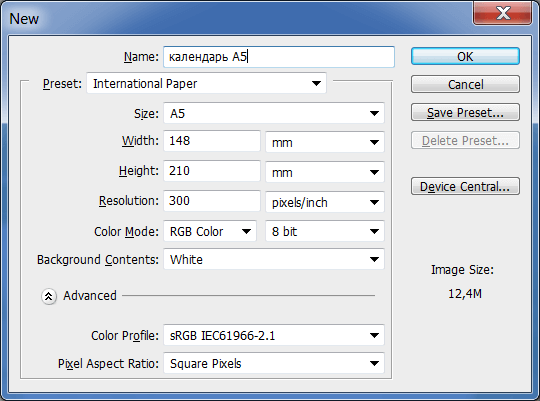
First, let's create an A5 document. To do this, go to the menu File-New (Ctrl+N)File-New (Ctrl+N) and set the following values in the parameters as shown in the image.
Rotate by 90 degrees - Image-Image Rotation-900CWImage-Image Rotation-90<sup>0</sup> clockwise.
Next, you need to place two images in the document - one that will serve as the outer part of the calendar, and the other as the background.
Any image can be used for the outer shell of the calendar, as long as it is not too bright, since the text will blend with the photo.
I chose the following photo.
Next, open the background image and insert it under the previously created layer.

Now we need to create a calendar grid. You can read how to do this in the tutorial.
So, all the main components for our calendar are ready. Let's start processing the materials.

Go to the layers panel, select the layer with the outer shell, and go to Blending OptionsBlending Options. There, set the scale of the pattern and other parameters in the Pattern OverlayPattern Overlay section. These settings are needed if you don't have a suitable photo for the outer shell of the calendar.

We have created the main part of the calendar; now we just need to attach the calendar grid to it. You can use an action for this, or create it manually.
Here's what the final result should look like:

https://www.youtube.com/embed/qIHvr1A-bKk
Tap to react


