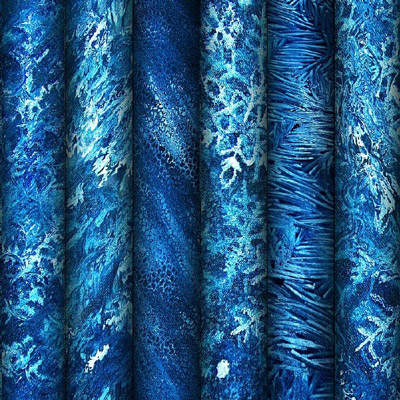
A genuine frost pattern on glass is nature's mathematics. Each branch of frost grows according to fractal laws, and a camera shooting that glass against the light captures a texture that cannot be drawn by hand. But real frost has a drawback: it melts. The JPG textures in this bundle do not. You get photographically accurate ice patterns ready for use in Photoshop, with no seasonal limitations.

Unlike synthetic patterns drawn in Photoshop or generated by AI, these textures are real photographs of frozen glass. Every crystal, every frost branch looks exactly as it occurs in nature. This means the result of overlaying them on a photograph will feel organic, not plastic.
What Is Inside the Bundle: File Format and Specifications
The textures come in the most universal raster format — JPG. Why not PNG or TIFF? For photographic textures, JPEG at 90–100% quality is visually indistinguishable from lossless formats while being 5–10 times smaller in file size. This matters when your project has 10–15 texture layers and each one would weigh 50 MB as a PNG.
| Feature | Value | Why It Matters |
|---|---|---|
| Format | JPG (JPEG) | Compatible with any Photoshop version, lightweight |
| Resolution | High (photographic) | Can be scaled and cropped without visible pixelation |
| Texture type | Natural, photographed | Organic look when overlaid, natural noise and micro-details |
| Color space | sRGB | Ready for web, social media, and digital print use |
| License | Free for all use | Personal and commercial projects without restrictions |
How to Use Textures as Overlays in Photoshop
The simplest and most common scenario: overlaying an ice pattern on top of a photograph. But simply dropping the texture on a second layer is not enough. You need the right blend mode, otherwise the image turns into visual mush. Here is a step-by-step guide that works for 90% of cases.
- Open your photograph in Photoshop. This is your background layer.
- Drag the JPG texture into the document or open it and copy to a new layer (Ctrl+A, Ctrl+C, Ctrl+V in the target document).
- In the Layers panel, change the Blend Mode from Normal to one of three options: Screen (ice becomes transparent-white, removing the dark background), Overlay (ice appears with contrast, adding texture), or Soft Light (the softest option, barely visible texture).
- Adjust Opacity — typically 40–70% produces the most natural result.
- Add a layer mask (click Add Layer Mask at the bottom of the Layers panel) and use a black brush to remove the texture from areas where it is not needed: faces, eyes, important details.
Blend Modes for Ice Textures: What to Use and When
Choosing the Blend Mode accounts for 80% of success when working with textures. The same ice pattern on the same photograph will produce fundamentally different results depending on the blend mode. Let us break down the main options.
| Mode | What It Does | When to Use | Recommended Opacity |
|---|---|---|---|
| Screen | Makes dark areas of the texture transparent, light areas visible | Frost on photo edges, icy breath on glass | 30–60% |
| Overlay | Boosts contrast, adds texture to both light and dark areas | Aggressive ice effects, photo manipulation, art projects | 40–70% |
| Soft Light | Gentle overlay, barely visible texture | Delicate portrait retouching, subtle winter mood | 50–80% |
| Multiply | Darkens, keeping dark texture areas visible | Ice shadows, old frozen window effect | 30–50% |
| Lighten | Shows only texture pixels lighter than the background image | Subtle frost coating (only the brightest crystals) | 40–60% |
Practical advice: do not limit yourself to one texture layer. Use two layers — one in Screen (50% Opacity), another in Multiply (20% Opacity). The ice will appear in both highlights and shadows, creating a volumetric, realistic effect.
Creative Applications: From Photo Manipulation to Design Elements
Frost textures are not just about overlaying them on a photo and calling it winter. Here are some less obvious but more interesting ways to use them.
Photo Manipulations
Create a looking through a frozen window effect: a portrait behind ice texture with a cleared area in the center. Technique: two texture layers, on the top one — a layer mask with a radial gradient from center (white) to edges (black). The model's face is clearly visible in the center, fading into frosty haze toward the edges. Add bluish toning through a Color Lookup LUT, and you have an album cover or movie poster.
Ice Text Effect
Type your text in a large font, add the frost texture on a layer above, and apply a Clipping Mask (Ctrl+Alt+G). The texture fills only the letters. Add Bevel & Emboss to the text layer and you get icy letters that look like they were cut out of a frozen window.
Web Design Backgrounds
Desaturate the texture (Ctrl+Shift+U), invert colors (Ctrl+I), and set Opacity to 10–15%. You get a subtle background texture for a winter-themed website or presentation. No visual overload — just a light tactile feel.
Video Vignettes
Save the texture with Screen blend mode applied as PNG, import into Premiere Pro or DaVinci Resolve. Stretch across the timeline and add Opacity animation (0% — 30% — 0%) over 2–3 seconds for scene transitions. The freezing effect between clips is a professional editing technique.
Resolution and Quality: When Textures Lose Their Purpose
Frost textures have a critical resolution threshold below which they stop working. If you see individual pixels in the pattern instead of smooth crystalline lines, the texture turns into digital noise.
Guidelines:
- For web and social media: texture width — minimum 2000px. Enough for covers, Stories, and banners up to 1920px.
- For A4 print (greeting cards): texture resolution — 300 DPI at A4 size (2480x3508px). Anything less and frost will look blurred.
- For large format print (posters, billboards): look for textures at 4000px or higher on the long side. Upscaling frost textures loses the micro-branching — precisely what makes them look natural.
A simple rule: the texture should be 20–30% larger than the target image on each side. Smaller — detail is lost. Exactly the same size — edges become visible. Larger — you can always crop the excess.
Comparison with Other Frost Texture Sources
You can photograph frozen glass yourself, download textures for free, or buy premium ones. Let us compare the options.
| Feature | This Bundle | DIY Photography | Stock Textures (Shutterstock) |
|---|---|---|---|
| Quality (realism) | High, macro-photography | Depends on equipment and conditions | High, professional photography |
| Time to obtain | Instant (download) | Hours/days (wait for frost, shoot, select) | Minutes (purchase + download) |
| Pattern variety | Several variants | Limited to your window | Huge selection |
| Cost | Free | Free (but time equals money) | From 10 USD per texture |
| License | Free usage | Yours (automatic) | Royalty-free (with restrictions) |
DIY photography is great if you have a macro lens, tripod, backlight, and frost outside on the right day. For every other case, a ready-made bundle saves time you can spend on the design itself instead of sourcing materials.
Combining Textures with Actions and Layer Styles
Frost textures truly shine when paired with other winter tools. The combination frost texture + winter action + snow text produces results unattainable by any single element alone.
A recipe for comprehensive winter processing of a single photo:
- Step 1 (base): apply the Winter Glow action from the 70 Winter Photoshop Actions Bundle for overall winter toning. Color temperature shifts cool, a soft glow appears.
- Step 2 (texture): overlay the frost texture in Screen mode (50% Opacity) along the frame edges. Distribute frost unevenly — denser toward corners, clearer toward the center.
- Step 3 (text): if a headline is needed, use the Ice Crystal style from the Winter Text Styles bundle on top of the processed image.
- Step 4 (final): add a global Curves adjustment with a gentle S-curve for contrast and a vignette (Filter > Lens Correction > Custom > Vignette).
This four-step sequence turns an ordinary portrait into a full winter art piece, ready for print or publication.
Winter Design Ideas with Textures
Sometimes the hardest part is not the technique but coming up with what to make. Here are a few ideas you can execute in an evening.
- New Year greeting card: dark blue background, gold style text, frost texture in corners via Screen mode. Centered greeting message. Minimal, premium, takes 20 minutes.
- Facebook or VK cover photo: horizontal 820x312 px. Winter landscape as background, frost texture in Overlay across the entire area, large text on the left, logo on the right.
- YouTube winter vlog intro: frame from the video, frost texture at Screen 40% with mask (remove from the presenter's face), channel name with icy text style at the bottom.
- Holiday dinner menu: A4 portrait orientation. Background — craft paper, frost texture Multiply 20% for tactile feel, dish names in a simple font, headline in Ice Crystal from the styles bundle.
- Gift certificate: A5 format. Dark green background, frost texture along edges via Lighten 30%, gold border, greeting text inside.
Frequently Asked Questions
What format do the textures come in and why JPG?
Textures are in JPG (JPEG) format. For photographic textures, JPG at 90–100% quality is visually indistinguishable from lossless formats but weighs 5–10 times less. This is critical for projects with 10–15 texture layers where each PNG would weigh around 50 MB.
Which blend mode should I choose for frost on a portrait?
For portraits, Soft Light at 40–60% Opacity works best. It provides delicate texture without overwhelming skin tones. Screen is for when frost needs to be clearly visible (on hair or clothing), and Overlay is for aggressive art effects.
Can I print frost textures on greeting cards and posters?
Yes, provided the texture resolution matches the print format. For A4 cards, you need 2480x3508px at 300 DPI. For large posters, 4000px or higher on the long side. Always convert to CMYK before printing (Edit > Convert to Profile).
How do I make frost appear only at the edges while keeping the center clear?
Add a layer mask to the texture layer. Select the Gradient Tool, set a radial gradient from white to black, and drag from center to edge holding Shift. The mask will show texture at the edges (white) and hide it in the center (black).
Why does my texture look dirty or grey in Screen mode?
Your texture likely has dark areas (the glass itself, shadows) that become semi-transparent but do not fully disappear in Screen mode. Solution: add a Levels adjustment layer above the texture, clip it with a Clipping Mask, and push the black slider to the right — dark areas vanish, leaving only the ice.
Can I use these textures in commercial projects?
Yes. You can use them in any project: commercial retouching, designs for sale, client social media content, printed products. The only restriction is you cannot resell the texture files themselves.
How do I combine multiple textures in one project?
Combine different textures on separate layers with different blend modes. For example: texture 1 — Screen 40% (large border pattern), texture 2 — Overlay 25% (fine frost across the entire area), texture 3 — Soft Light 15% (micro-texture). This three-layer approach creates depth unattainable with a single texture.
How do these differ from synthetic Photoshop patterns?
Natural textures like this bundle have organic structure: frost branching is uneven, pattern intensity varies, micro-imperfections are present. Synthetic patterns are repeating tiles with mathematically precise geometry that immediately reveals their artificial origin.
How do I prepare a texture for use in Figma or other software?
JPG opens in any graphics editor. For Figma, simply drag the JPG onto the canvas. If you need transparency, apply Screen mode to the texture on a black background in Photoshop and save as PNG-24. Use this PNG with transparency in Figma.
How should I store and catalog textures for quick access?
Create a Textures/Winter folder. Sort by type: Frost_Edge, Ice_Full, Snow_Dust. Add the texture folder to Photoshop Libraries (Window > Libraries) so you can drag textures into any document without searching your drive.
Tap to react
