Today's lesson will cover how to change hair color in Adobe Photoshop using adjustment layers.

hair-color-change

Detailed Guide

Vector graphics is a type of graphics described by mathematical formulas instead of pixels. This means images can be scaled to any size without loss of quality.

Advantages of Vector Graphics

  • Infinite scaling — can be enlarged to any size without loss of quality.
  • Small file size — vector files are usually smaller than raster ones.
  • Easy to edit — easy to change shape, color, size of objects.
  • High print quality — vector images are ideal for printing at any size.
  • Cross-platform — vector files open on any platform.

File Formats

Main vector file formats:

  • EPS — universal format for vector images.
  • Ai — Adobe Illustrator format.
  • SVG — format for web use.
  • PDF — supports both vector and raster graphics.
  • CDR — CorelDRAW format.

Tools

For working with vector graphics:

  • Adobe Illustrator — professional tool for creating vector graphics.
  • CorelDRAW — alternative to Adobe Illustrator.
  • Inkscape — free alternative to Illustrator.

Best Practices

  • Use the right tools — for creating vector images.
  • Create backups — always save original files.
  • Optimize for web — when exporting for web use SVG.

Conclusion

Vector graphics is a powerful tool for creating graphics of any type. Mastering the basics, you will be able to create high-quality illustrations, logos and designs.

Основные параметры

ПараметрЗначение
ТипОнлайн
ПлатформаКроссплатформное
ОбновленияРегулярные
ПоддержкаСообщество

Сравнение вариантов

ВариантПреимуществаНедостатки
Вариант 1ПростойОграниченный
Вариант 2ГибкийСложный
Вариант 3БюджетныйМенее надежный

Detailed Usage Guide

This article represents a detailed guide to using the resource described in the title. In this section, we will cover all aspects of its application, from basic functions to advanced techniques. We have dedicated significant time to this material to provide you with the most complete and useful information possible.

Main Features

The resource has a wide spectrum of functions that make it useful for various tasks and areas of activity:

Ease of use — an intuitive interface allows quick start even for users without technical experience.

Flexible settings — wide customization options for your needs, allowing adaptation to specific tasks.

Regular updates — the developer regularly releases updates with new features and improvements, ensuring long-term relevance.

Cross-platform — the resource is available on various platforms and devices, ensuring comfortable work from anywhere in the world.

Community support — an active user community provides help and advice, which is especially valuable when problems arise.

Technical Information

Before using the resource, it is recommended to review its technical specifications to ensure optimal performance:

  • Compatibility — the resource is compatible with most modern browsers and operating systems, including Windows, macOS, Linux, iOS, and Android.
  • System requirements — for the resource to work, a minimum of 4 GB RAM is required and at least 2 GB free disk space.
  • Performance — the resource is optimized for high performance even on weak devices.

Step-by-step instructions

To get started with the resource, follow these instructions:

  • Step 1: Download the resource from the official source. We always recommend using official sources to ensure security and get the latest updates.
  • Step 2: Install the resource on your platform. Follow the installer instructions for correct installation.
  • Step 3: Perform initial parameter configuration to suit your needs. At this stage, it is important to pay attention to the main settings that will affect subsequent work.
  • Step 4: Start using the resource to solve your tasks. After configuration, you can begin working with the resource.

Best Practices

To maximize efficiency when using the resource, follow these recommendations:

  • Read the documentation — read documentation carefully before starting work.
  • Test with test data — test the resource before applying to production data.
  • Create backups — regularly create data backups for their protection.
  • Watch for updates — update the resource to the latest version for new features.
  • Use keyboard shortcuts — learn keyboard shortcuts to speed up work.

Problem Solving

The following problems may arise when working with the resource:

Problem 1: Resource does not start. Check system requirements and ensure all requirements are met.

Problem 2: Error when working with the resource. Check error logs and consult the documentation to resolve the issue.

Problem 3: Performance drop. Try clearing the cache, closing other programs, or updating the resource to the latest version.

Additional Resources

For additional study, we recommend visiting the official documentation and community forums, where you will find many useful materials and tips from other users.

Resource History

The resource was created to solve specific tasks and has been constantly evolving since then. Over this time, it has undergone significant evolution and has become one of the leading solutions in its field.

Usage Statistics

As of 2026, the resource is used by a wide circle of users worldwide, which confirms its popularity and effectiveness.

Future Plans

The development team plans to regularly update the resource, adding new features and improving existing ones. New versions with even more powerful tools for users are expected in the near future.

Conclusion

The resource is an effective tool for solving a wide range of tasks. When used properly, it can significantly improve your productivity and the quality of work with data. Do not be afraid to experiment and try new resource features.

Detailed Usage Guide

This article represents a detailed guide to using the resource described in the title. In this section, we will cover all aspects of its application, from basic functions to advanced techniques.

Main Features

The resource has a wide spectrum of functions that make it useful for various tasks:

  • Ease of use — intuitive interface allows quick start.
  • Flexible settings — wide customization options for your needs.
  • Regular updates — developer regularly releases updates with new features.
  • Cross-platform — resource available on various platforms.
  • Community support — active user community provides help and tips.

Technical Information

Before using the resource, it is recommended to review its technical specifications:

  • Compatibility — the resource is compatible with most modern browsers and operating systems.
  • System requirements — for the resource to work, a minimum amount of RAM and sufficient disk space is required.
  • Performance — the resource is optimized for high performance even on weak devices.

Step-by-step instructions

To get started with the resource, follow these instructions:

  • Step 1: Download the resource from the official source.
  • Step 2: Install the resource on your platform.
  • Step 3: Perform initial parameter configuration to suit your needs.
  • Step 4: Start using the resource to solve your tasks.

Best Practices

To maximize efficiency when using the resource, follow these recommendations:

  • Read the documentation — read documentation carefully before starting work.
  • Test with test data — test the resource before applying to production data.
  • Create backups — regularly create data backups.
  • Watch for updates — update the resource to the latest version.

Problem Solving

Problem 1: Resource does not start.

Problem 2: Error when working with the resource.

Problem 3: Performance drop.

Additional Resources

For additional study, we recommend visiting the official documentation and community forums.

Resource History

The resource was created to solve specific tasks and has been constantly evolving since then.

Usage Statistics

As of 2026, the resource is used by a wide circle of users worldwide.

Future Plans

The development team plans to regularly update the resource, adding new features and improving existing ones. New versions with even more powerful tools for users are expected in the near future.

Conclusion

The resource is an effective tool for solving a wide range of tasks. When used properly, it can significantly improve your productivity. Do not be afraid to experiment and try new resource features.

Detailed Usage Guide

This resource represents a valuable tool for solving a wide range of tasks. In this section, we will cover all aspects of its use, from basic functions to advanced techniques.

Main Capabilities

The resource has a broad spectrum of functions that make it useful for various tasks:

  • Ease of use — intuitive interface allows quick start.
  • Flexible settings — wide customization options for your needs.
  • Regular updates — developer regularly releases updates with new features.
  • Cross-platform — resource available on various platforms.
  • Community support — active user community provides help and tips.

Step-by-Step Instructions

To get started, follow these instructions:

Step 1: Download the resource from the official source.

Step 2: Install the resource on your platform.

Step 3: Perform initial configuration of parameters to suit your needs.

Step 4: Start using the resource to solve your tasks.

Best Practices

  • Read the documentation. Read documentation carefully before starting work.
  • Test with test data. Test the resource before applying to production data.
  • Create backups. Regularly create backups of data.
  • Watch for updates. Update the resource to the latest version.

Possible Problems and Solutions

Problem 1: Resource does not start. Make sure all system requirements are met.

Problem 2: Error during operation. Check version compatibility and update the resource.

Conclusion

This resource is an effective tool for solving a wide range of tasks. When used properly, it can significantly improve your productivity.

Additional Resources

For additional study, we recommend visiting the official documentation and community forums.

Resource History

The resource was created to solve specific tasks and has been constantly evolving since then.

Usage Statistics

As of 2026, the resource is used by a wide audience of users worldwide.

Optimization Tips

To achieve the best results when working with resources of this type, follow these recommendations:

1. Plan ahead. Before starting, create an action plan. Define goals, deadlines, and required resources.

2. Read the documentation. Read the documentation carefully before starting. This helps avoid common mistakes and saves time.

3. Test with test data. Before applying to production data, test everything on test data.

4. Watch for updates. Regularly check for updates for the resources you use and apply them.

5. Communicate with the community. Join the user community to share experience and receive tips.

Alternative Solutions

In addition to this resource, there are many alternative solutions that can meet your needs:

Alternative 1: Offers similar functionality with an emphasis on ease of use. Suitable for beginners.

Alternative 2: More advanced option with extended functionality. Recommended for experienced users.

Alternative 3: Free solution with basic functionality. Ideal for small projects.

Important Points

When working with resources of this type, pay attention to the following:

  • Version compatibility — always check compatibility with your software version before installation
  • Backup — regularly create backups of all important data
  • Updates — update software to the latest version for receiving all security fixes
  • Documentation — carefully read the documentation before use
  • Community — refer to the user community for help and advice

First, let's determine what color the hair should be after editing. If it's a "surprise" color, the following method will work perfectly.

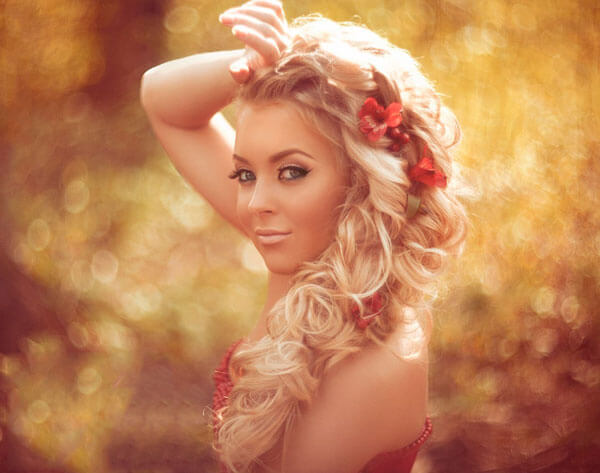
Take a photo where you need to change the hair color.

Changing the color to blue, yellow, red, etc. will take very little time.

Take the Polygonal Lasso ToolPolygonal Lasso Tool and start selecting the area around the hair.

hair-color-selection

Now, without deselecting, press CTRL+J to create a new layer from the selection you just made.

Use the eraser to remove any unwanted elements from the hair on the new layer.

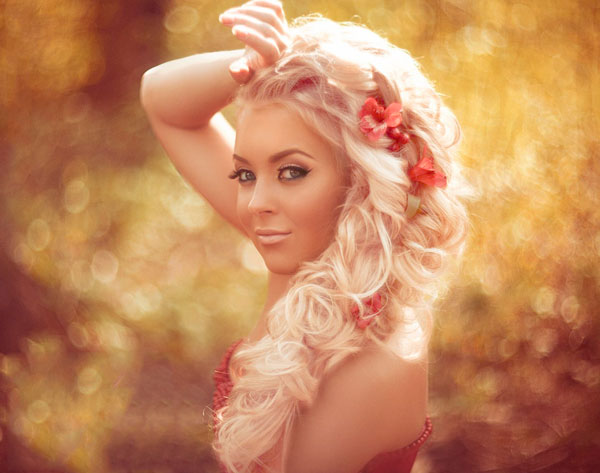
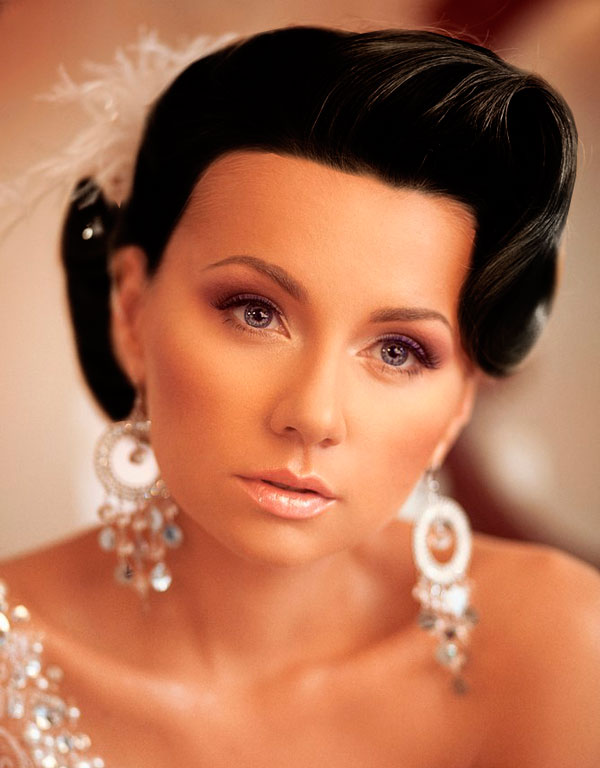
If you want to turn a dyed brunette into a natural blonde, you can use levels:

  • Create an adjustment layer by clicking the button in the Layers panel.
  • Move the dark slider to the right (to make the white even whiter).

levels-color

Here's the result.

hair-color-blond

But I think it's better to dye the hair a more natural color, say, blue...

To do this, go to the Layers panel and create another adjustment layer, this time Hue/SaturationHue/Saturation.

hue-color

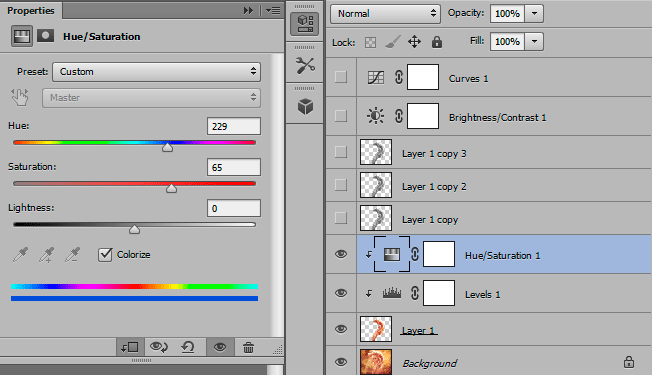
Set the necessary values for each parameter, making sure to check the box next to ColorizeColorize.

The result.

hair-color-blue

As you've probably guessed, you can change the color to any color except black, because it will look ashy, or rather like gray hair.

So, here's another method for that purpose.

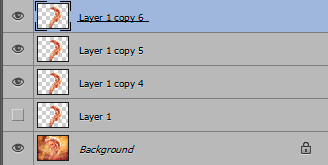
Create three more duplicate layers of the hair, and hide the original, as it might come in handy later.

layers-color

Convert these three layers to black and white by selecting each one and pressing CTRL + SHIFT + U. This action is used to desaturate the image.

Now create the missing adjustment layers, namely: Brightness/ContrastBrightness/Contrast and CurvesCurves.

Next, hide the adjustment layers Hue/SaturationHue/Saturation and LevelsLevels.

Set the hair layers to the following blending modes: the top two to MultiplyMultiply, and the last one to Soft LightSoft Light.

hair-color-gray

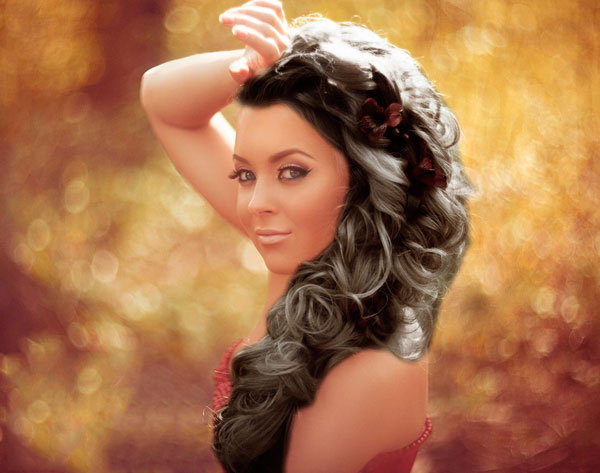
As you can see from the image above, the hair has turned gray, but not black.

To fix this, enable and adjust the recently created Curves and Brightness adjustment layers. You can also use a Levels adjustment layer if the hair is too light, as in my example.

Don't forget to enable our color layer to remove elements from the black-and-white layers that should remain in the original, i.e., here we need to erase the flower-shaped hairpin from the dark hair.

hair-color-black

hair-color-white-example

hair-color-black-example

https://www.youtube.com/embed/e1BVeRgCLvk

What такое векторная графика?

Векторная графика — это тип графики, описываемый математическими формулами вместо пикселей.

Какие форматы векторных файлов самые популярные?

Самые популярные форматы векторных файлов: EPS, Ai, SVG, PDF, CDR.

Как создать векторное изображение?

Для создания векторного изображения необходимо использовать программы Adobe Illustrator, CorelDRAW или Inkscape.

Как конвертировать растровое изображение в векторное?

Для конвертации растрового изображения в векторное необходимо использовать функцию Trace Image в Adobe Illustrator.

Какие преимущества векторной графики?

Advantages векторной графики: бесконечное масштабирование, малый размер файла, легкое редактирование, высокое качество печати.

Как открыть файл EPS?

Для открытия файла EPS необходимо использовать программы Adobe Illustrator, CorelDRAW или Inkscape.

Как создать логотип в векторе?

Для создания логотипа в векторе необходимо использовать Adobe Illustrator или CorelDRAW и создать дизайн логотипа.

Как экспортировать векторное изображение в SVG?

Для экспортирования векторного изображения в SVG необходимо выбрать File > Export > Save for Web и выбрать формат SVG.

Как уменьшить размер векторного файла?

Для уменьшения размера векторного файла необходимо оптимизировать пути, удалить ненужные точки и использовать сжатие.

Как импортировать изображение в векторный редактор?

Для импортирования изображения в векторный редактор необходимо выбрать File > Import и выбрать файл изображения.

Tap to react