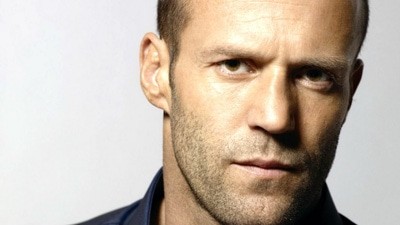
It's easy to give a person stubble in Photoshop, but how do you remove it? In this tutorial, we will talk about that.
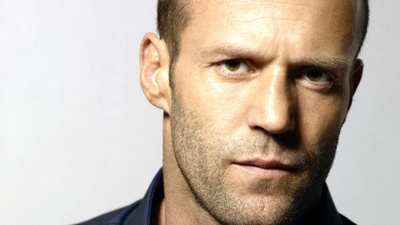
In order to remove stubble in Photoshop, we will need a stubbly person.
Open the program and immediately create a duplicate layer - Ctrl+J. Go to the menu <wild>Filter-Blur-Surface blur</wild>Фильтр-размытие-размытие по поверхности and set the values: radius <wild>Radius</wild>Радиус - 30-40, threshold <wild>Threshold</wild>Изогелия - 60-80. It all depends on the quality of your photo and its resolution. Here is approximately what we should sing:

Set <wild>Opacity</wild>Непрозрачность to 50-45%, create a mask - in the layers panel, click the <wild>Add vector mask</wild>Добавить векторную маску item.
Now take the <wild>Brush Tool</wild>Кисть, choosing black color and broad edges, and start painting over the eyes, mouth, ears... in general, remove the unsharp look.
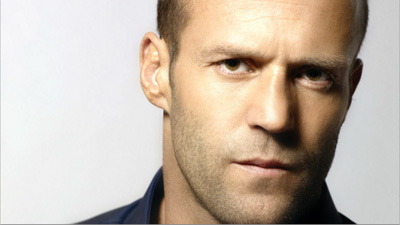
Already better, but the beard remains :)
Let's move on. Uncheck the visibility of the top layer and select the bottom layer - the <wild>Background</wild>Задний план.
Take the brush again, but this time with an opacity of about 30-40% and flow of 40-50%. Press the Alt key to sample the skin color, and brush over the remaining stubble. Do everything carefully, as you won't be able to undo the actions later.
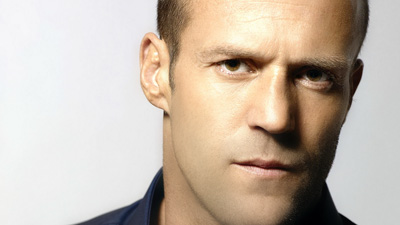
When the processing is complete, turn on the top layer and see the result:

But we need to finish our tutorial - add sharpness to the image, since we went a southern overboard with the photo and blurred it. So, go to the menu <wild>Filter-Sharpen-Smart Sharpen</wild>Фильтр-Усиление резкости-Умная резкость and set the values that will make your original file a masterpiece :) My values were: <wild>Amount</wild>Количество - 110%, <wild>Radius</wild>Радиус - 1px.
Rate this article