Скачать все 7 текстур старых кирпичных и оштукатуренных черно-белых стен с большим разрешением 4500 px одним архивом с Яндекс-Диска: textura_kirpich_shtukaturka.zip
Tap to react
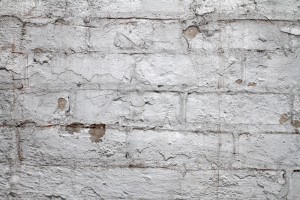
7 текстур старых кирпичный и оштукатуренных белых стен
Tap to react