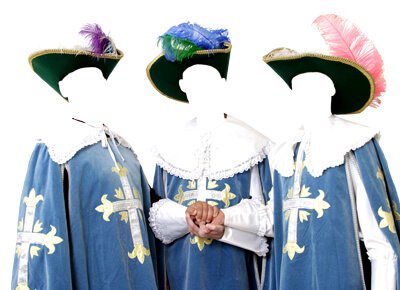
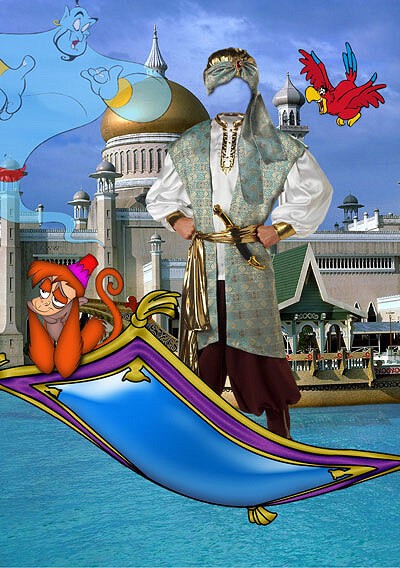
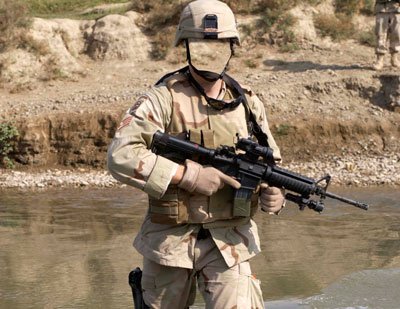
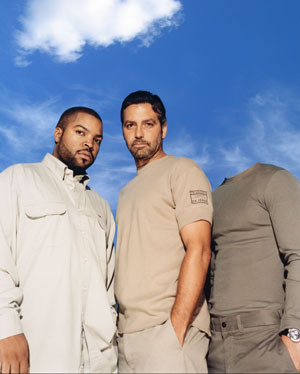
"Celebrities in Character" — Free Photoshop PSD Template
Celebrity face montage isn't just a fun social media gimmick. It's a legitimate skill that sharpens your mastery of masks, adjustment layers, and transformation tools. With a ready-made PSD template featuring labeled layers, the learning curve gets dramatically shorter. Today we're breaking down a template that opens up creative possibilities without forcing you to build everything from scratch.
I've been there: first time trying to paste Clint Eastwood's face onto Marilyn Monroe's body, and it's a mess. Shadows don't match, skin tones look like they're from different planets, hair overlaps so badly even blur won't save it. With a pre-built PSD, you see HOW it should look — layers are labeled, masks are set up, adjustment layers are in place.
What's Inside the PSD Template
The template contains multiple layers with different celebrities embedded into classic character roles. Each layer is labeled, so you won't get lost even if it's your first time opening someone else's PSD. A JPEG preview comes bundled — handy for quickly scrolling through and picking what to edit first. All layers are raster, no smart objects. That's a downside if you want fully non-destructive editing, but it's a speed advantage: the file opens instantly even on older machines. Resolution is Full HD 1920x1080, which is enough for web and social media.
| Element | Type | Description |
|---|---|---|
| Background layer | Raster | Neutral background, easy to replace |
| Main subject | Raster | Celebrity in a distinctive character role |
| Shadow masks | Adjustment | Layer group for shadow control |
| Color correction | Adjustment | Pre-configured curves and levels |
| Light highlights | Raster | Additional lighting effects |
| JPEG preview | Preview | Quick viewing without Photoshop |
The file is compatible with Photoshop CS6 and newer. GIMP opens it partially — adjustment layers may not transfer, but raster layers work. Affinity Photo users: import PSD, you'll only lose Photoshop-specific smart filters, which aren't in this template anyway.
Face Montage Techniques You'll Master
Masking and Blend If
The first thing this template teaches is proper masking. See how the face layer is cleanly cut along contours without harsh edges? That's a soft brush on a mask. Hardness 0%, opacity 50-70% for transitions, 100% for clean boundaries. Open Layer Style by double-clicking the layer. At the bottom find Blend If sliders. Drag the right slider of "This Layer" to the left while holding Alt — dark areas start disappearing, creating a smooth blend between face and background. This is faster than masking when blending two images with similar tones.
Color Matching for Skin Tones
The most common face montage problem: mismatched color tones. A warm-toned face on a cool-toned body looks like a patch. The template shows the approach: a Curves adjustment layer with Clipping Mask (Ctrl+Alt+G) attached only to the face layer. The algorithm: create a Curves adjustment layer above the face, hold Alt and click between layers. Now curves only affect the face. Tweak the red channel to add warmth, blue channel for coolness. The golden rule: watch the whites of the eyes — if they turn yellow or blue, you've gone too far.
Photoshop Tools for Montage Work
| Tool | Shortcut | Use |
|---|---|---|
| Move Tool | V | Moving and transforming layers |
| Brush Tool | B | Painting on masks: black hides, white reveals |
| Clone Stamp | S | Cloning skin areas to smooth transitions |
| Healing Brush | J | Smart retouching — blends texture and color |
| Liquify | Shift+Ctrl+X | Adjusting face shape to fit the base |
| Free Transform | Ctrl+T | Scaling, rotation, distortion |
| Dodge/Burn | O | Lightening/darkening specific areas |
The Ethics of Photo Manipulation
Celebrity face montage operates in a gray zone between creativity and rights violation. Let's break down what's legal and what could land you in court. The golden rule: parody is okay, commercial use without permission is not. If you're making a montage for your portfolio or social media, you're fine. If you're printing it on T-shirts and selling them, expect a letter from lawyers.
\u{201c}Parody and creative transformation are protected in most jurisdictions. But if you use a celebrity's image to advertise a product or create the impression that the celebrity endorses it — that's a direct path to a lawsuit.
Another nuance: the source photo. If you grabbed someone else's celebrity photo from the internet, that photo has an author. For non-commercial use this usually passes. For commercial use, you need a license, or use stock photos with free licenses.
Advanced Techniques: Frequency Separation and Dodge and Burn
Frequency Separation for Perfect Skin
After inserting a face and matching colors, the texture problem remains. One face has large pores, the other has smooth skin. Solution: Frequency Separation. Create two copies of the face layer. Apply Gaussian Blur at 2-3 px radius to the bottom one — this is the low-frequency layer handling color. Apply Filter > Other > High Pass at the same radius to the top one and set blending mode to Linear Light — this is the high-frequency layer for texture. Now you can edit color and texture separately. With a low-opacity brush, paint over problem areas on the low-frequency layer — color evens out while texture stays intact.
Dodge and Burn for Volume
After montage, the face often looks flat. To restore volume, create a new layer, fill with 50% gray (Shift+F5 > 50% Gray), blending mode Soft Light. Now paint highlights with a white brush at 5-10% opacity, shadows with black. Match the lighting direction from the original: if light comes from the left, highlights should be on the left. Mismatched lighting direction is the number one sign of a bad montage, detectable even by untrained viewers.
Fine-Tuning Skin Color After Montage
Color correction is the most underrated montage stage. Ninety percent of beginners stop at "looks close enough." But the viewer's eye detects the slightest skin tone mismatches. First, create a Selective Color adjustment layer above the face layer. Work with the red and yellow channels — they control skin tone. Red channel: remove Cyan by 5-10% if the face is too pink, add Yellow if it needs warmth. Yellow channel: reduce Magenta if skin leans orange. Next, a Curves layer with two points: one in shadows (lower third), one in highlights (upper third). Final step: Match Color — Image > Adjustments > Match Color with Intensity at 70-80%. This automatically matches the face histogram to the body histogram.
Working with Hair During Montage
Hair is the Achilles' heel of any montage. A hard edge between hair and background instantly reveals the manipulation. Solution: the Select and Mask tool. Select hair using any method, click Select and Mask. Enable Smart Radius — Photoshop determines where edges are hard and where they're soft. The key: the Refine Edge Brush. Paint along the hair-to-background boundary — Photoshop analyzes pixels and separates hair while preserving semi-transparency. After extraction, halos from the old background often remain. Fix: create a new layer in Overlay or Color mode, sample the hair color with the eyedropper, and paint over halos with a soft brush.
A Brief History of Photo Manipulation
Face montage isn't a digital-era invention. The first photomontages appeared in the mid-19th century when photographers combined multiple negatives during printing. Oscar Gustave Rejlander created the famous "Two Ways of Life" in 1857 from 32 separate negatives. In the 20th century, political photomontage became a propaganda tool: disgraced politicians vanished from Soviet photos, undesirable figures disappeared from Nazi images. The technique was simple: manual retouching on prints and re-photographing. A high-quality montage of a single image took several days of a retoucher's work. When Photoshop launched in 1990, montage became accessible to the masses. Today, AI tools like Midjourney create realistic faces from scratch, but understanding Photoshop montage fundamentals remains essential — AI gives you raw results, and finishing them properly still requires manual work.
Where to Use Your Results
- Social media: avatars, memes, creative posts
- Designer and retoucher portfolio: showcasing masking and color correction skills
- Educational materials: visual examples for students
- Gifts for friends: print and frame them
- Photo manipulation contests and challenges
The template is universal: replace the celebrity face with your own and get unique content for any platform. The layered structure lets you adapt the result to any specific task in minutes.
Auto-Blend Layers and Advanced Blending Techniques
Photoshop's Auto-Blend Layers feature can do part of the matching work for you. Select both the face layer and the base layer by holding Ctrl, then go to Edit > Auto-Blend Layers. Choose Panorama mode and check Seamless Tones and Colors. Photoshop analyzes histograms and shifts color curves to visually merge the layers. It's not perfect, but gives you an excellent starting point for manual fine-tuning. Pro tip: reduce the top layer's opacity to 50 percent first to visually check alignment. If the face is significantly darker or lighter than the base, correct manually with Curves before running Auto-Blend.
Puppet Warp and Liquify for Face Shape Matching
Puppet Warp (Edit > Puppet Warp) lets you place pins on key facial points — eye corners, nose tip, mouth corners, chin — and drag to reshape. Use at least 8-10 pins for controlled distortion. The Normal mode works best for soft tissue, Rigid for hard contours. Always work on a duplicate layer since Puppet Warp changes are irreversible once applied.
The Liquify filter (Shift+Ctrl+X) complements Puppet Warp by working like sculpting with clay. Forward Warp shifts pixels along brush direction, Pucker shrinks areas, Bloat expands them. Keep Brush Pressure at 20-30 for fine work and 50-70 for rough adjustments. Never work at 100 percent — the result will look distorted. Enable Show Backdrop at 50 percent opacity to see the original as a reference.
Creative Uses and Lighting Matching
Face montage goes beyond "pasting a celebrity head onto another body." Build parody magazine covers for social media, create conceptual art series exploring identity and gender roles, or develop advertising concepts for your portfolio. For lighting matching: identify the brightest highlight, deepest shadow, and mid-tone on both the source face and the target body. If they don't match in brightness and position, adjust with Curves and layer masks, or flip the face layer horizontally if the light direction is opposite. As a last resort, paint shadows and highlights manually on a 50 percent gray layer in Soft Light mode — it takes 15-20 minutes but gives the most controlled result possible.
Frequently Asked Questions
Which Photoshop version opens this PSD?
The template is compatible with Adobe Photoshop CS6 and all Creative Cloud versions. GIMP opens it with limitations — adjustment layers may not work. Affinity Photo — via PSD import, raster layers intact.
Can I use the template in commercial projects?
Yes. All images in the template have free licenses or were created specifically for distribution. You can use the result in portfolios, social media, and commercial designs.
How do I replace a face with my own in the template?
Open the PSD, find the face layer, create a mask if there isn't one. Paste your photo, resize with Ctrl+T, adjust color via Curves with Clipping Mask. Then refine edges with a soft brush on the mask.
What if face and body colors don't match?
Create a Curves or Color Balance adjustment layer with Clipping Mask (Ctrl+Alt+G) above the face layer. Tweak red and blue channels until tones match. Check by looking at eye whites and shadows.
Why does the face look flat after montage?
Missing shadows and highlights matching the base lighting. Use Dodge and Burn: 50% gray layer in Soft Light mode, white brush for highlights, black for shadows. Follow the original light direction.
How do I blur harsh edges during montage?
Select the layer mask, pick a soft brush (B) with 0% hardness and 30-50% opacity. Gently paint along edges — the mask smooths the transition. For hair, use the Refine Edge tool.
Is celebrity face montage legal?
For parody and creative projects — legal in most countries. For commercial use (printing on merchandise, advertising) permission is required. Source photos must also have appropriate licenses.
How does Clone Stamp differ from Healing Brush for retouching?
Clone Stamp (S) copies pixels exactly. Healing Brush (J) copies texture but adapts color and brightness to the surroundings. Use Healing Brush to smooth skin transitions.
Can I open PSD in free editors?
Yes. GIMP — partially. Photopea (online) — almost fully. Krita — partial support. For full functionality, use Photoshop.
How do I save without ruining the original?
Before starting, press Ctrl+Shift+S (Save As) and save a copy under a different name. Never save over the original template.
Tap to react