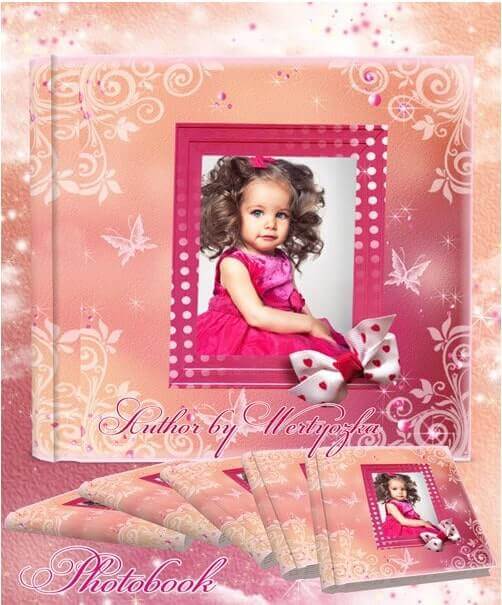
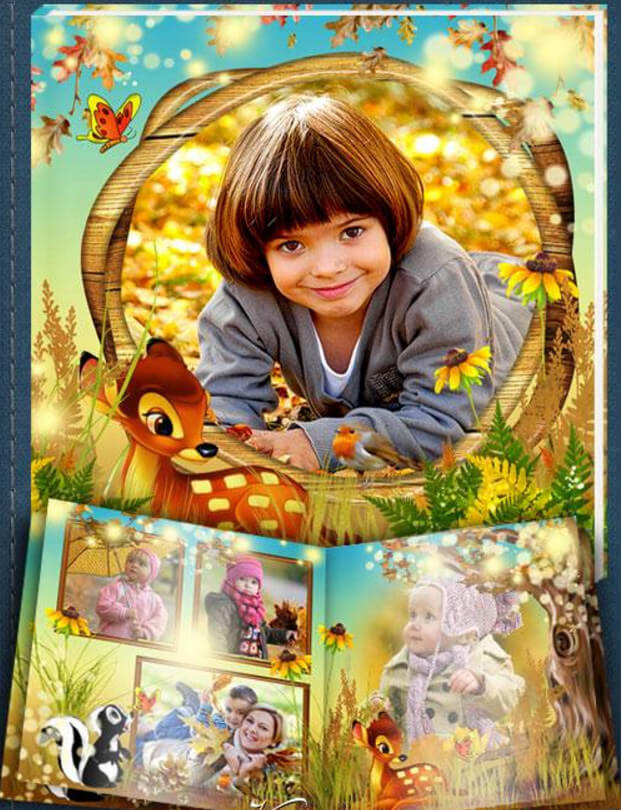
What Is the Your Memories Photo Book

The Your Memories photo book is a professional set of 5 fully layered PSD files for Adobe Photoshop, designed for creating family and personal photo albums. Every spread is meticulously crafted: clean frames, balanced composition, and a thoughtful grid for photo placement. The template works for both home printing and professional print shops.

The idea behind this template comes from a simple observation: most people store their photos on hard drives and cloud services, rarely revisiting them. A printed photo book is a completely different experience. When you turn pages by hand, each photo comes alive, and emotions become tangible. This template was created for those who want to give their memories a worthy frame.

The design uses a soft pastel palette: gentle beige, cream, and muted pink tones. The background mimics the texture of premium photo paper — a barely perceptible grain adds tactility without distracting from the images. Accents are delivered through thin lines, delicate vignettes, and semi-transparent overlays. Everything together creates an airy feel — the book does not overwhelm; it gently wraps around the viewer.

Each spread measures 4882×3307 pixels at 300 DPI. This is A3 format with a slight width buffer, comfortably accommodating photos of various aspect ratios: from classic 3:2 to square and panoramic. All 5 files are packed into a ZIP archive weighing 287 MB.

Unlike online photo book builders, where you are locked into preset templates and tied to a specific service, the PSD file gives you complete freedom. You can print the book at any shop, change any design element, and save the result in any format.

Technical Specifications

Here are the full template specs — these numbers help you assess the scope and decide whether to download.

ParameterValue
File count5 PSD (fully layered)
Spread dimensions4882 × 3307 pixels
Resolution300 DPI (dots per inch)
Color modeRGB, 8 bits per channel
Archive weight287 MB (ZIP)
Page count10 (5 spreads × 2)
Print formatA3 (297×420 mm)
Supported softwarePhotoshop CS6+, CC, Affinity Photo, Photopea
PlatformsWindows 10/11, macOS (Intel and Apple Silicon)
Interface languageAny (fonts are standard system ones)

Spread Structure

Each of the 5 spreads plays a distinct role. Together they form a complete story that the reader experiences from cover to cover. Here is what awaits inside:

SpreadPurposeRecommended photo count
1. CoverTitle spread with a large headline and central photo1–2
2. IntroductionSpread for an opening text and 2–3 key photos2–3
3. Main BlockCentral spread with a 4–6 photo grid4–6
4. GalleryMosaic-style spread with varied photo sizes5–8
5. FinaleClosing spread with one hero image and space for a caption1–2
You can reorder spreads — simply rename the files or arrange them in the desired sequence when assembling the PDF for print.

Design and Styling

The Your Memories design is built around three principles: air, light, simplicity. No clutter, no loud colors, no heavy graphic elements. Just clean composition that respects the photograph and gives it room to breathe.

The color palette includes:

  • Base beige (#F5F0E8) — background for all spreads, imitating warm photo paper
  • Cream (#FAF5EF) — accent blocks and text backdrops
  • Muted pink (#E8D5D0) — thin frames and dividers
  • Graphite (#4A4A4A) — primary text color
  • Dusty gold (#C4B5A5) — decorative lines and vignettes

The type decisions rely on standard system typefaces. Headlines are set in Georgia — an elegant serif with expressive terminals. Body text uses Arial, neutral and highly legible at any size. Captions and dates use Georgia Italic for a light contrast.

\u{201c}

The best photo book is one you want to revisit. And for that, the design must be invisible. It does not shout look at me — it whispers look at the photo.

Worth special mention is the smart object system. Each photo slot is an embedded PSD with pre-configured masks, shadows, and clipping paths. All you do is paste your image — Photoshop applies all effects automatically. This saves hours of manual work.

How to Work with the Template

Creating a photo book from the Your Memories template takes five steps. If you have opened Photoshop at least once, you will be fine. If not, this guide walks you from archive extraction to a finished layout.

Step 1: Extract and Prepare

Download the archive and extract it into a dedicated folder. Do not open PSD files directly from the archive — this can cause save errors. Make sure you have enough free disk space: during editing, Photoshop creates scratch files, and total usage may grow to 500–800 MB per spread.

Before starting, create a backup copy of the template folder. If you accidentally overwrite the original PSD while editing, the backup will save you.

Step 2: Open a Spread

Launch Adobe Photoshop. Go to File → Open (Ctrl+O) and select the first PSD — the cover. Check the Layers panel (F7): you will see dozens of layers grouped logically. Groups are labeled intuitively: Background, Photos, Text, Decor. Do not delete or rename groups — this breaks the template logic.

Step 3: Replace Photos

In the Photos group, find a layer with the smart object icon (a small page icon in the lower-right corner of the thumbnail). Double-click the thumbnail — an embedded document opens. Paste your photo (Ctrl+V), resize via Free Transform (Ctrl+T), save (Ctrl+S), and close the embedded document. The image instantly appears in the main layout with all effects applied.

Repeat for each frame. One spread takes 2–5 minutes, depending on the number of photo slots.

Tip: process your photo before inserting it into the smart object — adjust brightness, contrast, color correction. You can do this after insertion too, but changes inside a smart object apply globally, which is not always convenient.

Step 4: Edit Text

Select the Type tool (T). Click any text block you want to change and type your own content. Replace the Your Memories headline with your book title. Add photo captions that match the overall tone — short, warm, personal.

If the text overflows its block, reduce the font size in the Character panel (Window → Character) or shorten the wording. Do not stretch text blocks beyond the guides — this can cause clipping during printing.

Step 5: Save for Print

Once all spreads are ready, save each in its final format. For print shops, use TIFF with LZW compression (File → Save As → TIFF, Layer Compression: Discard Layers, Image Compression: LZW). For home inkjet printing, JPEG at Quality 12 works well. For digital display (tablet, photo frame), use JPEG Quality 10 at 150 DPI.

Do not send PSD files to print shops. They contain metadata, weigh far more, and do not always open correctly on prepress equipment. Print shops work with TIFF or PDF.

Compatibility and Alternative Software

Although the template is built for Adobe Photoshop, it opens in several other editors. Here is a tested compatibility overview.

ProgramSupport LevelNotes
Adobe Photoshop CS6FullAll smart objects, layers, and masks work correctly
Adobe Photoshop CC 2020+FullRecommended version, maximum performance
Affinity Photo 2HighSmart objects open as embedded documents, masks preserved
Photopea (browser)MediumFree browser editor, opens PSD but rasterizes smart objects
GIMP 2.10+LowSmart objects not supported, layers open but require manual fixes
KritaLowOpens basic layer structure, effects are discarded

Printing the Photo Book

The template specs are optimized for professional printing. Let us go through the key prep steps.

Color Mode

The template ships in RGB — convenient for on-screen preview and editing. Before printing, convert to CMYK: Edit → Convert to Profile → Working CMYK. Note that RGB pastels may mute slightly during conversion. This is normal — colors always appear darker and warmer on paper than on a monitor.

Bleed

The standard bleed is 3 mm per side. The template intentionally omits bleed — different print shops have different requirements, and adding bleed is easier than removing it. To add bleed: Image → Canvas Size, increase width and height by 6 mm anchored to the center. Extend background layers to the new edges.

Paper Choice

For the Your Memories photo book, I recommend matte paper at 200 gsm or heavier. Glossy paper creates glare when viewing and collects fingerprints. Matte surfaces diffuse light more softly and render the template's pastel tones better. If budget allows, consider a linen-textured photo paper — it adds a vintage charm that perfectly matches this template's aesthetic.

If you are printing the book as a gift, ask the print shop about hardcover binding with fabric coating. It costs more than standard binding, but the impression such a gift makes is incomparable to a budget paperback.

Usage Ideas

The template is versatile — here are a few directions where it shines:

  • Family album. Gather a year's worth of photos: birthdays, walks, holidays, everyday moments. By year-end, you will have a finished chronicle — with zero layout rush.
  • Wedding book. Select 15–20 of the best wedding shots and arrange them chronologically. The soft palette of the template blends seamlessly with wedding tones.
  • Baby album. A child's first year: first tooth, first step, first word. The template becomes a time capsule your child will revisit 20 years from now — with emotions words cannot capture.
  • Travel gift book. One trip, one book. The pastel palette does not clash with beach, mountain, or city scenery.
  • Photographer portfolio. Beginner photographers can use the template to present work to clients. Five spreads are enough to showcase diverse shoots without overload.

What Is in the Archive

After extracting the Your Memories ZIP archive, you will find:

  • 5 PSD files — one per spread, all layered with smart objects
  • ReadMe.txt — brief instructions for replacing photos and text, in English and Russian
  • _Previews folder — JPG previews of each spread to evaluate the design before opening heavy PSDs

No paid fonts, stock photos with restricted licenses, or hidden files.

Download

Frequently Asked Questions

What is the Your Memories PSD photo book template?

A set of 5 fully layered PSD spread files designed for Adobe Photoshop. Each spread measures 4882×3307 px at 300 DPI — print-quality A3 format. The archive weighs 287 MB. The design features a soft pastel palette emphasizing lightness and elegance.

Which Photoshop versions are supported?

The template is compatible with Adobe Photoshop CS6 through CC 2025, including the latest Creative Cloud release. Works on Windows 10/11 and macOS (Intel and Apple Silicon). Alternatives include Affinity Photo, Photopea (browser-based), and GIMP — though smart objects may rasterize.

How many spreads and pages are included?

The archive contains 5 PSD files — 5 spreads, totaling 10 pages with double-sided printing. Enough space for 15–30 photos at 4×6 or 5×7 inches. The set covers: front cover, three inner spreads, and a closing page.

How do I replace photos in the template?

Double-click the smart object icon in the Layers panel. A separate document opens — paste your photo, resize it to fit (Ctrl+T), save (Ctrl+S), and close the window. The image automatically snaps into place with masks, shadows, and clipping paths preserved.

Can I edit the text on the spreads?

Yes, all text layers are fully editable. Select the Type tool (T), click any label, and type your own headlines, captions, or dates. Only standard system fonts are used — Arial, Georgia, Times New Roman — so no additional font installation is needed.

Is the template suitable for professional printing?

Absolutely. The 300 DPI resolution and 4882×3307 px dimensions meet professional print shop requirements. The color mode is RGB — convert to CMYK before submitting (Edit → Convert to Profile). Bleed is not included by default; add 3 mm per side manually or discuss with your printer.

What kind of photos work best with this template?

The template is designed around warm, soft tones — family portraits, baby photos, wedding shots, and romantic sessions work beautifully. High-contrast and dark images can fit but require more manual brightness adjustments. Recommended source image resolution: 2000 px on the long side.

Do I need to install extra fonts?

No. The template uses only standard system fonts present in every Windows and macOS installation (Arial, Georgia, Times New Roman). No paid or custom typefaces required.

Can I change the color scheme?

Yes. Every design element sits on its own layer. Background fills can be recolored via Layer → Layer Style → Color Overlay. Text blocks change color through the Character panel. Solid-fill graphic elements recolor via Hue/Saturation (Ctrl+U) with Colorize enabled.

How do I save the finished photo book for printing?

Save each spread separately: File → Save As → TIFF (LZW compression, layers discarded) or PDF (High Quality Print preset). For preview or client delivery, use JPEG Quality 12, Baseline Optimized. Do not send raw PSD files to print shops — they are unnecessarily heavy and contain extraneous data.

Tap to react