
В нашем сегодняшнем уроке мы покажем какие изменения можно внести при помощи стандартного фильтра Фотошоп под названием Vanishing pointТочка схождения, а также как самостоятельно исправить перспективу, и посмотрим на результаты своих действий.

Начнем, пожалуй, с того, что данный фильтр не отлично справляется с поставленной задачей (о чем мы поговорим чуть позже), а также он предназначен скорее для быстрого редактирования (а как все мы знаем - быстро не значит здорово!).
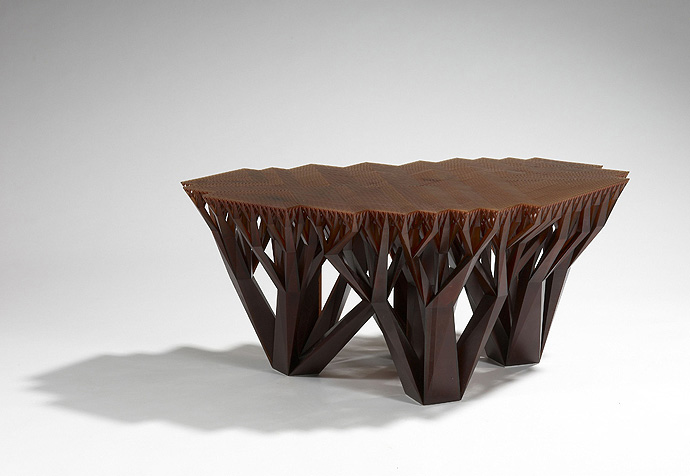
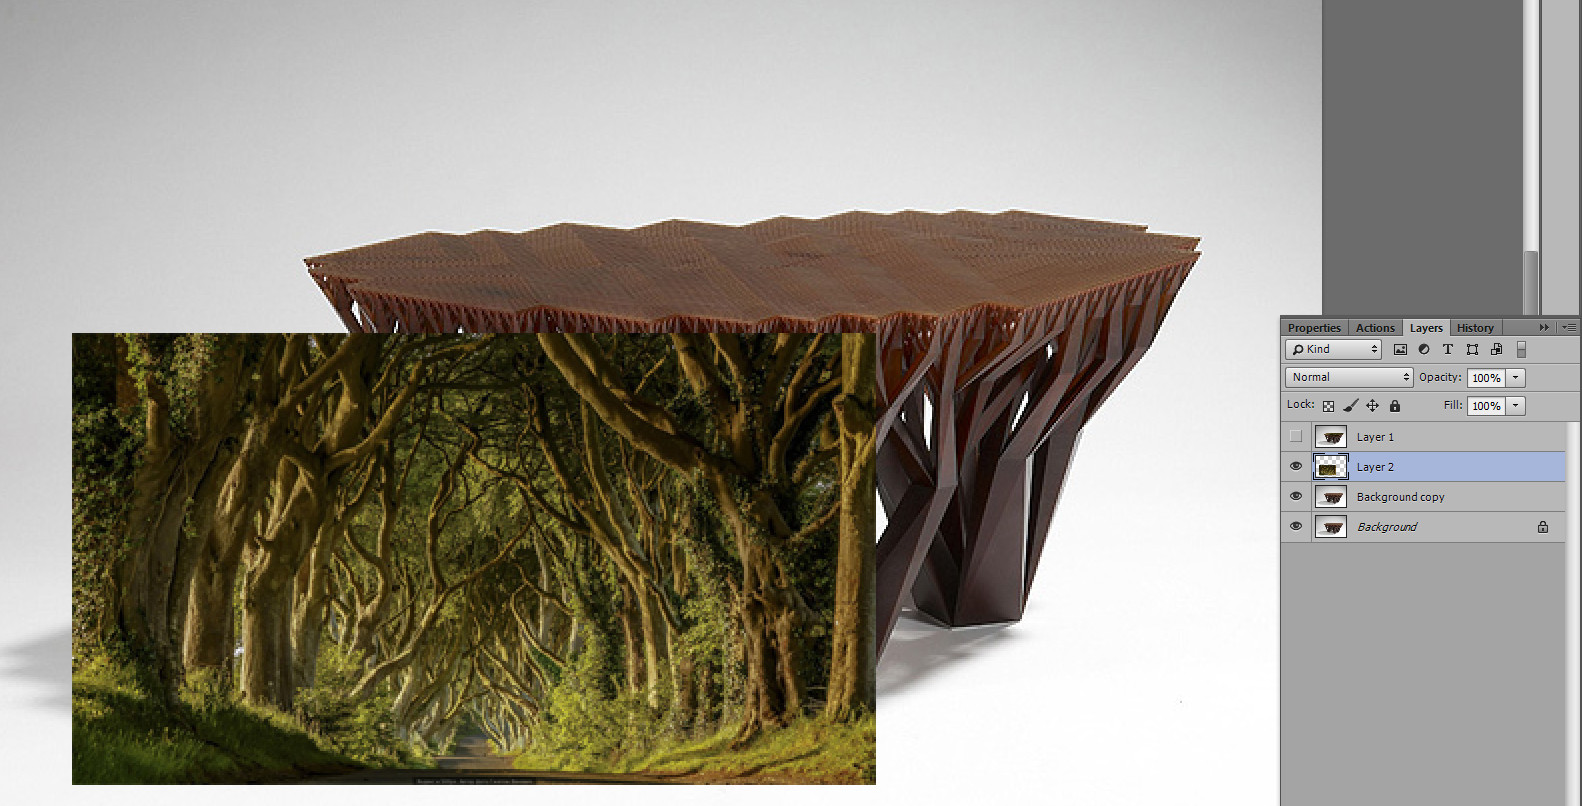
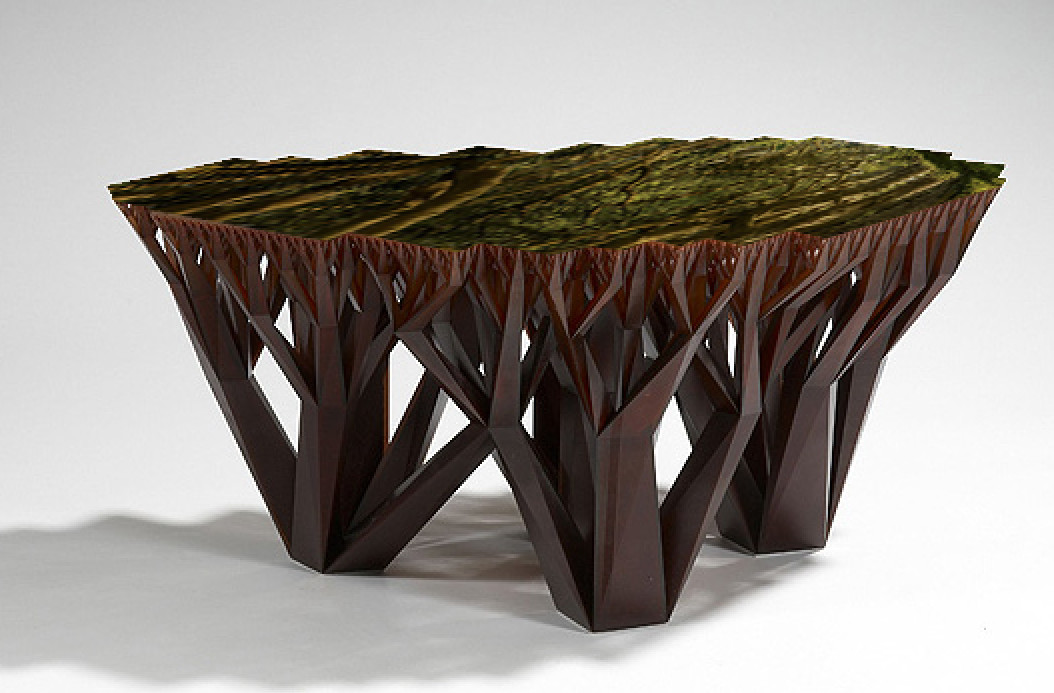
Итак, нам понадобится 2 изображения: одно со столиком - куда будем накладывать второе - лес.

Можно сразу перенести фотографию с лесом на конечное изображение, а можно просто скопировать его, нажав клавиши CTRL + A и CTRL + C поочередно. Мы перетащим фото на исходник.
Теперь, выбрав новый слой, перейдем на панель слоев и найдем пункт Select PixelsВыбор пикселей, предварительно нажав правой кнопкой мыши и зайдя в контекстное меню. Таким образом, мы выделим все пиксели нового слоя.

Для удобства дальнейшей обработки создадим дубликат нижнего слоя (чтобы в случае чего наш исходник остался неизменным). Просто нажимаем CTRL + J.

Затем, выбрав продублированный слой, ищем в меню программы пункт с фильтром Filter-Vanishing PointФильтр-точка схождения.

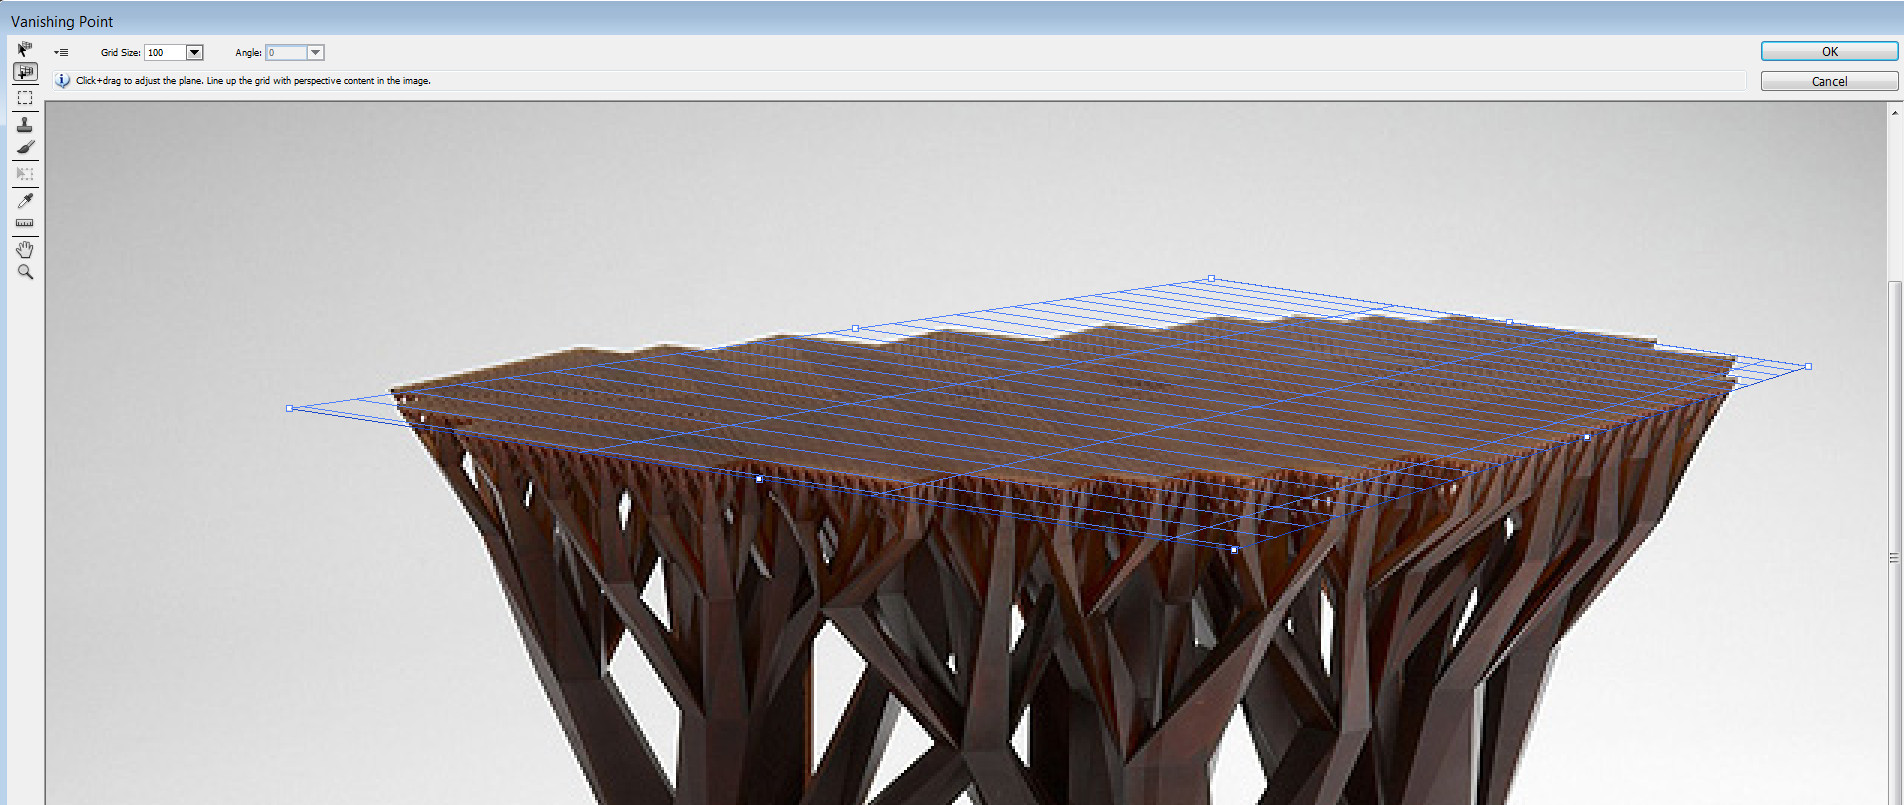
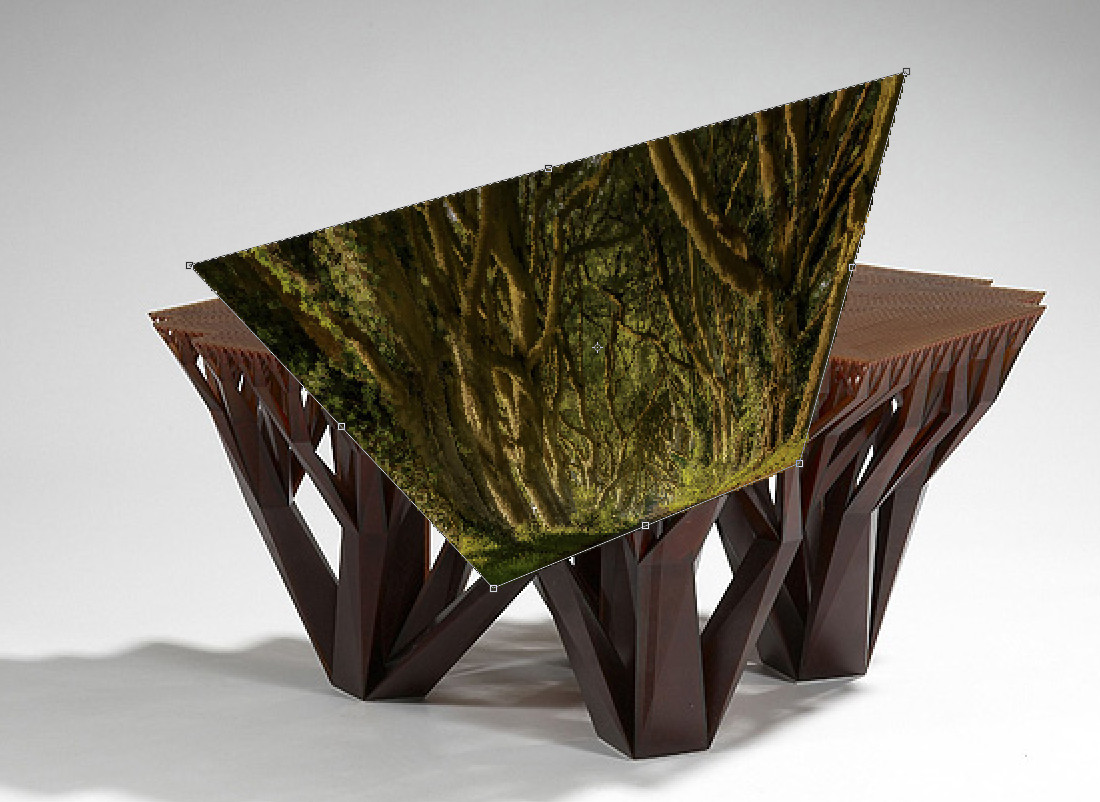
Так выглядит наш фильтр Фотошоп. Нам необходимо выделить при помощи специального инструмента область, куда будем вставлять второй снимок.
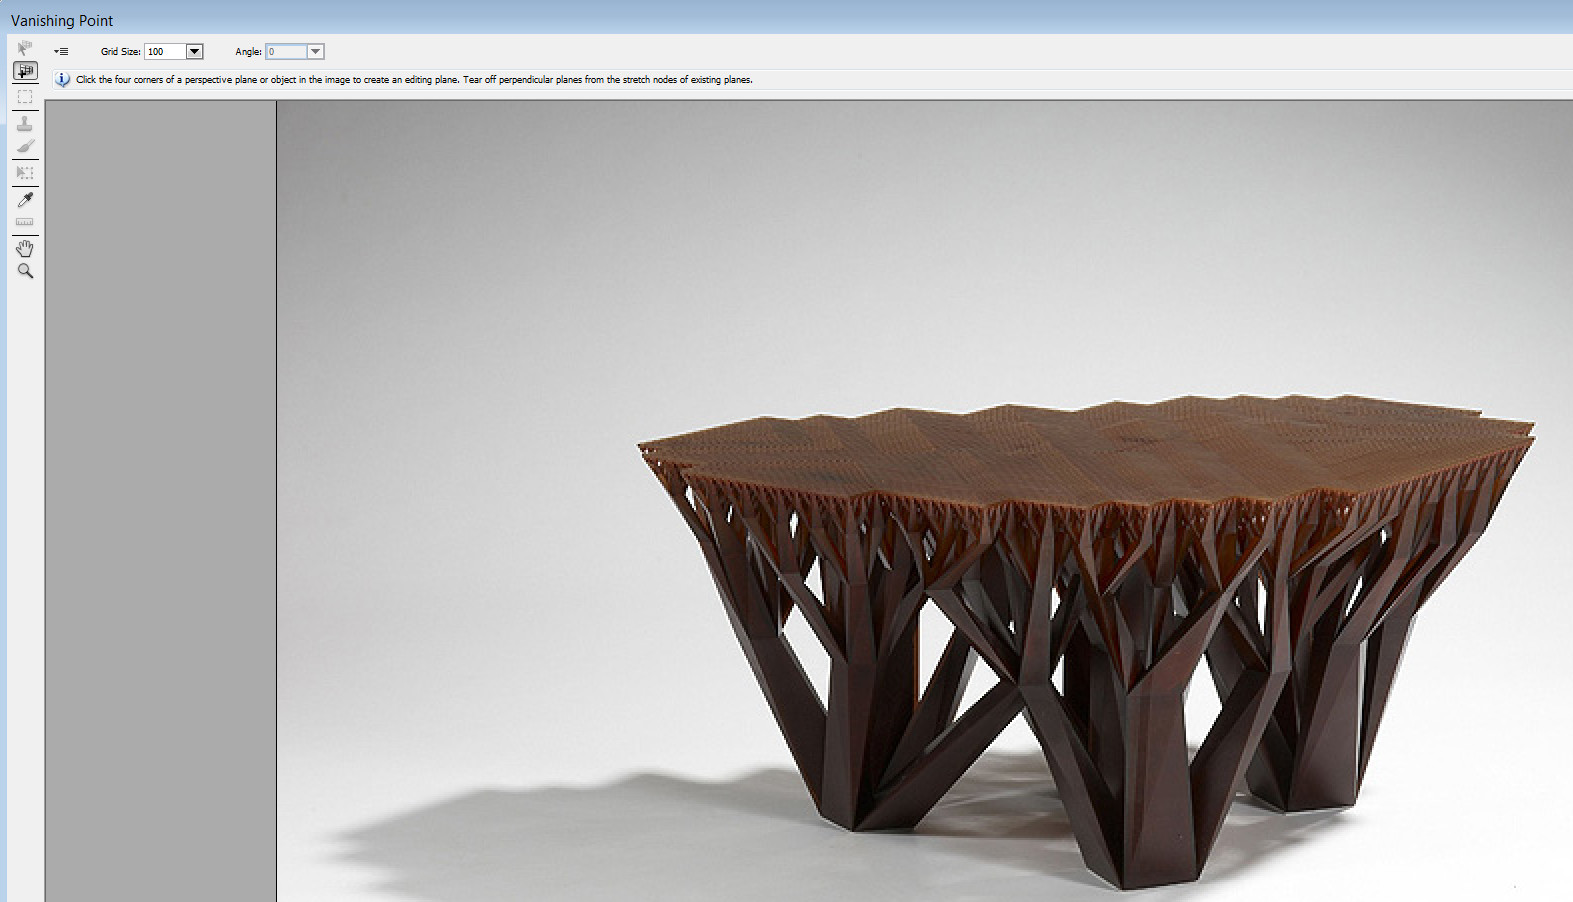
Для этого берем самый верхний левый инструмент и начинаем выделять стол. Если после выделения вы увидите красные границы, то знайте, что нужно их исправить, так как нужно получить сетку из синих линий. В противном случае фильтр не сработает!
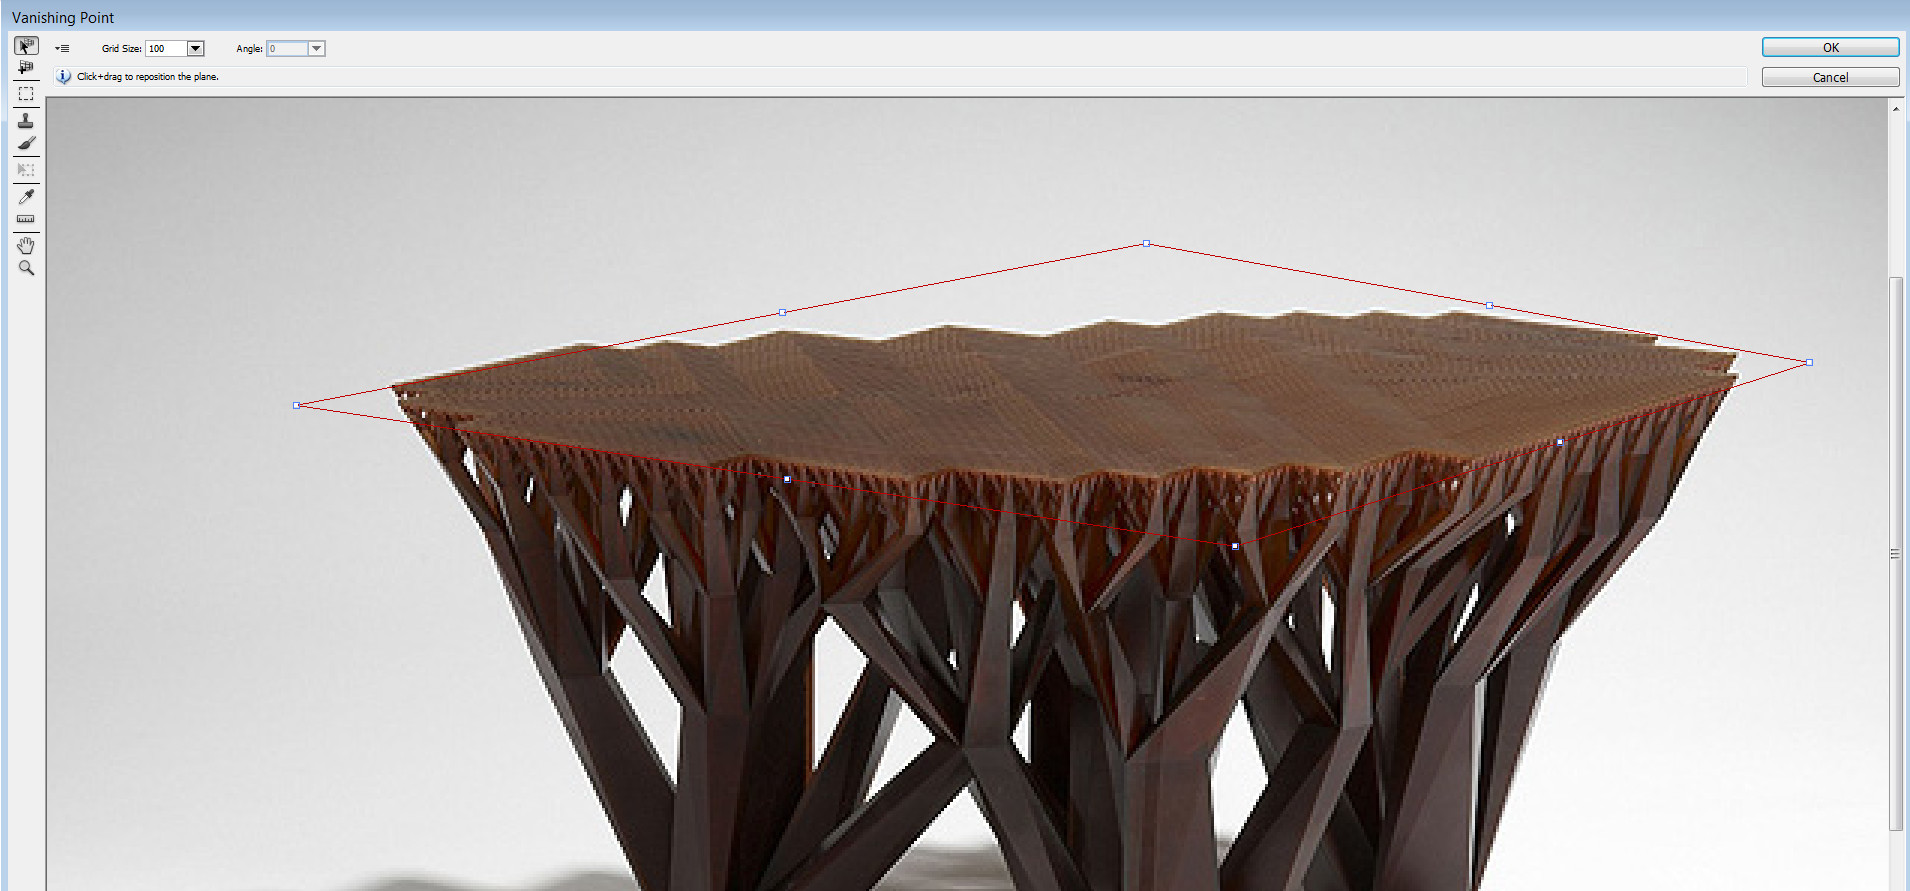
Обращаю ваше внимание на то, что фильтр работает ТОЛЬКО с плоскими поверхностями (горизонтальными и вертикальными), поэтому его применение не целесообразно к элементам сложной структуры (например, как эта - со множеством граней).
В меню фильтра можно найти дополнительные функции, такие как: показать края, показать измерения, перевести сетку в Фотошоп и т.п.

Теперь просто нажимаем клавиши CTRL + V, чтобы вставить второе изображение. Нужно заметить, что оно должно быть немного больше той области, куда вы собираетесь ее вставить.

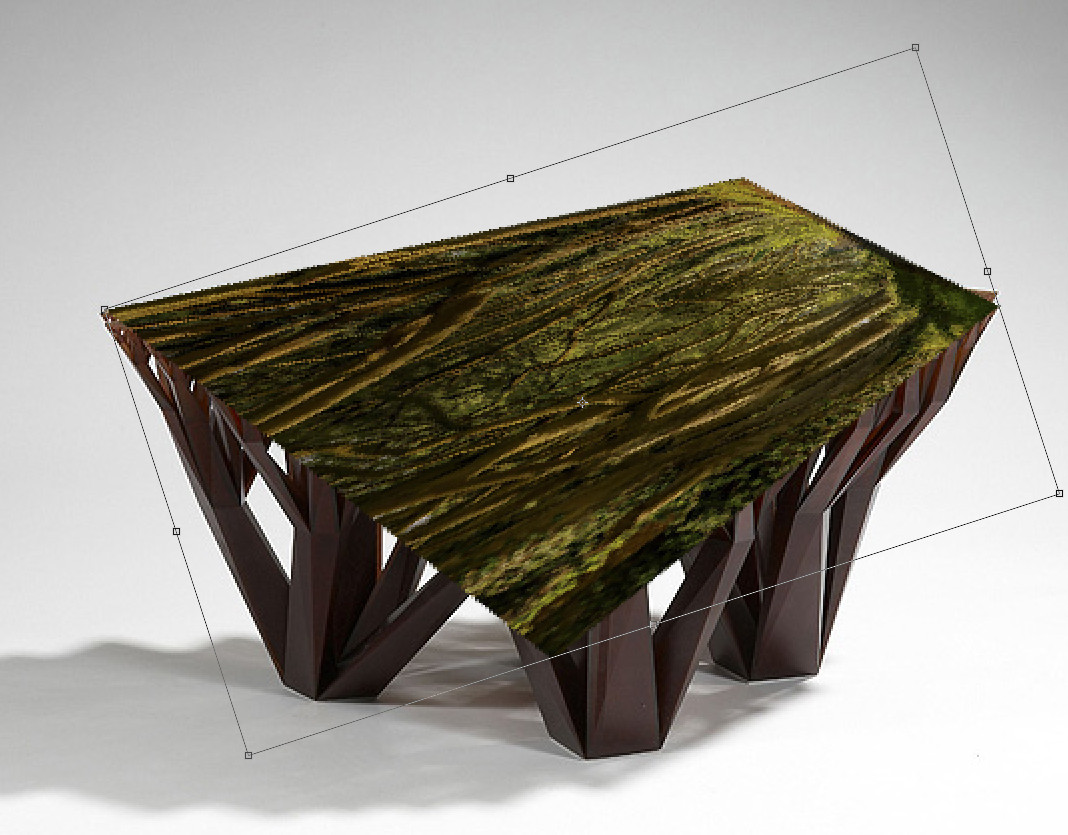
Если мы перетащим изображение внутрь только что созданной области выделения, то получим следующую картину. Не фонтан, поэтому нужно придумать что-то другое!

Получившееся изображение вряд ли кого-то устроит!
Давайте попробуем сделать самостоятельную работу по изменению перспективы. У нас есть отдельный урок на эту тему.
Создаем дубликаты слоев при необходимости, а также переходим в контекстное меню слоя с лесом и выбираем пункт PerspectiveПерспектива.
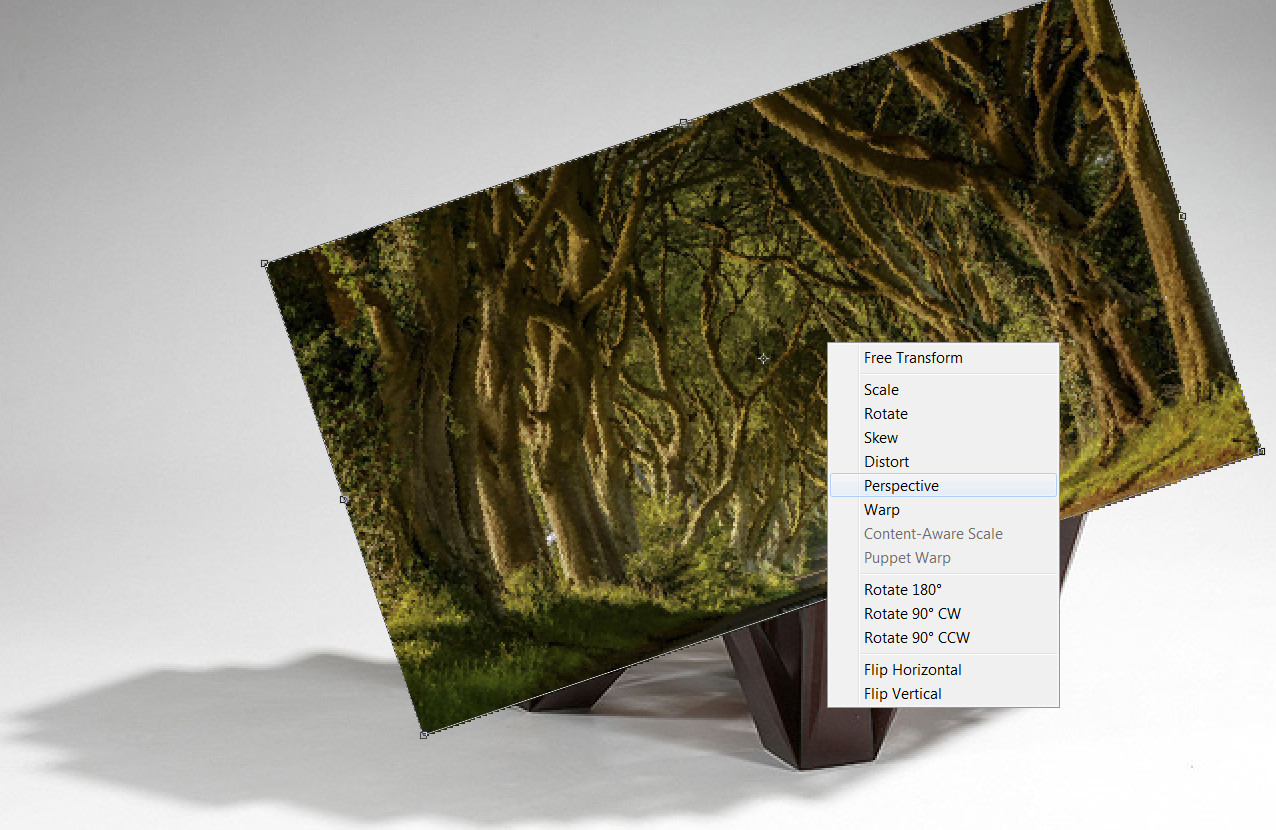
Применяем перспективу на фото, потом выбираем деформацию (из того же контекстного меню), вращение и т.п., и производим манипуляции.
Чтобы добиться реалистичности, вам может потребоваться время.
Деформацию применяйте только после установки перспективы, так как она может повлиять на конечный результат.

Чтобы выделить края у стола, выделите фон, а затем примените инверсию (CTRL + I). Этим действием мы удалим впоследствии ненужные элементы леса.

Чтобы выделить стол, временно отключите слой с лесом, а после выделения снова включите его.

Теперь нужно проделать тоже самое с нижней частью стола. Здесь придется выделять вручную с помощью инструмента лассо или любого другого. Можно применить степень непрозрачности на 50-40% для верхнего слоя, чтобы было удобнее выделять края у стола.
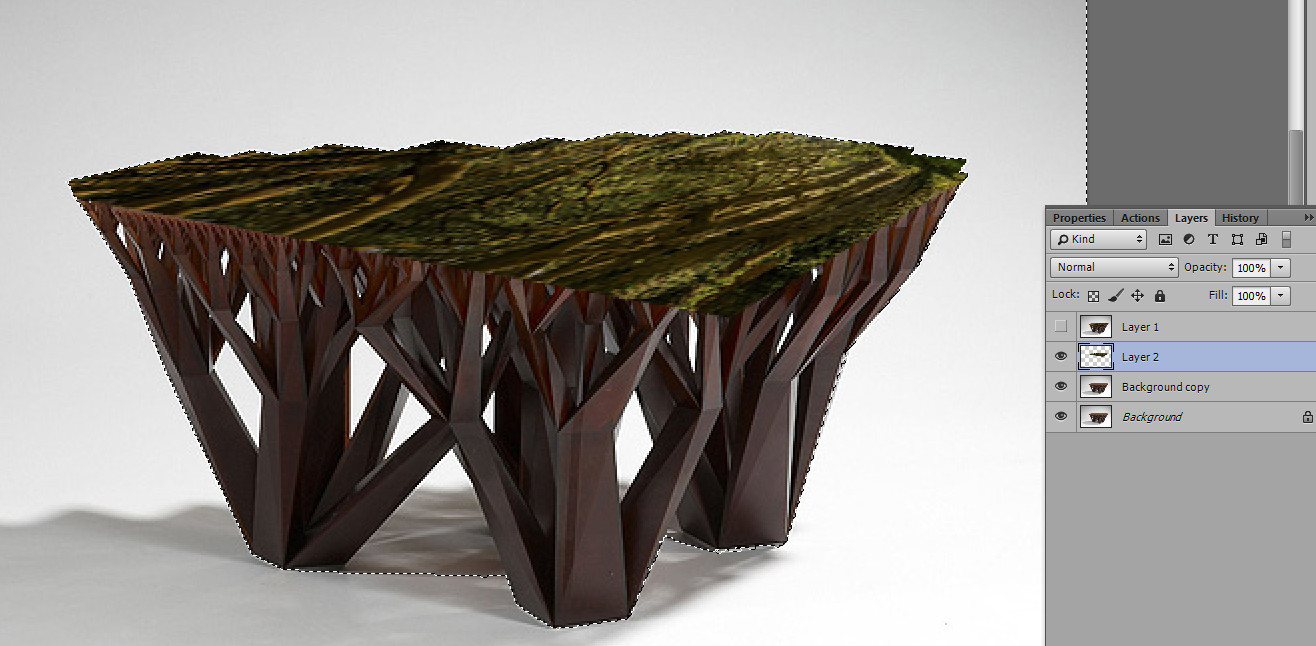
Должно получиться что-то подобное:

Выделив края, нажимаем на кнопке DELETE.
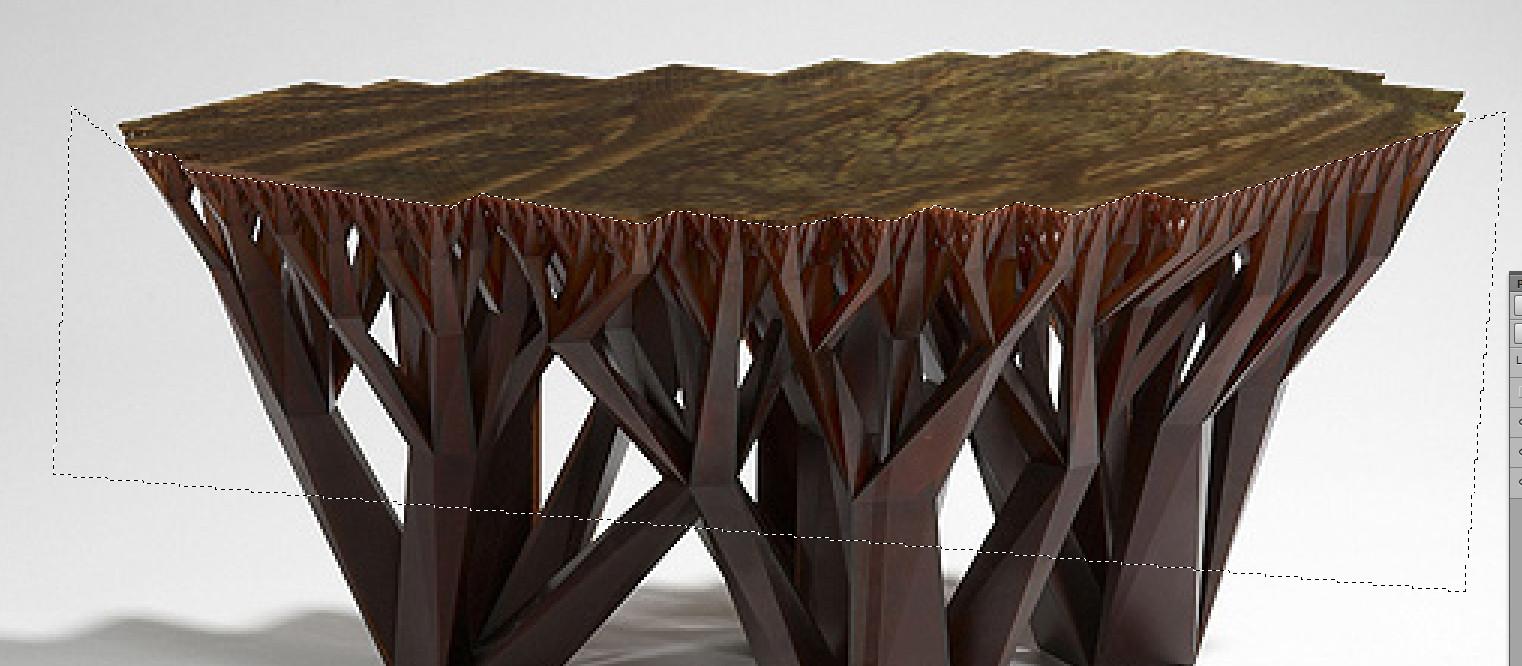
Согласитесь, результат намного лучше автоматического фильтра.
Чтобы верхнее фото не смотрелось слишком нереалистично по сравнению со столом, применим к нему опцию наложения. Я выбрал режим "Мягкий свет".
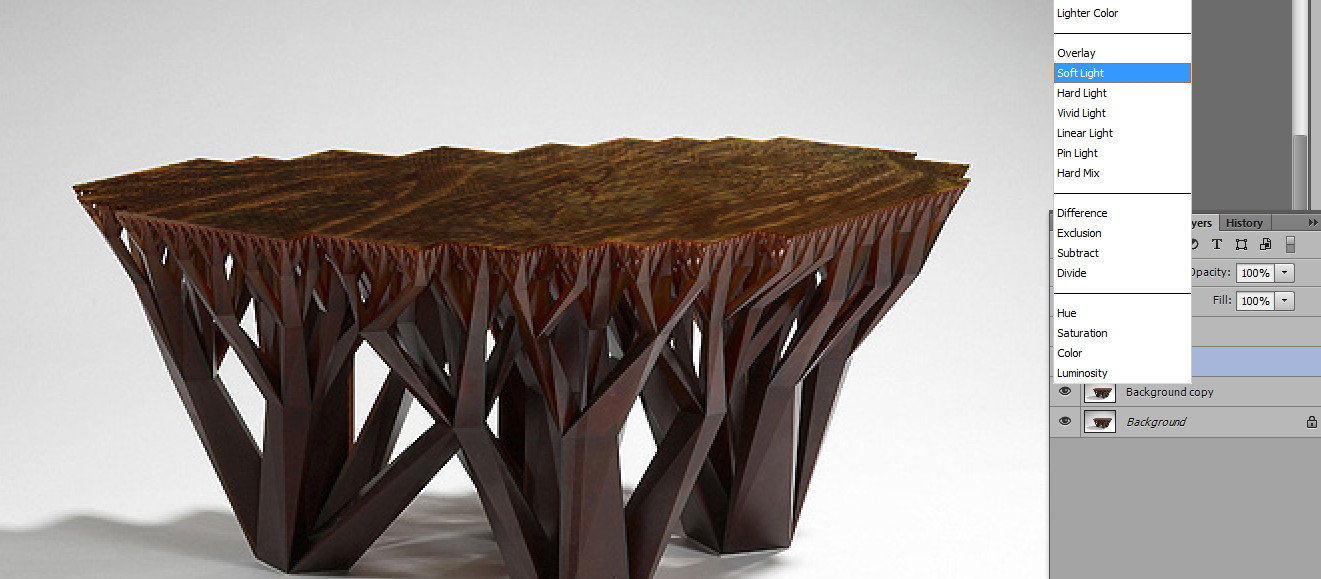
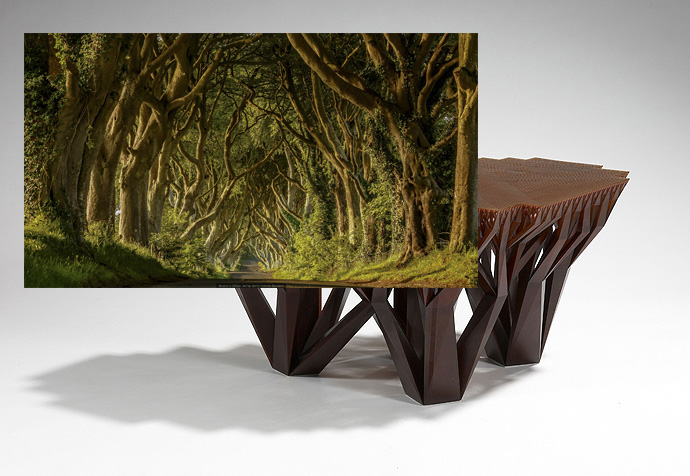
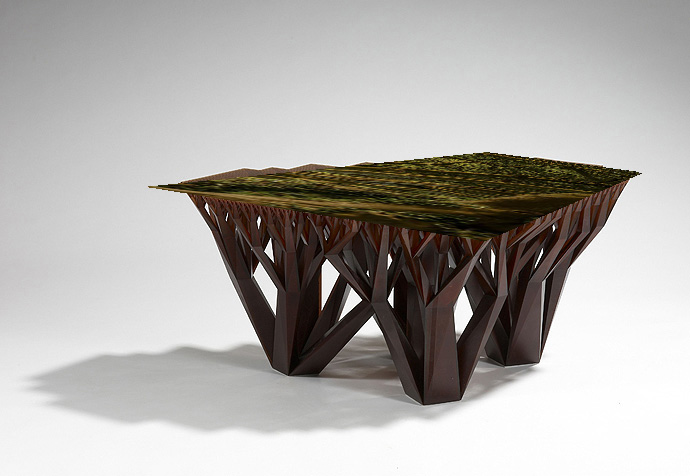
А вот, конечный результат наших действий.
Выводы:
Можно использовать кучу автоматических фильтров, но данный вариант (ручной обработки) предпочтительнее, чем Vanishing pointТочка схождения.
Tap to react


