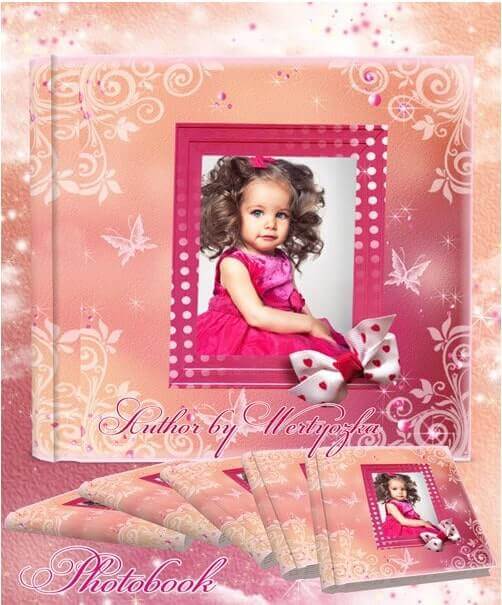
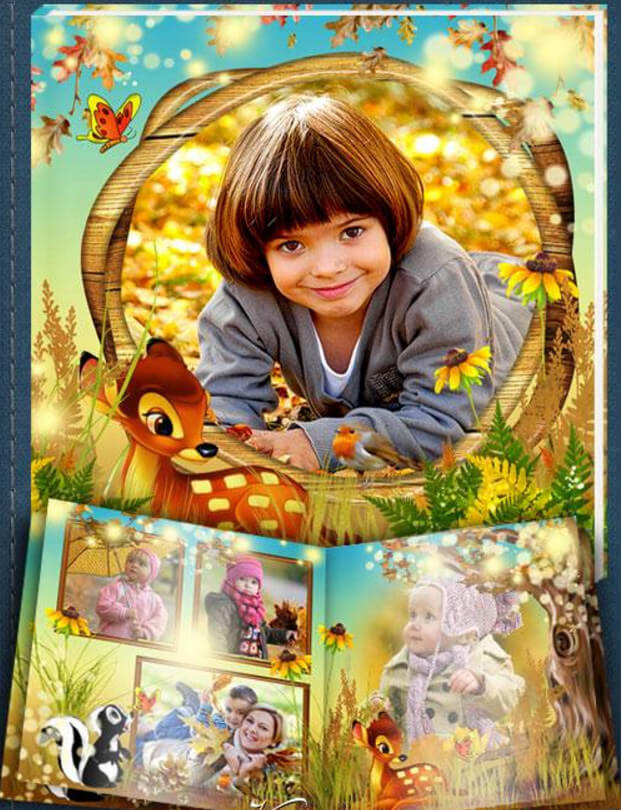
The first tooth, the first step, the first birthday — moments that fly by faster than the camera shutter. And yet the photos just pile up on the hard drive: a folder marked "January," another marked "February," and then there is the dreaded "sort later" folder. Sound familiar? Today we are examining a tool that turns terabytes of scattered snapshots into a cohesive story: a children's vintage-style photo book — 7 fully layered PSD files at 300 DPI and 7205×3602 pixels. The archive weighs 711 MB, and that is not bloated filler — it is seven complete source files where every design element sits on its own layer, ready for your edits.

Vintage aesthetics in children's photography might seem like an unconventional choice at first glance, but it is spot-on in practice. Modern templates with neon colors and cartoon characters go stale faster than the child learns to walk. But aged paper textures, lace frames, and muted sepia tones — this visual language speaks of something timeless. A baby photo in a vintage frame looks as though it has been cherished in a family album for three generations. That is precisely the magic we aimed for when assembling this template.

Every element in the template — text, frames, backgrounds, decorative details — lives on its own named, organized layer. No flattened JPEG masquerading as a PSD. Open, edit, save — no hocus-pocus required.

Unpacking the archive: what each of the seven files contains

Before downloading 711 MB and wondering what to do with it, let us walk through the contents. Seven PSD files is not a random number. It is the minimum yet sufficient set for a complete photo book — one you would not be embarrassed to print at a professional lab and give to a grandparent. Each spread has been designed with a specific composition and recommended photo count in mind, so you never have to guess where to place which image.

# Spread purpose Design highlights Recommended photo count
1 Front cover Central photo in a lace frame, vintage-font title, aged paper background with craquelure texture 1
2 Opening spread Large photo on the left, text block with space for the name and birth date on the right, ornamental border 1–2
3 Family spread Grid of 3–4 photos with parents, lace corner decorations, and calligraphic flourishes 3–4
4 First year timeline Chronological strip: photos by month, background featuring vintage calendar sheets 4–6
5 Celebration spread Large central composition, banner ribbon with congratulatory text, vignettes 2–3
6 Collage spread Freeform layout of 5–8 photos, handwritten-style captions, decorative clips and ribbons 5–8
7 Back cover Minimalist design, space for a closing message or short poem 0–1

Each PSD file represents a full spread (two facing pages), yielding a total of 14 printed pages. Layers are grouped into folders: "Background", "Frames", "Photos", "Text", "Decor". The grouping is not decorative — it genuinely saves time when navigating layers. If you have ever cursed a designer who left 150 unnamed layers in a single PSD, this template will not disappoint you.

Each spread measures 7205×3602 px at 300 DPI. That translates to approximately 61×30.5 cm in print. For an A4 photo book (A3 spread) this is more than sufficient. If scaling is needed, use Image → Image Size without quality loss.

Technical specifications: numbers that actually matter

When you download a "free PSD template" from the internet, you often end up with a single flattened layer, a watermark, and 72 DPI resolution. This is a different situation — and the specifications back that up. This template was built with real print production in mind, not for a designer's portfolio screenshot. Let us look at the hard numbers — they speak louder than any description.

Parameter Value Why it matters
Number of PSD files 7 A complete set of spreads — no need to purchase or finish anything extra
Resolution 300 DPI Print industry standard — no pixelation on paper
Spread dimensions 7205 × 3602 px Equivalent to ~61×30.5 cm — accepted by any print shop
Archive size 711 MB Uncompressed layered sources — a sign of quality, not bloat
Color mode RGB, 8 bits/channel Standard for editing; convert to CMYK before sending to print
Layer organization Folders + named layers Navigation takes seconds, not minutes
Smart objects for photos Yes Replace photos with a double-click — masks and effects are preserved
Editable text Yes, all blocks Change names, dates, greetings — in any language

A word about the 711 MB figure — do not let it intimidate you. For comparison: a single flattened JPEG of this size, saved as a print-ready TIFF, would occupy roughly 75 MB. Seven such files would already be 525 MB. Add layers, masks, and smart objects at native resolution — and 711 MB becomes a perfectly reasonable number. A suspiciously small archive size for these specs is exactly what should raise red flags. If a PSD template claiming 300 DPI and seven spreads weighs only 50 MB, you are likely looking at flattened JPEGs inserted into a single Background layer — rendering the "source file" functionally useless for any actual editing.


Vintage aesthetics in detail: why this style works

Vintage is not just "aged paper and sepia." It is a deliberate system of visual techniques, each solving a specific design challenge. Let us break down what composes the style of this template and why it pairs so well with children's photography. Understanding these principles will help you move beyond mechanically dropping photos into pre-made frames and toward working with the design consciously.

Color palette

The palette is built around warm pastel tones with low saturation: cream (#F5F0E1), dusty rose (#C9AFA0), pale teal (#A8C4C2), muted brown (#8B7355). Not a single neon or acidic shade in sight. Why does this matter? Children's photos are emotionally saturated by themselves — a bright smile, sparkling eyes, colorful clothing. A loud background would compete with the photo, stealing attention. A subdued vintage background, by contrast, works like a mat — it frames without arguing. This is a fundamental design principle: the background should support the content, not compete with it.

Textures and materials

Every background in the template imitates an actual physical material: kraft paper with microfibers, linen with its characteristic thread weave, aged cardboard with a craquelure effect (a network of fine cracks). The textures are not slapped on as a single image overlay — they are embedded in smart objects, allowing you to control intensity via layer opacity without affecting the rest of the design. If craquelure feels too aggressive, drop Opacity to 40% and get a subtle aging effect instead. The linen texture at 20–30% opacity creates a barely perceptible tactile effect that viewers do not consciously register but subconsciously read as "real material."

Typography

Headings use serif typefaces in the Victorian-era spirit — highly legible yet distinctly decorative. Captions and secondary text employ script fonts that mimic dip-pen calligraphy. The pairing of a structured serif for body text with freeform calligraphy for accents creates the precise contrast that vintage typography depends on. All text layers are editable — not rasterized. Fonts are embedded in smart objects; no separate font installation is required. This means you can type the child's name, date, or greeting in any language — including Cyrillic — and the text will display correctly.

\u{201c}

A vintage style in a children's photo book is not about making the child look old. It is about saying: your story did not begin yesterday — it is the continuation of a long chain of family stories.

Decorative elements

Lace frames and vignettes are the template's calling card. They are built not as raster overlays but as vector masks, offering two advantages: infinite scaling without sharpness loss, and the ability to fine-tune curves. Ornamental borders along page edges function as visual anchors — they keep the viewer's eye within the spread rather than letting it drift past the trim line. Handwritten-style notes in the margins ("first tooth — 7 months," "loves bath time") add the feel of a living family archive — the kind your grandmother kept in albums with cardboard pages and photo corners.


Step-by-step guide: from download to finished photo book

Enough theory — let us get practical. Here is the sequence that turns a folder of PSD files into a completed album. We have walked this path dozens of times with various templates and know exactly where the common pitfalls lie. Follow these steps and you will avoid the same mistakes.

Step 1. Download and extract

The archive link is at the bottom of the article. Download the ZIP file (711 MB) and wait for the download to complete. Extract it into a dedicated folder — not the drive root, not the desktop, but a purpose-built directory. You will find seven PSD files plus JPEG previews. Any archiver works: 7-Zip, WinRAR, or the built-in Windows/Mac tool. Do not attempt to open files directly from within the archive — Photoshop cannot save changes that way, and you risk losing all your work.

Step 2. Photo selection

Before opening Photoshop, choose your photos. The golden rule: five excellent shots beat twenty-five mediocre ones. The table above shows the recommended photo count for each spread. Stick to it — cramming fifteen photos into a spread designed for three will create visual chaos. Photo format does not matter (JPEG, TIFF, PNG — Photoshop reads everything). The one requirement: the source image must be at least 2000 pixels on the long side, otherwise you will see pixelation in print. As you select photos, think about rhythm: alternate close-up portraits with medium shots and wide scenes — this creates visual variety and keeps the viewer engaged.

Do not use photos downloaded from social media or messaging apps — they undergo compression down to 72–96 DPI. For 300 DPI printing, that is catastrophically insufficient. Use original files from your camera or phone at native resolution.

Step 3. Working in Photoshop

Open the first PSD file. In the Layers panel you will see folders: "BACKGROUND", "FRAMES", "PHOTOS", "TEXT", "DECOR". To replace a photo, find the layer with the smart object icon — double-click it, Photoshop opens the embedded document, paste your photo into it, save (Ctrl+S), close — the photo instantly takes its designated place with all masks, frames, and effects intact. Text is even simpler: select the Type tool (T), click on any text block, enter the child's name, date, greeting. Done. Each spread takes about 10–15 minutes — including positioning and adjusting photos within smart objects.

Step 4. Print preparation

Once all seven spreads are complete, convert the color mode from RGB to CMYK: Edit → Convert to Profile → select the profile recommended by your print shop (typically Coated FOGRA39). Save each spread as a TIFF (with LZW compression) or PDF (Press Quality). Do not send PSD files directly to the print shop — not every press properly interprets them. Always request the print shop's technical requirements: some require bleeds of 3–5 mm, others work without them. Confirm accepted file formats and color profiles before sending — this saves you at least one round of corrections.

Step 5. Pre-print checklist

Run through this list before sending the layout to print:

  • All text has been proofread — no typos in names or dates
  • Photos do not extend past the trim area (bleed, if the template provides one)
  • Color mode is CMYK, not RGB
  • Resolution is 300 DPI — verified via Image → Image Size
  • Files are named logically: 01-cover.tiff, 02-spread-1.tiff, etc.
  • Layers are flattened in TIFF files (Layer → Flatten Image before saving)
Keep an intermediate copy with unflattened layers in PSD format. If the print shop requests changes, you can open the source and fix it in a minute instead of starting from scratch with a flattened TIFF.

Comparison: vintage template vs. other styles

Why vintage specifically, and not minimalism, pop art, or scrapbooking? Let us compare approaches honestly, without marketing gloss. Each style has its place, but for a children's photo book that will be revisited for years, the selection criteria differ from passing trends.

Characteristic Vintage (this template) Minimalism Scrapbooking Cartoon style
Emotional impact Warm, nostalgic Calm, neutral Playful, bright Childish, entertaining
Relevance in 10 years High — vintage never ages out Medium — minimalism is also timeless Low — decorations become dated Very low — cartoon characters get forgotten
Difficulty for a beginner Medium Low High (many elements) Low
Visual noise Moderate, organized Minimal High, chaotic Medium
Good as a gift for grandparents Yes, ideal Yes Mostly yes Mostly no

Vintage wins on the "test of time" criterion. A photo book laid out in this style today will look just as appropriate in fifteen years as an actual 1910s family album looks today. This is not a fleeting trend — it is an aesthetic that has passed a century of real-world testing. Minimalism fares well too, but an unprepared viewer often perceives it as "unfinished." Scrapbooking overwhelms with an abundance of tiny details. And cartoon templates are a guaranteed way to end up with an album your child will laugh at within five years.


Frequently asked questions

What is a children's vintage-style photo book?

A set of 7 fully layered PSD files for Adobe Photoshop, designed in a retro aesthetic with aged paper textures, lace frames, and a pastel color palette. Each file is a full spread with editable layers: frames, backgrounds, text, and decorative elements. Resolution: 300 DPI, spread size: 7205×3602 px, total archive weight: 711 MB.

Which programs do I need to work with the template?

Primary: Adobe Photoshop (CS6 and later, including CC). Alternatives: Affinity Photo (full smart-object support, one-time purchase), Photopea (free browser-based editor, PSD support), GIMP (free, partial support — smart objects rasterize but text layers are preserved). No additional software is needed for printing — export as TIFF or PDF.

How many spreads and pages are in the photo book?

The archive contains 7 PSD files — 7 spreads (14 pages with double-sided printing). The set includes: front cover, 5 inner spreads, and a back cover. Enough space for 20–40 photos. If you need more, any spread can be duplicated: right-click the layer group → Duplicate Group → move to a new document.

Can I edit text and photos in the template?

Yes, every element is editable. Text layers: use the Type tool (T) — supports both Latin and Cyrillic characters. Photos: replaced through smart objects — double-click the layer, paste your image, save (Ctrl+S) — the photo instantly takes its place with all masks, frames, and overlay effects preserved.

Is the template suitable for professional printing?

Absolutely. 300 DPI is the print industry standard — no pixelation. The spread size of 7205×3602 px corresponds to approximately 61×30.5 cm. Color mode is RGB; convert to CMYK (Edit → Convert to Profile → Coated FOGRA39) before sending to print. Confirm bleed requirements with your print shop — typically 3–5 mm per side.

How is vintage style different from retro and classic?

Vintage emulates late 19th–early 20th century aesthetics: kraft paper, lace, pastel tones, calligraphic fonts. Retro covers 1950s–80s style: bright contrasting colors, geometric patterns, pop art, neon accents. Classic style is a neutral, timeless design with no attachment to a specific historical era. This template is pure vintage.

What age range is this template suitable for?

Universal — from newborns to early school age (0–8 years). Vintage aesthetics particularly shine with first-year photos: hospital discharge, christenings, first steps, birthdays. Also an excellent choice for kindergarten and elementary school graduation albums — the retro style adds warmth to any children's photos.

How do I download and set up the template correctly?

Download the ZIP archive (711 MB) from the link at the bottom of the article. Extract into a dedicated folder — not the drive root, not the desktop. Open any PSD in Photoshop: all fonts are embedded in smart objects, no separate font installation is needed. Do not open files directly from within the archive — Photoshop cannot save changes that way.

Are there any usage restrictions for the template?

The template is free for both personal and commercial use. You can create photo books for clients, sell finished albums, and use the layouts in your portfolio. The only restriction: do not resell the PSD source file itself or include it in commercial template bundles.

What if I do not have Adobe Photoshop?

Use Photopea — a fully free online editor that opens PSD files directly in the browser with smart-object and text-layer support. Affinity Photo (one-time purchase, no subscription, full PSD compatibility) or GIMP (free, smart objects rasterize but text layers remain editable) also work.

Download

This is not just another "insert photo and print" template — it is a full-fledged design tool. Seven spreads with thoughtful composition, a logical layer structure, print-grade 300 DPI resolution, and a vintage aesthetic that never goes out of style. If you have been looking for a template you would not be ashamed to take to a print shop and would not be afraid to show to friends — you have found it. The download link is above; the archive is 711 MB. Download it, open it, and start creating.

Tap to react