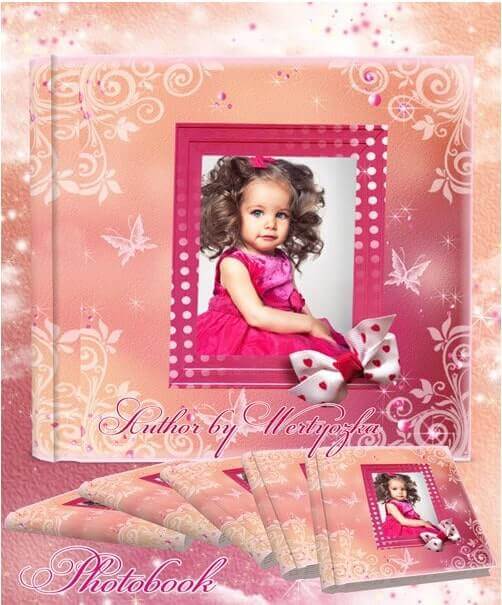
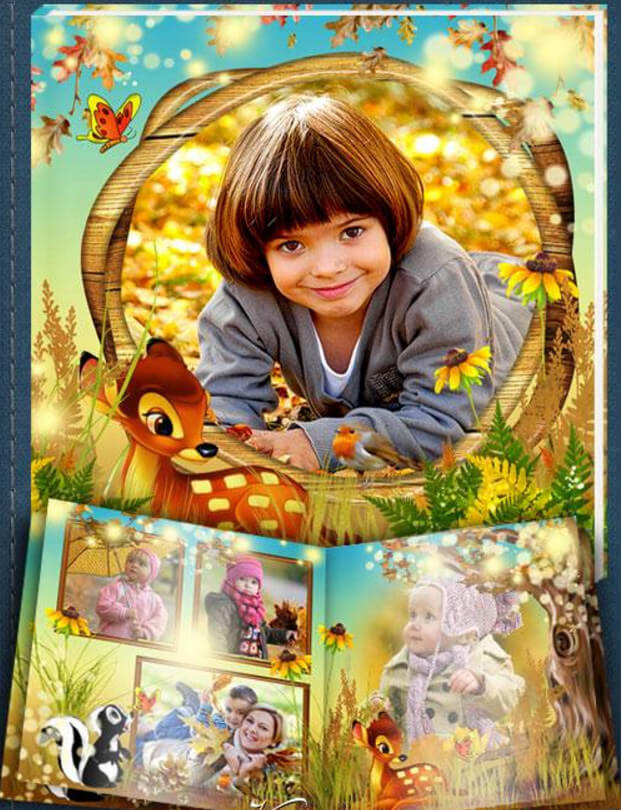
Universal Photoshop Photo Album with Photo Frames

A simple and clear photobook template for everyone who values time and quality. Universal Photo Album for Photoshop with photo frames is a ready solution for creating beautiful photobooks without design skills. Take photos, insert into frames, send to print. Everything else is already done by a designer: backgrounds chosen, shadows configured, element placement balanced.

The file is in PSD format at 4882x3307 pixels, 275 MB in archive. Includes 5 spreads with frames of various shapes and sizes. Suitable for any genre: family photos, weddings, travel, children. The design is neutral and timeless.

What makes this album special

Unlike rigid photobooks with fixed grids, this album offers a freer structure. Frames can be moved, resized, rotated, and combined. Background textures feature soft gradients that add depth without distraction. You can replace gradients with your own backgrounds or images.

The album pays attention to small details. Each frame has a subtle shadow creating a 3D effect, as if the photo is glued onto the page. Spacing between frames is calibrated for balanced composition. These details separate amateur layout from professional work — and you get them out of the box.

The archive is 275 MB. Ensure at least 800 MB of free disk space for extraction.

Archive contents

One PSD file organized by spreads. Each spread in its own layer group. Inside: background layer (gradient or texture), photo frames (smart objects), decorative elements (lines, corners), shadows, and text layers (for titles). Everything is labeled in Russian for convenience.

ParameterPhoto AlbumPhotobook 1Photobook 2
Resolution4882x33074882x33076300x3450
Spreads554 + cover
Archive275 MB210 MB319 MB
Photo framesYesYesNo
Shadow effectOn every frameSelectiveYes

How to use the template

Step 1. Extract and open

Download the archive, extract to a folder. Open PSD in Photoshop. If prompted about color profile mismatch, select Use Embedded Profile (Coated FOGRA39). Full loading may take 15–30 seconds.

Step 2. Explore structure

Open the Layers panel (F7). Groups labeled 1 to 5 are spreads. Expand any group to see Background, Shadows, Frames, Decor, Text layers. Navigation is intuitive.

Step 3. Replace photos via smart objects

Find a layer in the Frames group with a photo thumbnail. Double-click it. A new window opens with a placeholder image. Drag your photo in or use File — Place Embedded. Scale and position your photo. Close and save. The main document updates automatically. Repeat for all frames on all spreads.

Step 4. Edit text

In the Text group, example text layers are ready. Select the Type tool (T), click on text, and type yours. Font, size, and color can be changed in the Character panel (Window — Character). Use one font for headings and another for captions.

Step 5. Prepare for print

Check all spreads for missed frames, shifted elements, and font issues. Zoom to 100 percent and inspect every corner. Save as PDF via File — Save As — PDF with Highest Quality settings.

Full preparation takes 30–40 minutes. With experience, reduce to 15–20 minutes per book.

Who this template is for

Amateur photographers wanting to gift a physical album instead of digital files. The universal design works for children, travel reports, and weddings. Print one test copy, and if satisfied, run a batch for all family members. Professional photographers can use it as a base option in their portfolio. Offer clients 3–4 designs, with this album as one option. Changes take 10–15 minutes thanks to structured layers.

Print recommendations

Request a color proof before full print run. Monitor colors (RGB) always look brighter than print (CMYK). Choose hard cover for frequently handled books. Soft cover wears out faster. Laminate the cover — matte for children albums, glossy for wedding albums. In Russia, popular services include Fotokniga, Soyuzpechat, and NetPrint. Production takes 1–7 business days depending on complexity.

FormatSpreadsPrice rangeProduction time
8x8 in5$12–201–3 days
8x8 in10$20–352–5 days
12x12 in5$30–502–5 days
12x12 in10$50–853–7 days

Photo processing tips

Process each photo before insertion: adjust exposure, remove noise, sharpen. Use Lightroom or Photoshop Camera Raw. Keep contrast and saturation consistent across all photos for a cohesive look. Crop photos to the target aspect ratio before inserting into smart objects. If the frame is square, crop 1:1 first. If rectangular, use 3:2 or 4:3. Use Adobe RGB color space for better print color reproduction. 16-bit depth gives smoother gradients for large uniform areas.

Frequently asked questions

What is included in the universal photo album?

5 spreads in PSD format, 4882x3307 resolution, 275 MB archive. Photo frames, backgrounds, decorative elements, text layers.

How is it different from a regular photobook?

The album has a freer structure: you can arrange photos arbitrarily, change frame positions and background textures.

Which Photoshop is required?

Adobe Photoshop CS6 or newer. Uses smart objects and adjustment layers.

Can I move frames around?

Yes, every element is on its own layer. Move, copy, delete — full editing freedom.

Is it suitable for printing?

Yes, CMYK profile, 300 DPI resolution. Perfect for print lab production.

How many photos fit in the album?

Depending on layout — 10 to 20 photos across 5 spreads.

Are there built-in effects?

Yes, shadows, gradients, and vignettes. Each effect can be toggled or adjusted.

Can I use it commercially?

Yes, the template is allowed for commercial use. Make and sell photobooks.

How to save for printing?

Export to PDF (PDF/X-4 preset) or save each spread as uncompressed TIFF.

Are fonts included?

Yes, all fonts are either replaced with standards or embedded in the PSD.

Can I add more spreads?

Yes, duplicate existing spreads and change content. File structure supports expansion.

Is it suitable as a gift?

Perfectly suitable. Print a quality copy — the best gift for loved ones.

Choosing photos for your album

Photo selection determines 80 percent of your photobook's success. The template frames the images, but content is king. For family albums, choose emotional candid shots over posed portraits. Children laughing, hugs, shared activities — these evoke warm feelings when flipping through. Alternate close-ups with wide shots and details: hands, eyes, toys, food. Varying shot types makes the book dynamic.

For wedding albums, follow the chronology: preparation, ceremony, walk, reception. This creates a narrative that reads like a story, not random photos. Do not include every shot. Select 30–40 best images from 500–1000 captured. Quality over quantity — 20 excellent photos beat 50 mediocre ones.

For travel albums, include not just landscapes but genre scenes. Street food, locals, transportation, tickets, signs — these details create atmosphere and transport the viewer. Add captions with location names and dates — future you will appreciate these notes. Text layers in the template are pre-configured.

Album typeRecommended photosShot ratioText
Family/Children30–5060% medium, 40% closeMinimal
Wedding40–6040% wide, 40% mid, 20% detailsNames, date, thanks
Travel30–4050% landscape, 30% genre, 20% portraitsLocations, dates, stories
Portfolio20–3080% close, 20% midProject name

Working with layers and effects

The template includes adjustment layers to enhance photos without editing originals. Brightness/Contrast lightens dark images. Color Balance removes excess blue or yellow. Photo Filter adds warm tones. Just toggle layers on or off — changes are non-destructive.

Decorative elements (lines, corners, ornaments) sit above photo layers. Change their color via Layer Style — Color Overlay. If an element feels unnecessary, toggle its visibility off. The template avoids clutter but includes basic decorations for a finished look.

Frame shadows are a separate layer group adding depth and dimension. Shadow intensity adjusts via layer Opacity. Default is 40 percent — optimal for most projects. For minimalist style, reduce to 20 percent. For flat design, disable shadows entirely.

Presenting photobooks to clients

If you are a photographer making custom photobooks, presentation matters. Show the client a PDF preview before printing. Use Jumpshare or Google Drive for delivery. Ask clients to view on a calibrated monitor, not a phone. Explain that printed colors may differ slightly from screen. After printing, create a mini-presentation. Lay the book on a table, shoot a video flipping through pages. Clients appreciate the attention to detail.

A photobook is a physical product that lasts decades. Unlike digital files that may sit forgotten on a hard drive, books get flipped through, shown to guests, and passed to children. Pricing: photobook cost is usually included in wedding or family packages. Average markup is 30–50 percent above print cost. If the book costs you $50, charge $65–75. Include 2–3 photos of finished books in interiors in your portfolio.

Photobook care

Store your photobook in a dry place at room temperature. Avoid direct sunlight — UV fades inks and yellows paper. Ideal location: a closed bookshelf or living room shelf away from windows. Do not store in kitchens or bathrooms — humidity and temperature changes damage paper and glue. Handle with clean, dry hands. Greasy fingerprints attract dust on glossy paper.

Remove spots with a soft dry cloth. Do not use wet wipes or household chemicals — they damage page coatings. For matte paper, use a special photo eraser. If the book is stored in a box, ensure the box does not compress the cover. Over time, pressure deforms the spine. When storing vertically on a shelf, support with adjacent books to prevent cover warping. With proper care, a photobook stays presentable for 20–30 years.

How a photobook becomes a family heirloom

In the age of digital photo albums on phones and clouds, a physical photobook gains special value. It is not just a photo set but a tangible object you can hold, flip through, and pass to children. Family photobooks made today will become priceless documents of an era 20 years from now. Children will see their parents young, their family home, their traditions. Digital files get lost, hard drives fail, cloud services shut down — paper books remain.

When creating your photobook, you are building a legacy for future generations. Choose photos responsibly. Include not just formal portraits but everyday scenes: making breakfast, reading a book, walking in the park. These candid moments will trigger the warmest memories decades later. Always label who and where is in each photo. Names, dates, events — these captions add context. In 10 years you may not remember where a particular shot was taken. The template's text layers make adding captions easy. Spend 15 minutes on captions — your book becomes a true family archive.

Digital vs physical photo albums. Digital albums are convenient for storage and sharing — send a Google Photos link. But they are rarely revisited. Statistics show 80 percent of digital albums are never opened after the first viewing. A photobook gets flipped through regularly, especially displayed in a visible spot. It becomes home decor and a source of pride. Psychological studies in behavioral economics show people value physical products higher, even when the digital version contains identical information. A gifted photobook feels more thoughtful and valuable than a USB drive with photos.

Environmental aspect: modern photobooks use paper from certified sustainable sources (FSC, PEFC) and eco-friendly water-based inks. Unlike 90s plastic photo albums, they biodegrade naturally. If environmental impact matters to you, choose a print lab using recycled paper and plant-based inks — many manufacturers offer these options. Ultimately, a photobook is not just a product — it is emotion, memory, a piece of life. The time invested in creating it pays off in joy when flipping through its pages years later.

Photobook as interior design: interior designers recommend placing photobooks on coffee tables and open shelves. This brings life to a space, making it more personal and cozy. Match the cover color to your room. Light living rooms suit white or beige covers. Studies suit dark blue or burgundy. If the book will be on display, order a hard cover with quality printing — it becomes decor, not just a photo storage.

Corporate photobook gifts: large companies order branded photobooks for partners and clients. The book includes photos from corporate events, team pictures, key projects. The cover features the company logo. An expensive but effective loyalty tool. If you work with corporate clients, offer this service — margins are higher than private orders and volumes are larger.

Tap to react