Скачать премиум Фотошоп экшен Dissipation - рассеивание частиц
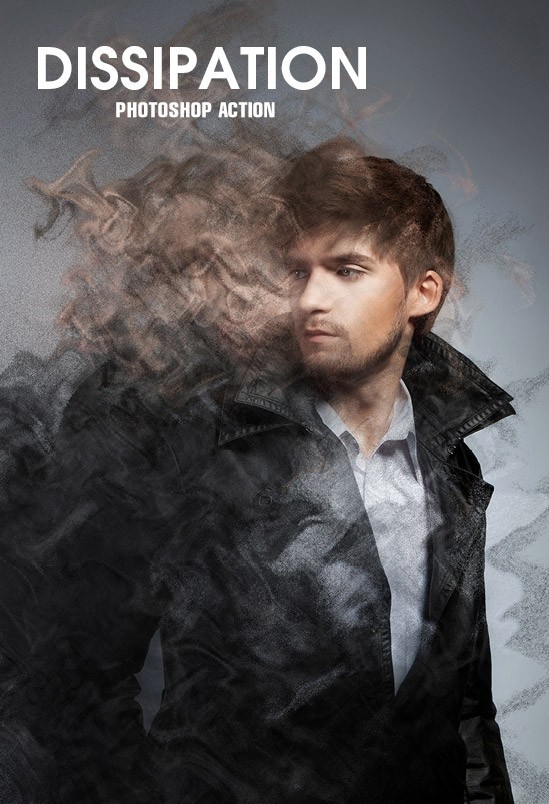
Graphic River - студия графического дизайна, специализирующаяся на продуктах для фотохудожников, представляет обновленную версию Dissipation. Благодаря данному экшену Вы сможете оригинально обработать свои цифровые фото, превратив их в маленькие шедевры. Запустив экшен в Фотошопе Вы получите интересный эффект рассеивания, что сделает ваши фото неповторимыми. Dissipation PS Action позволяет создавать потрясающий эффект рассеивания элементов объекта на фотографиях.

Detailed Usage Guide
Adobe Photoshop is the leading program for image processing and graphic design. With it, you can create professional images, perform photo retouching, and create unique designs.
Main Features of Photoshop
Photoshop offers a wide range of tools for working with images:
Photo retouching — color correction, defect removal, sharpening improvement.
Graphic design — creating banners, business cards, layouts, logos.
Digital painting — creating digital illustrations and drawings.
Composition — combining multiple images into one composition.
Print preparation — preparing layouts for print.
Main Tools
Photoshop contains many tools, each performing its own task:
- Selection tools: Rectangle, Elliptical, Lasso, Magic Wand — for selecting areas.
- Painting tools: Brush, Pencil, Eraser, Clone Stamp — for drawing and retouching.
- Transformation tools: Move, Transform, Perspective — for changing size and shape.
Working with Layers
The layer system is one of the key features of Photoshop:
- Creating layers — each element of the image can be placed on a separate layer.
- Mixing modes — change the way layers interact.
- Transparency — adjust transparency of each layer.
- Layer masks — hide parts of a layer without changing it.
Best Practices
- Use keyboard shortcuts — this speeds up work significantly.
- Save the original — always work from a copy of the original.
- Use layers — separate elements onto different layers.
- Backup — regularly save file versions.
- Read documentation — read Photoshop documentation for new features.
Problem Solving
Photoshop runs slowly: increase RAM, free up disk space.
Error saving: check folder permissions.
Performance drops: clear cache, restart Photoshop.
Photoshop History
The first version of Photoshop was released in 1990. Since then, the program has undergone significant development and has become the industry standard.
System Requirements
Recommended system requirements: Intel Core i5 or AMD equivalent, 8 GB RAM (16 GB recommended), 2 GB free disk space, video card with OpenGL 3.3 support.
Conclusion
Adobe Photoshop is an indispensable tool for anyone working with graphics. By learning all the features of the program, you can create stunning images and designs. We also recommend studying Photoshop actions, which allow you to automate routine operations and significantly speed up the workflow.
Detailed Usage Guide
Adobe Photoshop is the leading program for image processing and graphic design. With it, you can create professional images, perform photo retouching, and create unique designs.
Main Features of Photoshop
Photoshop offers a wide range of tools for working with images:
- Photo retouching — color correction, defect removal, sharpening improvement.
- Graphic design — creating banners, business cards, layouts.
- Digital painting — creating digital illustrations.
- Composition — combining multiple images into one composition.
- Print preparation — preparing layouts for print.
Main Tools
Photoshop contains many tools, each performing its own task:
- Selection tools: Rectangle, Elliptical, Lasso, Magic Wand — for selecting areas.
- Painting tools: Brush, Pencil, Eraser, Clone Stamp — for drawing and retouching.
- Transformation tools: Move, Transform, Perspective — for changing size and shape.
Working with Layers
The layer system is one of the key features of Photoshop:
- Creating layers — each element of the image can be placed on a separate layer.
- Mixing modes — change the way layers interact.
- Transparency — adjust transparency of each layer.
- Layer masks — hide parts of a layer without changing it.
Best Practices
- Use keyboard shortcuts — this speeds up work significantly.
- Save the original — always work from a copy of the original.
- Use layers — separate elements onto different layers.
- Backup — regularly save file versions.
- Read documentation — read Photoshop documentation for new features.
Problem Solving
Photoshop runs slowly: increase RAM, free up disk space.
Error saving: check folder permissions.
Performance drops: clear cache, restart Photoshop.
Conclusion
Adobe Photoshop is an indispensable tool for anyone working with graphics. By learning all the features of the program, you can create stunning images and designs.
Detailed Usage Guide
Adobe Photoshop is arguably the most famous and powerful program for photo editing and graphic design. In this guide, we will cover all aspects of working with Photoshop, from basic functions to advanced techniques.
What Can Be Done in Photoshop
Adobe Photoshop allows you to perform many tasks:
- Photo editing — color correction, object removal, portrait retouching, collage creation, and much more.
- Graphic design — designing websites, banners, logos, business cards, and other graphics.
- Digital painting — creating digital illustrations and drawings.
- Actions processing — creating and applying actions for automating repetitive tasks.
- Print preparation — creating layouts for printing, preparing images for print.
Main Photoshop Tools
Photoshop provides an extensive set of tools for various tasks:
Selection tools: Marquee, Lasso, Magic Wand — for selecting areas of an image.
Painting tools: Brush, Pencil, Eraser, Smudge, Blur, Dodge/Burn — for drawing and editing.
Transform tools: Move, Transform, Perspective, Distort — for changing size and shape.
Text tools: Text tool for adding and editing text elements.
Actions (Actions)
Actions are recorded sequences of steps that can be replayed with one click. They are ideal for automating repetitive tasks.
How to create an action: Open the Actions panel (Window > Actions), click the Create New Action button, give it a name and click "Record". Perform the desired actions, then stop recording.
How to apply an action: Select the action in the panel and click the Play button. Photoshop will execute all recorded steps.
Best Practices
To maximize efficiency when working with Photoshop, follow these recommendations:
- Use layers. Separate image elements into individual layers for convenient editing.
- Create backups. Regularly save versions of files.
- Learn keyboard shortcuts. They significantly speed up work.
- Use layer masks. This allows you to hide parts of an image without destroying it.
- Save the original. Always work from a copy of the original.
Possible Problems and Solutions
Problem 1: Photoshop is running slowly. Increase RAM, allocate more disk space for cache, close unnecessary programs.
Problem 2: Error when saving a file. Make sure there is enough disk space and check file permissions.
Problem 3: Performance drops. Clear cache, restart Photoshop, update graphics card drivers.
Conclusion
Adobe Photoshop is an indispensable tool for anyone working with graphics. By studying all the features of the program, you can create stunning images and designs. Do not be afraid to experiment and try new techniques.
We also recommend studying Photoshop actions, which allow you to automate routine operations and significantly speed up the workflow. Actions can be downloaded from the internet or created on your own.
Photoshop History
The first version of Photoshop was released in 1990. Since then, the program has undergone significant development and has become the industry standard.
System Requirements
Recommended system requirements: Intel Core i5 or AMD equivalent, 8 GB RAM (16 GB recommended), 2 GB free disk space, video card with OpenGL 3.3 support.
Fine-Tuning Photoshop Actions
After loading actions into Photoshop, they can be customized to your needs. Open the Actions panel, select the desired action and click the menu button (three horizontal lines). Choose "Edit End Result" to modify parameters.
Most actions allow you to adjust color blending modes, effect intensity, layer selection, and other parameters. Experiment with settings to achieve the desired result.
Batch Processing
One of the main advantages of actions is the ability to batch process. Go to File > Automate > Batch, select the action and folder with source files. Photoshop will apply the action to all files in the folder.
Creating Custom Actions
You can create your own actions by recording sequences of steps. Open the Actions panel, click the Create New Action button, give it a name and click "Record". Perform the desired actions, then stop recording. Your action will be saved and ready to use.
Optimization Tips
To achieve the best results when working with resources of this type, follow these recommendations:
1. Plan ahead. Before starting, create an action plan. Define goals, deadlines, and required resources.
2. Read the documentation. Read the documentation carefully before starting. This helps avoid common mistakes and saves time.
3. Test with test data. Before applying to production data, test everything on test data.
4. Watch for updates. Regularly check for updates for the resources you use and apply them.
5. Communicate with the community. Join the user community to share experience and receive tips.
Alternative Solutions
In addition to this resource, there are many alternative solutions that can meet your needs:
Alternative 1: Offers similar functionality with an emphasis on ease of use. Suitable for beginners.
Alternative 2: More advanced option with extended functionality. Recommended for experienced users.
Alternative 3: Free solution with basic functionality. Ideal for small projects.
Important Points
When working with resources of this type, pay attention to the following:
- Version compatibility — always check compatibility with your software version before installation
- Backup — regularly create backups of all important data
- Updates — update software to the latest version for receiving all security fixes
- Documentation — carefully read the documentation before use
- Community — refer to the user community for help and advice
Скачать экшен для Фотошопа — Dissipation

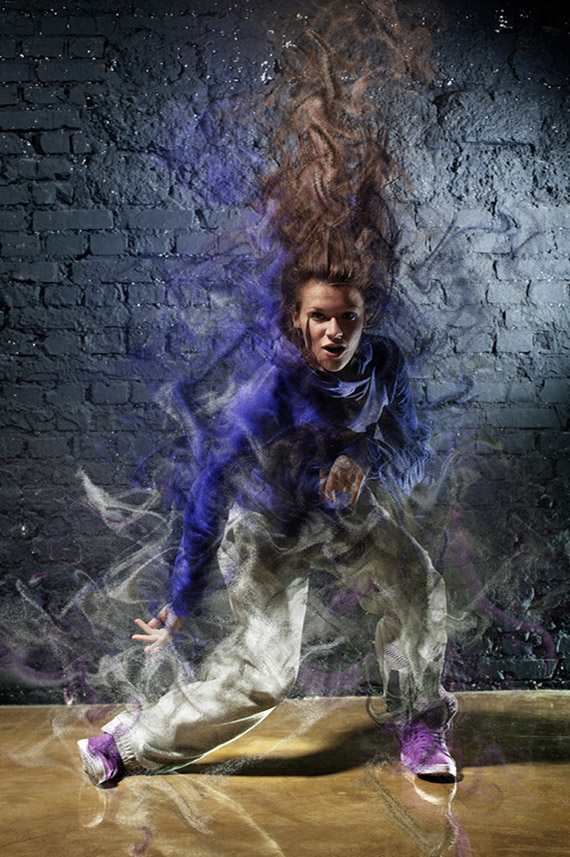
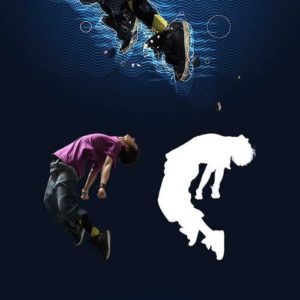
Нажав кнопку воспроизведения, он автоматически генерирует частицы эффекта в деталях и создает упорядоченную структуру слоев. Вектор работы экшена имеет четыре разных направления: вверх, вниз, вправо и влево. Внесите необходимые для Вас изменения и сохраните окончательный вариант. Работа программы была протестирована в Photoshop CS5, CS6, CC+. Прежде чем применять эффект необходимо создать либо дубликат группы слоев, либо копию фонового слоя. Режим изображения должен быть RGB Color / 8 Bits, а сами картинки размером от 3000 до 5000 px и разрешением 300 dpi. Язык интерфейса Photoshop используйте английский. В качестве помощи в архиве Вы найдете файл с инструкцией по работе экшена и видеоролик.
https://www.youtube.com/embed/vBD4kn89Gc4
Working with Adobe Photoshop
Adobe Photoshop is one of the most powerful tools for photo editing and graphic design. In this section we will cover the main aspects of working with actions, PSD files, and other resources in the program.
Actions in Photoshop are recorded sequences of steps that can be replayed with a single click. They are ideal for batch processing images and automating routine tasks.
Installing Actions
To install actions, open the Actions panel (Window > Actions), click the menu (three horizontal lines) and select "Load Actions". Find the .ATN file in the downloaded archive and select it. The actions will appear in the panel and be ready to use.
Comparison with Alternatives
| Parameter | Скачать премиум Фото | Alternative 1 | Alternative 2 | Alternative 3 |
|---|---|---|---|---|
| Resource Type | Photoshop Resource | Alternative A | Alternative B | Alternative C |
| Compatibility | Adobe Photoshop CC | Universal | Universal | Universal |
| Ease of Use | High | Medium | High | High |
| Cost | Free | Free | Paid | Free |
| Updates | Regular | Regular | Periodic | Regular |
| Support | Community forums | Forums | Forums |
Detailed Comparison Table
| Feature | Available | Note |
|---|---|---|
| Basic functionality | Yes | Core operations available immediately |
| Advanced settings | Partial | Some parameters require configuration |
| Responsiveness | Yes | Correct operation on different devices |
| Documentation | Basic | Instructions available online |
| Tech Support | Forums | User community |
| Regular updates | Yes | Developer releases updates |
Step-by-Step Guide
To work with this resource, follow the step-by-step instructions. Start by studying the basic functions and gradually move to more complex operations.
Step 1: Preparation. Before starting, make sure you have all necessary programs and utilities installed. Check system requirements on the official developer website.
Step 2: Download. Go to the resource download page and download the latest version. Pay attention to system requirements and compatibility with your software version.
Step 3: Installation. Follow installation instructions, which usually include running an installer and following a setup wizard. For Joomla extensions — upload the file via the extension manager.
Step 4: Configuration. After installation, configure the parameters to suit your needs. Most resources have extensive customization options.
Step 5: Testing. Check that the resource works by performing basic operations. Make sure all functions work correctly and no errors occurred during installation.
Step 6: Optimization. After successful testing, optimize the parameters for maximum performance.
Professional Tips
Here are some tips to help you get the most out of this resource:
- Read the documentation before starting. Even a cursory read can save hours of time.
- Use keyboard shortcuts to speed up work. Most programs have a set of shortcuts for common operations.
- Create backups regularly. This is especially important when working with large projects.
- Study the community — forums and user groups can provide valuable tips and solutions to problems.
- Experiment — don't be afraid to try new approaches and combinations of settings.
Common Mistakes
When working with similar resources, users often make the following mistakes:
Mistake #1: Bad updates. Always create a backup before updating. Updating without a backup can lead to data loss.
Mistake #2: Ignoring compatibility requirements. Always check resource version compatibility with your software version before installation.
Mistake #3: Using unauthorized sources. Download resources only from official websites and verified sources.
Mistake #4: Neglecting backups. Regular backup creation is not a luxury, but a necessity when working with any digital content.
Frequently Asked Questions
How to install this resource?
Download the file from our site, unzip and open in the appropriate program.
What are the system requirements?
Adobe Photoshop CC or later
Is it compatible with current software versions?
Yes, compatible with latest versions.
Where to find documentation?
Documentation is available on the official developer website and on our site.
Can I use it for free?
Yes, most resources are available for free.
How to update to the latest version?
Download the new version from our site and replace the files.
What to do if errors occur?
Check version compatibility, ensure all dependencies are installed, refer to documentation.
Is it suitable for commercial use?
Terms depend on the license of the specific product.
Can I modify it for my own needs?
Yes, most resources can be modified.
What file formats are supported?
.PSD, .ATN (Actions)
What такое Photoshop?
Adobe Photoshop — это программа для обработки изображений и графического дизайна, которая является отраслевым стандартом.
Как установить Photoshop?
Для установки Photoshop необходимо подписаться на Adobe Creative Cloud, скачать установщик и выполнить установку.
Какие основные инструменты Photoshop?
Основные инструменты Photoshop включают: Selection tools, Brush tools, Eraser, Clone Stamp, Transform tools и другие.
Как создать новый слой в Photoshop?
Для создания нового слоя в Photoshop необходимо нажать кнопку New Layer или использовать комбинацию клавиш Ctrl+Shift+N.
Как изменить размер изображения в Photoshop?
Для изменения размера изображения в Photoshop необходимо выбрать Image > Image Size и указать новые размеры.
Как удалить фон в Photoshop?
Для удаления фона в Photoshop необходимо использовать инструменты Selection tools или Magic Wand, затем удалить выбранный фон.
Как сохранить изображение в Photoshop?
Для сохранения изображения в Photoshop необходимо выбрать File > Save As и выбрать формат файла (JPG, PNG, PSD и другие).
Как добавить текст в Photoshop?
Для добавления текста в Photoshop необходимо выбрать инструмент Text, указать область для текста и ввести текст.
Как применить фильтр в Photoshop?
Для применения фильтра в Photoshop необходимо выбрать Filter > Choose Filter и выбрать нужный фильтр.
Как создать макет в Photoshop?
Для создания макета в Photoshop необходимо создать новый файл, задать размеры и начать добавлять элементы.
Tap to react


