Сегодня мы изучим с Вами, как создавать в Фотошоп такую сюрреалистичную картину с альпинистом, который наслаждается видом на башню храма. В обучающем уроке по Фотошоп вы узнаете как делать собственный пейзаж пещеры с реалистичными тенями и светом, а также используя несколько различных фото из камней, поместить храм и альпиниста внутри нее. Затем мы закончим рисунок с помощью теплого оттенка цвета и придадим картине специальный эффект. Через данный урок Фотошоп вы изучите особую технику, которая поможет вам в дальнейшем создавать великолепные фото коллажи.
Данное изображение было создано в программе Adobe Photoshop и обработано с помощью многочисленных инструментов. Сначала мы создали рамку для пещеры. Потом добавили немного гор, чтобы сделать фон реалистичным, применили отдельные фото альпиниста, храма и плюща. Наконец, напоследок мы закончили обработку со снимком при помощи добавления ему теплых оттенков. Для работы вам потребуется Photoshop CS5 или более новая версия этой программы.
Ресурсы
- Stone1
- Stone2
- Stone3
- Stone4
- Climber
- Sky
- Temple
- Hawk
- Bridge
- Waterfall
- Mountain1
- Mountain2
- Texture
- Ivy
Шаг номер 1
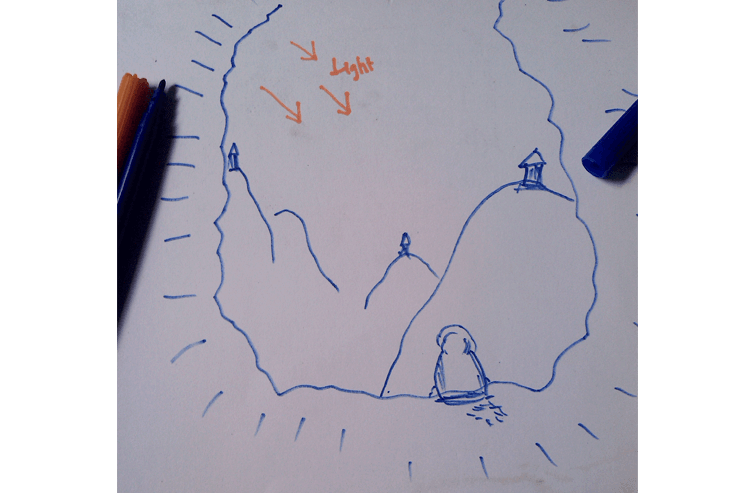
На первом шаге мы создадим набросок будущей композиции. Назначением его станет выбор инструментов для последующей работы и подбор фотографий для внедрения в проект и поиск их в интернете (выше есть ссылки на исходники, поэтому вам не придётся их искать).
Шаг номер 2
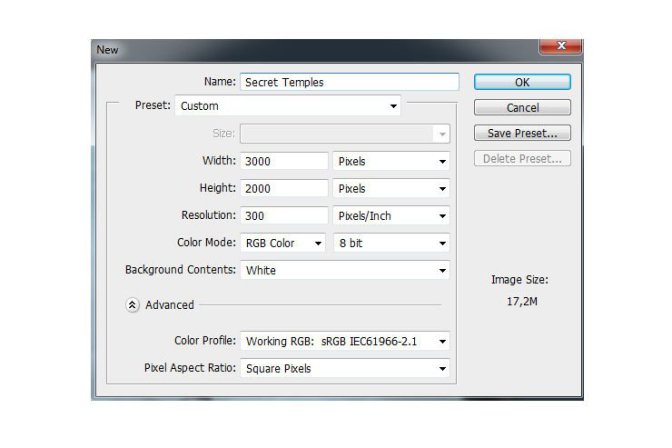
Теперь приступим к Фотошоп обработке и комбинированию снимков в единую сцену. На первом этапе создадим новый документ размерами 3000 пикселей шириной и 2000 пикселей высотой. Для этого можно перейти в пункт File > New или использовать горячие клавиши Cmd /Ctrl+ N.
Шаг номер 3
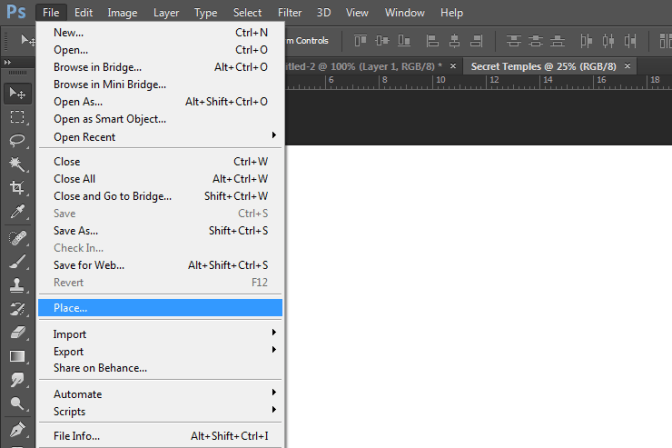
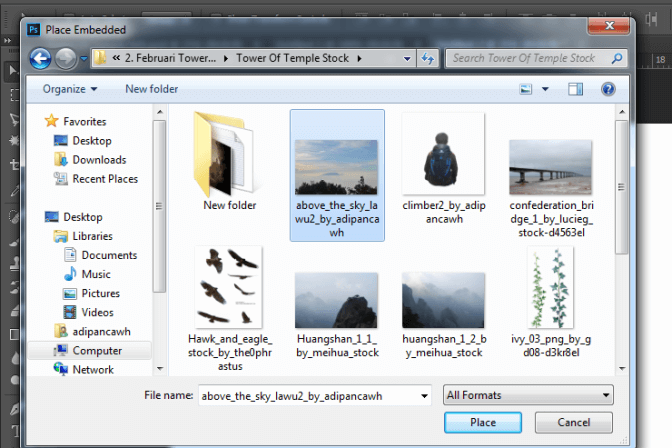
Затем мы добавим фото. Переходим в File > Place и выбираем необходимые изображения.
Шаг номер 4
Добавим фото “sky” в созданный только что документ.
Шаг номер 5
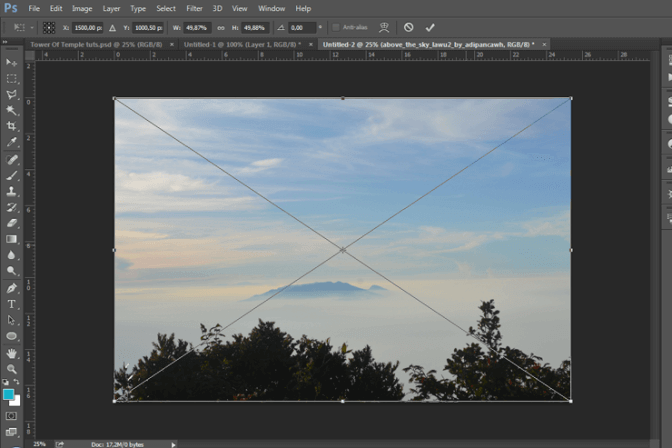
Растягиваем фото, как показано на рисунке ниже. Необходимо применить трансформацию (если вы перемещаете снимок через пункт Place, то трансформация появится автоматически). Если нужно сделать ее вручную, то нажимаем клавиши CTRL + T или переходим в меню Edit > Transform > Scale. Теперь тяните за углы фотографии, чтобы сформировать рамку.
Шаг номер 6
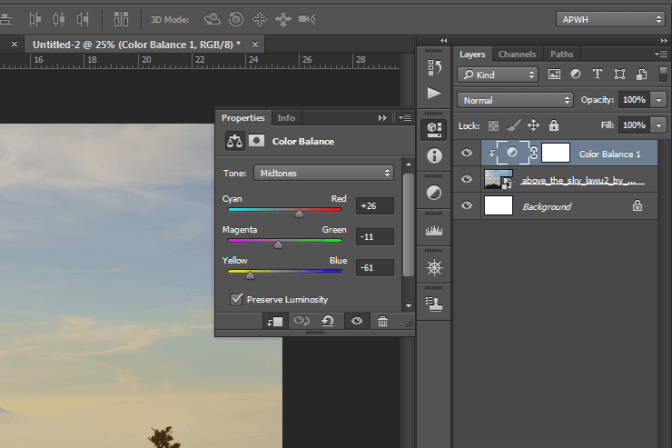
Добавляем корректирующий слой с обтравочной маской, чтобы небо выглядело не в холодных оттенках. Делаем новый слой для коррекции: Color Balance (Цветовой баланс) (Layer >(Слой >); New Adjustment Layer >(Новый корректирующий слой >) Color Balance (Цветовой баланс)), устанавливаем параметры, как указано на рисунке.
Шаг номер 7
Чтобы работа выглядела аккуратно не только снаружи, но и в самой программе, нужно сделать группу элементов. Выделяем все слои, потом перетаскиваем их в маленькую папку на панели слоев, которая создаст новую группу с ними. Также можно выделить их (слои) и воспользоваться клавишами Ctrl/Cmd+G. Назовём новую группу слоёв “Sky”.

Шаг номер 8
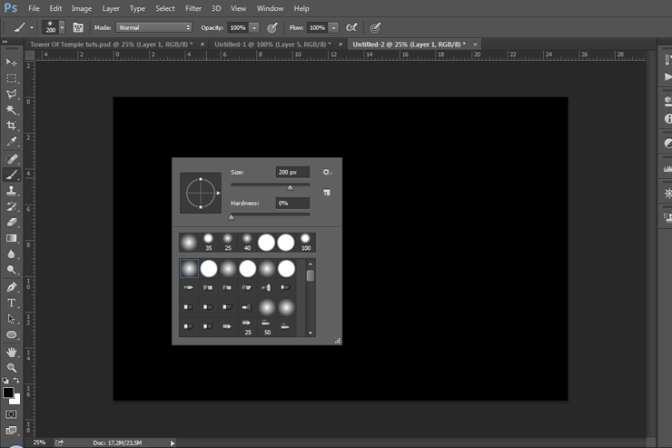
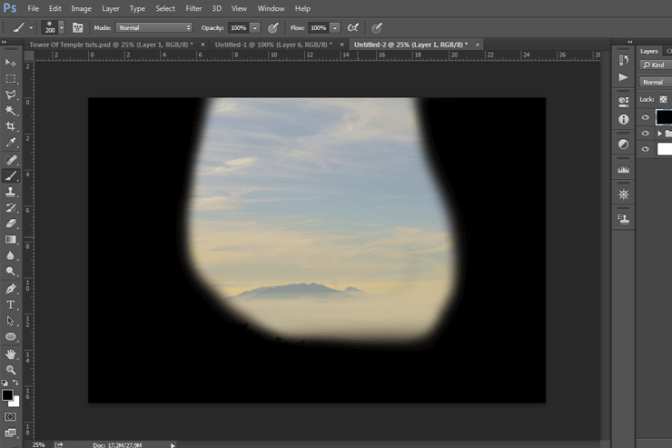
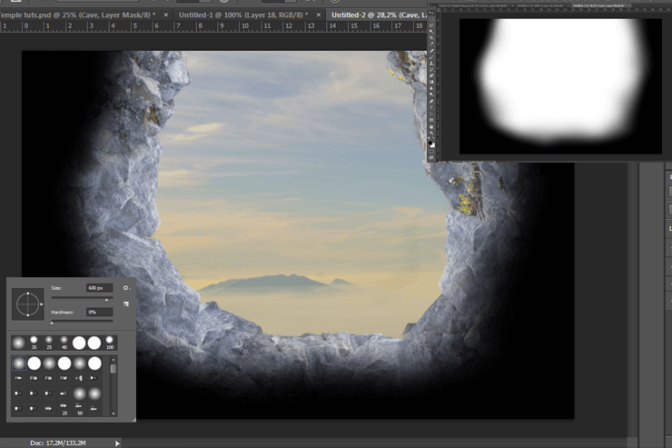
Теперь создадим новый слой и зальём его черным цветом. Можно пользоваться чем угодно - добавить корректирующий слой или просто нажать клавиши Cmd /Ctrl + backspace (убедитесь что передний цвет является черным).
Шаг номер 9
Возьмите мягкую кисть и сделайте маску, как указано на нижнем рисунке.
Шаг номер 10
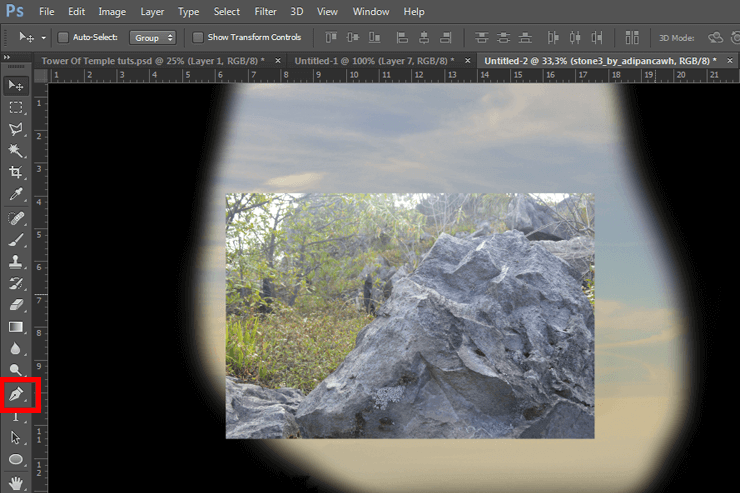
Добавим фотографию “stone3” в документ, затем воспользуемся инструментом Pen Tool (P) (Инструмент "Перо") для выбора объектов.
Шаг номер 11
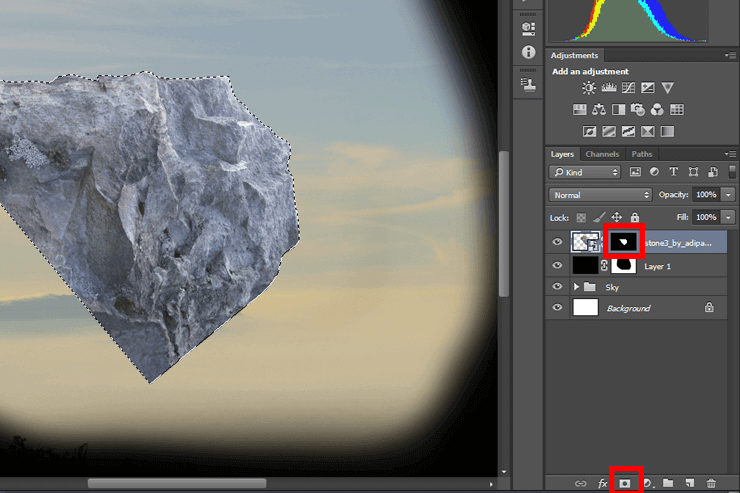
После выделения фото, нажмите правой кнопкой мыши чтобы выбрать пункт создания выделения.

Шаг номер 12
Затем добавим маску слоя к фотографии, кликнув на иконке маски на панели слоев.
Шаг номер 13
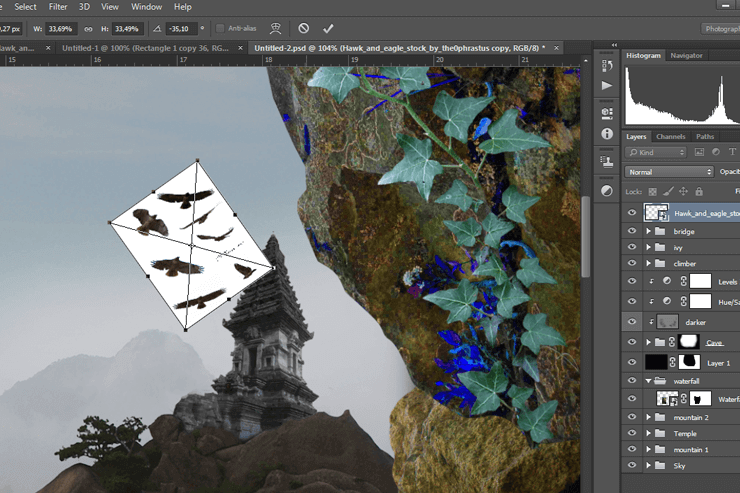
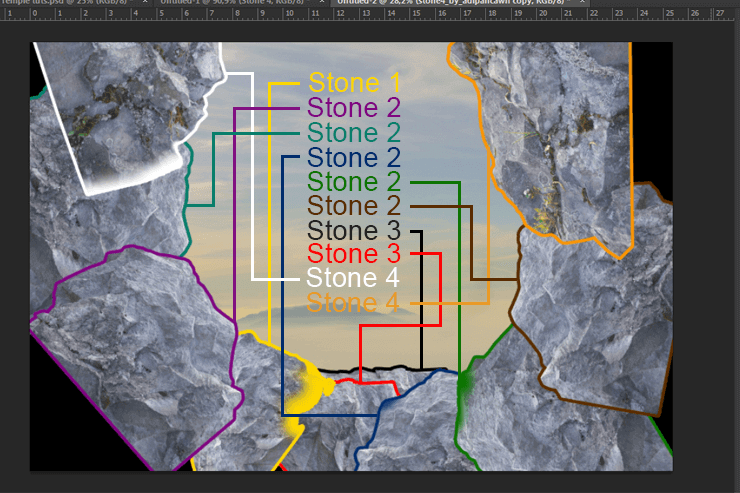
Повторяем предыдущее действие, добавляем все камни и выделяем их. После этого используем инструмент трансформации и размещаем снимки как показано на нижнем рисунке.

Шаг номер 14
Теперь делаем пещеру с комбинированием камней. Пользуемся инструментом перемещение (Move tool) и трансформацией (Transform tool), чтобы положить блоки из них как показано на рисунке ниже.
Шаг номер 15
Выделяем все слои с камнями, потом перетаскиваем их в папку на панели слоёв для создания новой группы. Переименовываем группу слоев на “Cave”.

Шаг номер 16
Добавляем маску для слоя.

Шаг номер 17
Берём мягкую кисть и создаем маску.
Шаг номер 18
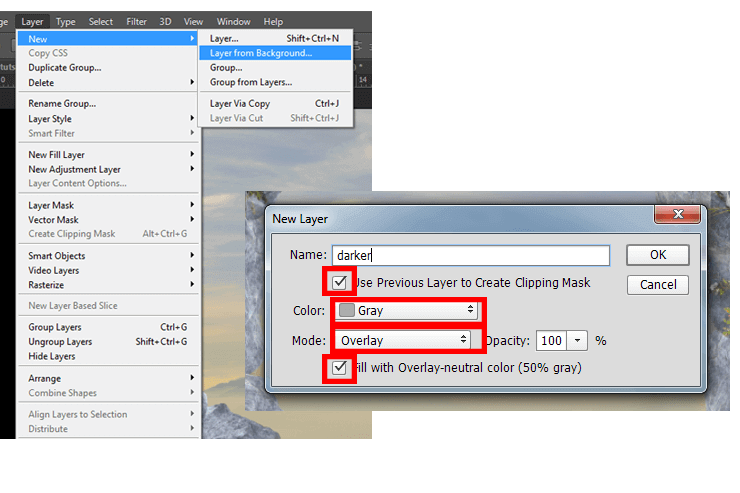
Создаём новый слой из фона, сделав активным предыдущий слой для создания обтравочной маски. Цвет: серый, режим: наложение.
Шаг номер 19
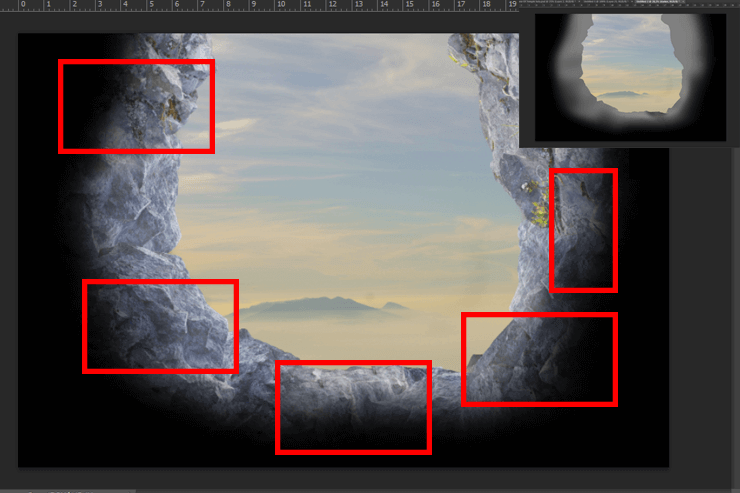
Возьмем мягкую круглую кисть и нарисуем тень.
Шаг номер 20
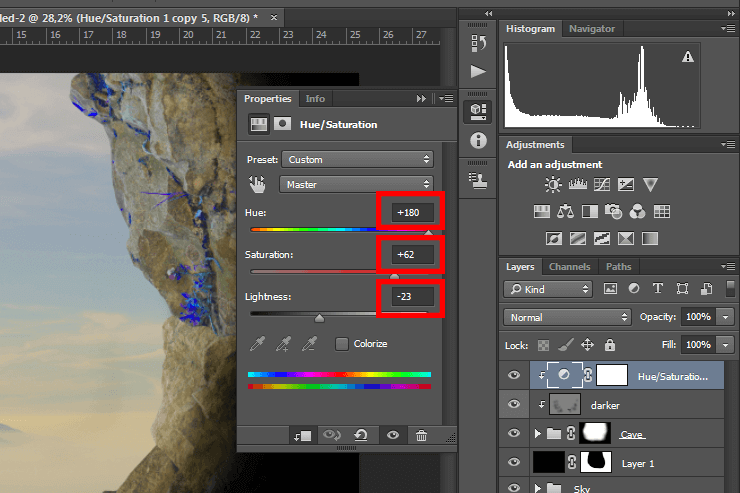
Создайте корректирующий слой для изменения насыщенности и тона фотографии (Hue/Saturation) - (Layer > New Adjustment Layer > Hue/Saturation), установите настройки для него и сделайте обтравочную маску.
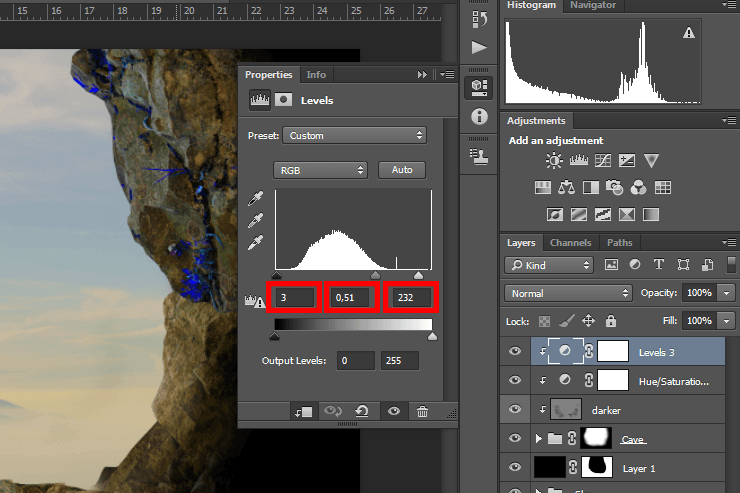
Шаг номер 21
Делаем новый корректирующий слой для изменения уровней снимка (Layer > New Adjustment Layer > Levels), установите настройки для него и сделайте обтравочную маску.
Шаг номер 22
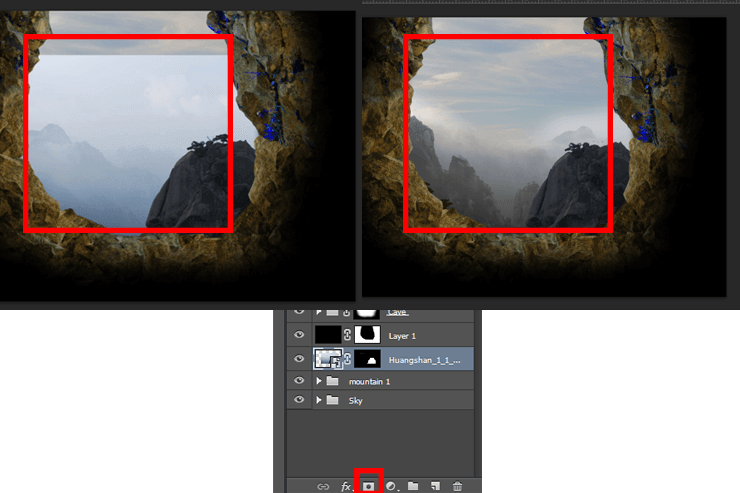
Добавляем к документу фото “mountain1”, помещаем слой с горой между слоем с небом и слоем с пещерой.
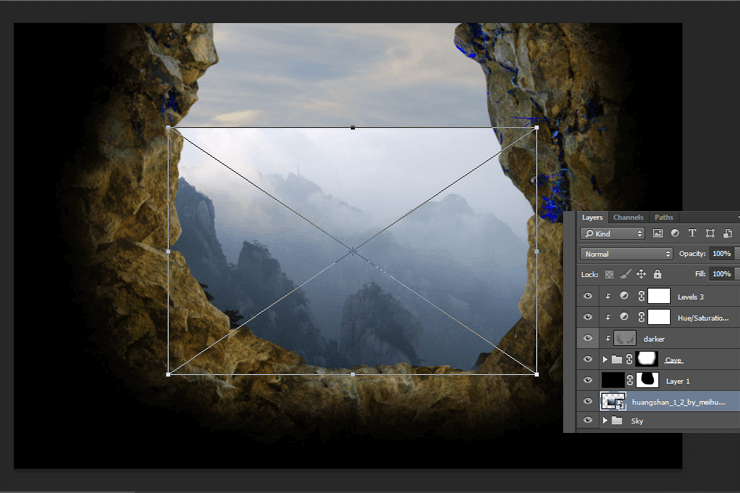
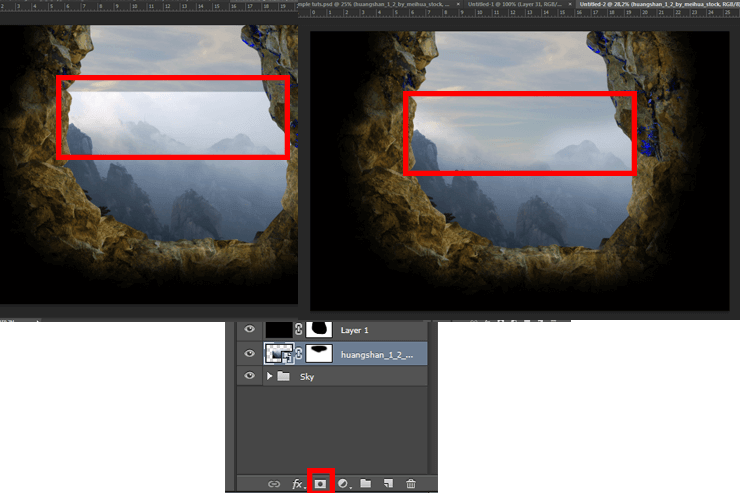
Шаг номер 23
Возьмем мягкую круглую кисть и делаем маску.
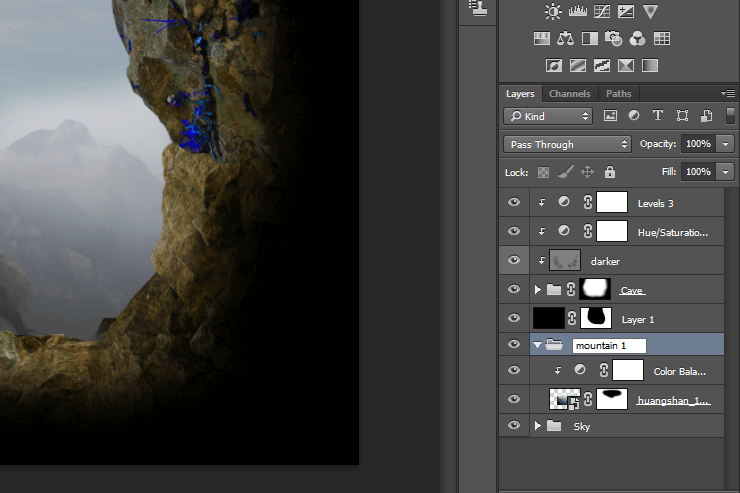
Шаг номер 24
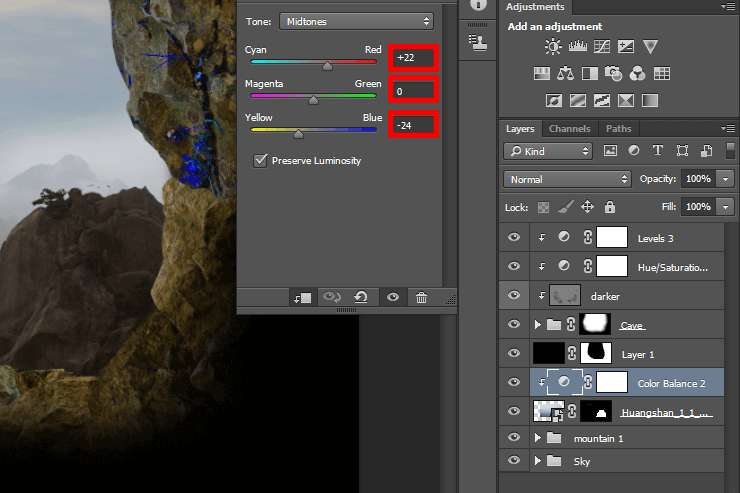
Создаём новый корректирующий слой: Color Balance (Цветовой баланс) (Layer > New Adjustment Layer > Color Balance), устанавливаем настройки для него и производим обтравочную маску.

Шаг номер 25
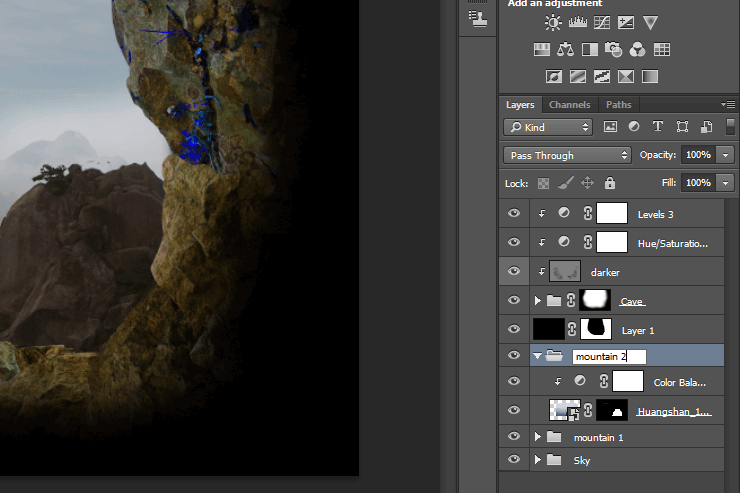
Перемещаем слой с горой в новую группу и называем ее “mountain1”.
Шаг номер 26
Добавляем фото “mountain2” к документу и помещаем его выше слоя “mountain1”.

Шаг номер 27
Возьмем мягкую круглую кисть и делаем маску.
Шаг номер 28
Создаём новый корректирующий слой: Color Balance (Цветовой баланс) (Layer > New Adjustment Layer > Color Balance), и производим аналогичные действия.
Шаг номер 29
Помещаем слой с горой в новую группу и даём ей название "mountain2".
Tap to react


