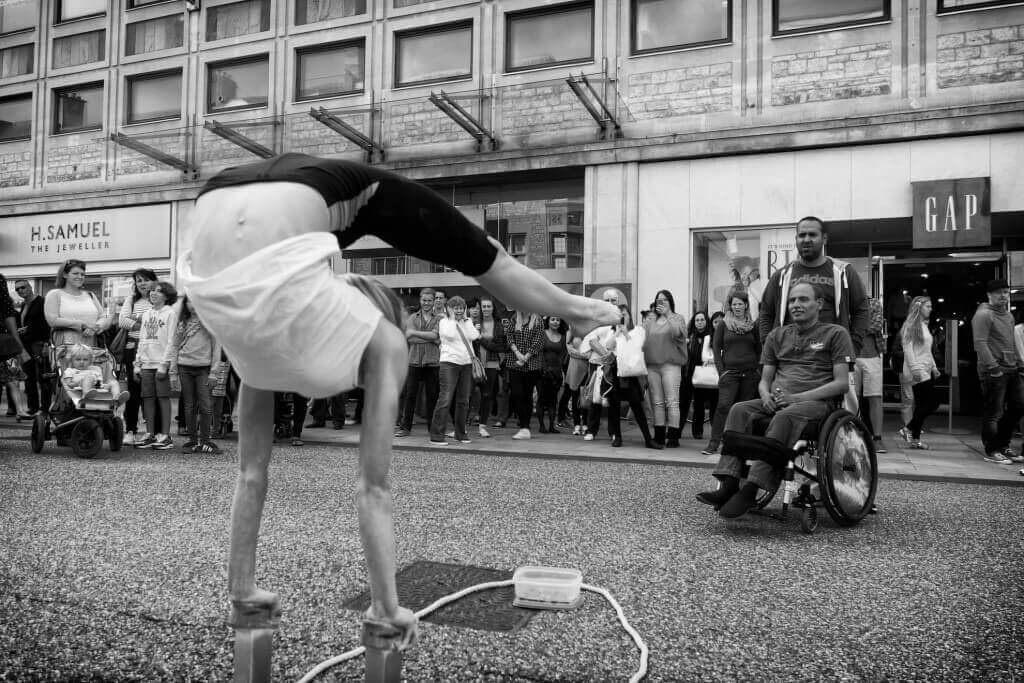
Street photography: shooting strangers on the street
Street photography is the art of seeing the extraordinary in the ordinary

You are standing on a busy street, gripping your camera so hard your knuckles turn white. Heart pumping, palms sweating, one thought racing through your mind: "What if they notice me? What if they start yelling?" Sound familiar? Congratulations — you have just met the biggest enemy of any street photographer. Yourself.

The fear of photographing strangers is completely normal. Every street photographer goes through it. Bruce Gilden, a Magnum legend, admitted he shook for the first few years every time he raised his camera. The difference between him and those who stay in the shadows is simple: he kept shooting. Every single day. Despite the fear.

I put together a 31-day plan that will take you from complete paralysis to confident shooting in any city around the world. No magic tricks — just systematic work and proven techniques.


Why We Are Afraid to Shoot on the Street

Before jumping into battle, let us understand the nature of fear. Most street photographer fears fall into three categories. Understanding is the first step to overcoming.

Fear TypeDescriptionHow It ShowsLevel
SocialAfraid of reactions: yelling, aggression, judgmentLower the camera, pretend to shoot a building, walk away80% of beginners
TechnicalAfraid the shot will be bad: wrong focus, overexposure, blurConstantly checking the screen, re-shooting, missing moments60% of beginners
EthicalUnsure if you have the right to photograph people without permissionAvoiding faces, shooting only backs, cropping heads off70% of beginners

The 31-Day Action Plan

We break the task into micro-steps. Each week focuses on one aspect. Do not skip ahead — the sequence is critical.

Week 1: Preparation and Reconnaissance

First week — no people photography. Just reconnaissance, setup, and getting used to holding the camera.

Day 1–2: Choosing and Setting Up Your Camera

It does not matter what you have — DSLR, mirrorless, or phone. What matters is that the camera is always with you. The optimal choice for street photography is a compact mirrorless with a prime lens. Fujifilm X100 series or Sony RX100 are great options.

Do not chase gear. The best camera for street photography is the one you carry every day. Cartier-Bresson only shot 50 mm, and it worked out fine for him.

Day 3–4: Settings for Street Shooting

Set up your camera so you do not have to think about it while shooting.

ParameterDayEvening/NightWhy
ModeAperture Priority (A/Av)Manual (M)DOF and shutter speed control
Aperturef/8f/2.8–f/4f/8 gives hyperfocal distance — everything in focus
Shutter1/250 s1/125 sMinimum to freeze motion
ISOAuto (100–800)Auto (800–6400)Modern cameras handle high ISO well
FocusAF-C / ContinuousAF-S / SinglePeople move
Drive modeSilent / Electronic shutterMechanical shutterDo not attract attention
Do not set ISO Auto without an upper limit. Cap it at 6400 — otherwise you will get noise that kills any shot. Better to underexpose by 1 stop than to crank ISO to the moon.

Day 5: Blind Shooting Practice

Turn off the screen. Use only the viewfinder. Shoot everything: traffic lights, signs, shadows, puddles. Do not look at the results. The goal is to stop checking every frame. Just shoot.

Day 6: Location Scouting

Go out without a camera. Just walk and observe. Where is the best light? Where are interesting textures? Where do people stop? Memorize. This is your future hunting ground.

Day 7: Collecting References

Study the work of Henri Cartier-Bresson, Robert Doisneau, Garry Winogrand, Alex Webb. Do not just look at "pretty" — analyze why it works. Where is the shooting position? What is the distance to the subject? Is the light coming from the front or the side?


Week 2: Shooting Without People

The second week teaches you to work with composition, light, and moments. No people yet.

Day 8–9: Lines and Geometry

Look for leading lines: roads, railings, shadows, building edges. Shoot only the geometry of urban space. The rule of thirds is your friend but not a dogma. Sometimes the center gives more drama.

\u{201c}

Photography is an instantaneous reaction: drawing with light, and you never know what will come next.

Henri Cartier-Bresson, Photographer

Day 10–11: Working with Light

Go out during the golden hour — one hour before sunset or one hour after sunrise. Shoot long shadows, backlight, reflections in shop windows. Light is the street photographer's main tool.

Day 12–13: Framing and Frames

Look for natural frames: arches, windows, doorways, tree branches. A frame focuses attention on the subject and adds depth.

Day 14: Reflection

Select your 10 best shots from the week. Print them or put them on a wall. Look for common patterns in your best images. Write down observations.


Week 3: First Contact

The hardest week. But doable if you do not rush it.

Day 15–16: Shooting from Behind

Simply follow someone and shoot them from behind. They do not see you — you do not feel pressure. Shoot their walk, their clothes, their interaction with the city. After 10 frames you will realize: nothing bad happened.

Day 17–18: Shooting in Crowds

Go to a busy place — market, subway, festival. In a crowd you are invisible. People are busy with themselves, they do not care about you. This is the perfect environment to practice. Shoot face-to-face — fast and without hesitation.

The first time I shot a stranger point-blank, my heart dropped to my feet. But that frame turned out to be the best of the month. The "raise and shoot" technique works flawlessly.

Day 19–20: The Smile-and-Walk Technique

After you shoot — smile. Simple and genuine. In 99% of cases, the person will smile back or just look away. Street aggression is rare, and your smile defuses any tension.

Day 21: Give a Compliment

Approach the person you want to photograph and give a compliment: "Excuse me, you have an amazing style. May I take your photo?" If they refuse — smile, thank them, and move on. Nothing personal.

How to approach strangers for street photography

Дополнительный день 21.5: Работа с отражениями

Отражения в витринах, зеркалах заднего вида, лужах после дождя — это отдельная вселенная. Техника простая: встаньте так, чтобы в отражении был интересный сюжет, и ждите человека, который завершит композицию. Отражения добавляют слоистость и визуальную глубину. Плюс никто не догадывается, что вы снимаете именно их — вы просто стоите с камерой.

Совет: ищите витрины с тёмным фоном и ярким уличным светом. Контраст между тёмным стеклом и освещённым тротуаром даёт объём. Если рядом есть прохожий в яркой одежде — ловите момент, когда он проходит ровно по центру отражения.

Разбор техники Shoot-through на практике

Shoot-through — это не просто съёмка через стекло. Это метод, который позволяет снимать candid-портреты без риска confrontational ситуации. Встаньте у входа в магазин или кафе. Стекло работает как щит: вы видите людей, они вас — нет. Фокусируйтесь на человеке внутри помещения или на его отражении, смешанном с уличной сценой. Снимайте серию — 3–5 кадров, чтобы поймать лучшее выражение лица.

Ещё один вариант — съёмка через дверной проём или арку. Это не защищает от обнаружения, но создаёт естественную рамку. Человек, проходящий через арку, автоматически привлекает внимание зрителя. Это приём из классической живописи, который отлично работает в фотографии.


Week 4: Consolidation and Experiments

Final week. You have overcome the main hurdle — now work on visual literacy and style.

Day 22–23: Project "One Spot — 50 Frames"

Pick one intersection or square. Stand for 30–40 minutes. Shoot everything that happens. People enter the frame, leave, change poses. This exercise teaches patience and anticipation.

Day 24–25: Black and White Vision

Switch your camera to monochrome. Shoot only B&W. This teaches you to see contrast, textures, and shapes without being distracted by color. Many street photography greats shot exclusively B&W — and they were onto something.

Day 26–27: Shooting in Challenging Conditions

Rain, snow, fog — the best time to shoot. People reveal themselves differently: hiding under umbrellas, running, emotions raw. Plus fewer pedestrians — less pressure.

Day 28–29: Culling and Selection

From 500+ frames over the month, keep 10–20 best. Be ruthless. If the frame does not work — delete it. Criteria: emotion, composition, light, moment.

// Selection scheme const culling = { step1: 'Technical reject', step2: 'Story unclear', step3: 'No emotion', step4: 'Too ordinary' }; // Passed all steps — it is portfolio-worthy[/codeblock]

Day 30–31: Publishing and Final Reflection

Publish a series of 5–10 frames on social media, a forum, or a photography community. Get feedback. Write down what changed over the month. You will be surprised how far you have come.

Model releaseA model release is a written agreement allowing use of a person's image for commercial purposes. In street photography for editorial and artistic projects, it is usually not required. is an important document for commercial photography.

Shooting Techniques: Approach Comparison

TechniqueDescriptionDifficultyBest LensRisk of Being Noticed
From the hipShoot from hip level, camera on belt, look awayLow28–35 mmMinimal
Zone focusingManual focus on fixed distance, shoot without adjustingMedium28–35 mmMinimal
Direct eye contactDirect gaze into the camera, conscious shootingHigh35–50 mmHigh
Shoot-throughShoot through windows, glass, reflectionsLow50–85 mmZero
Pre-focusFocus on a spot where someone will appear, then waitMedium28–50 mmMinimal
PanningTrack a moving subject, blurred backgroundHigh35–50 mmMedium

Frequently Asked Questions

What if a person notices me and gets angry?

Smile, lower your camera, and say: "Sorry, you looked amazing in this light. I can delete the shot if you want." In 95% of cases, the person calms down. If they insist — delete it in front of them. Your calmness and respect solve everything.

What lens is best for street photography?

The gold standard is 35 mm on full frame (23–24 mm on crop). This field of view is close to the human eye. For closer contact — 28 mm, for portraits — 50 mm. Zooms are not recommended: they encourage laziness and reduce quality.

Do I need to ask permission before shooting?

In an ideal world — yes. In practice, if you shoot in a public place, permission is not legally required (in most countries). But if you want to be sure — ask. A portrait taken with consent is often more valuable than a "stolen" shot.

How do I stop shaking when shooting?

Shaking goes away only with practice. Technical hack: set shutter speed to 1/250 s or higher — hand shake will not affect sharpness. Psychological hack: count to three and press the shutter on "three." After 21 days the habit sticks.

Can I photograph children on the street?

Photographing children in public is legally okay but ethically debatable. The best approach is to shoot when the child is in context (playing in a yard, walking with parents) and not make the child the sole subject. If a parent complains — delete the frame.

How do I adjust camera settings on the fly?

Use hyperfocal distance and aperture priority mode. Set f/8, ISO Auto capped at 6400, shutter speed Auto with a minimum of 1/250 s. Focus — manual at 2–3 meters. Focus zone: from 1.5 m to infinity. There — you can forget about settings.

What if the city has an aggressive atmosphere?

Use the shoot-through technique — shoot through windows, reflections, glass doors. Or work from a cafe, shooting the street through a window. Or just pick a different neighborhood. Do not risk your safety for a shot.

How do I develop visual literacy?

Every day look at 20–30 works by recognized masters. Analyze: where is the photographer standing? Where is the light coming from? What is the distance? Keep an observation journal. After a month, you will start "seeing" frames before you raise the camera.

Should I start with black and white?

Yes. B&W simplifies visual noise — you learn to see contrast, shapes, and textures instead of bright patches. Many beginners switch to monochrome and come back to color a month later with a completely different understanding of the frame.

How do I deal with bad days?

Everyone has empty days. Professionals trash 50% of their shots, beginners — 90%. It is normal. A bad day is still experience. You went out. Tomorrow will be better. The key is to keep going.


Useful Keyboard Shortcuts and Commands

For quick camera adjustments in the field:

  • AF-ON — back-button focus (separates focusing from shutter)
  • Fn + dial — quick ISO change
  • C — switch focus mode (on some cameras)
  • DISP — hide extra info from the screen
Download settings cheatsheet1.2MB

Tap to react